
How to Change the Name of an Activity or Event
This document guides users on how to make changes to the name or title of an Activity in StoriiCare. It is essential to understand that any Activity must first exist in the database before it can be scheduled (See: How to Add a New Activity Type).
Editing The Name of Scheduled Events
If you have an activity that is already scheduled and you wish to update its title or name, please follow the instructions outlined below:
Step 1. Changing the Name/Title
Open the Calendar from the Dashboard.
Locate the activity or event you wish to modify.
Click on the three dots in the upper right-hand corner and select Edit.
Click on the title text box to edit the name.
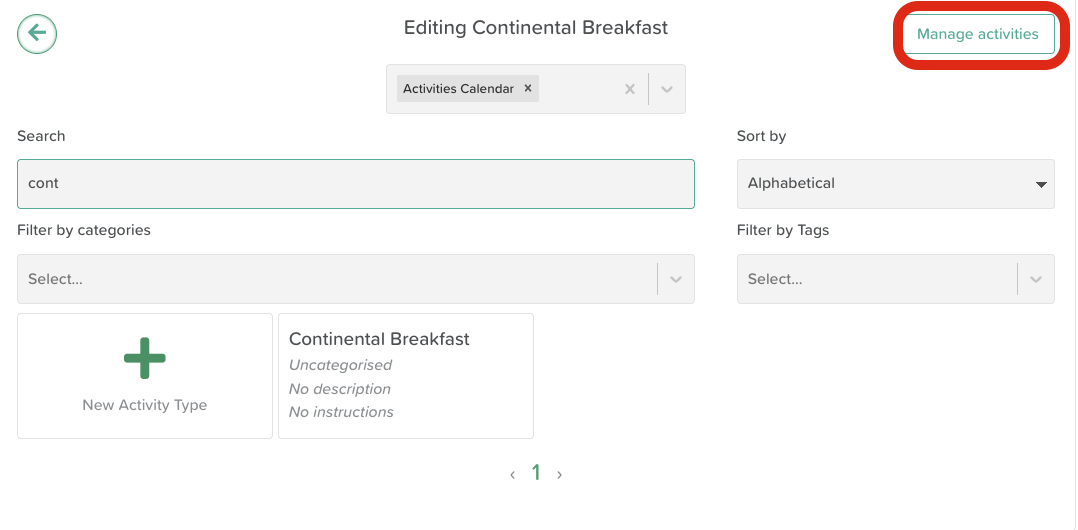
Search for the activity name.
Click the Manage Activities button located in the top, right-hand corner.
Click on the pencil icon next to the Activity Name to make your changes.
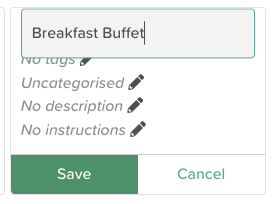
Click Save.
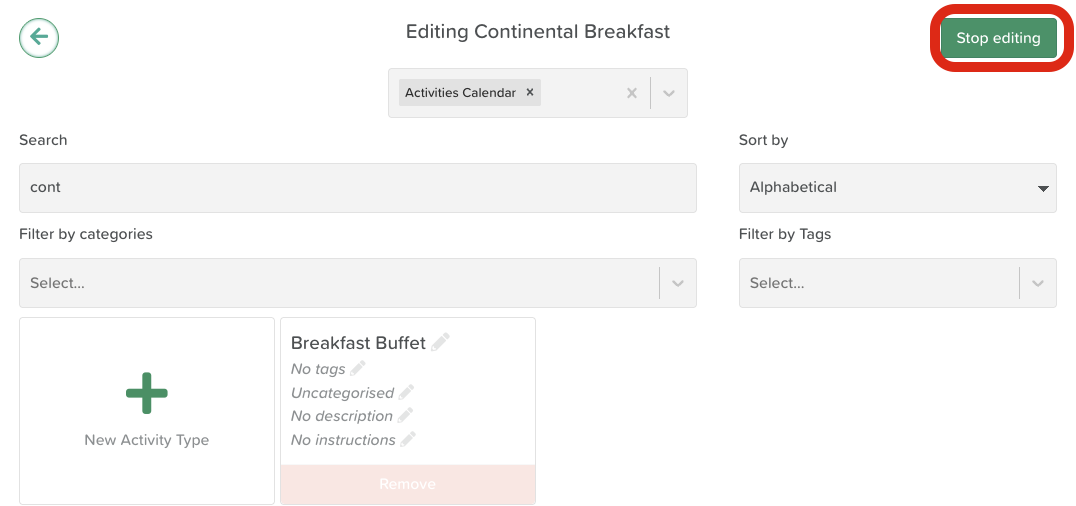
Click the Stop Editing button at the top of the page.
Click the back arrow once your changes are saved.
Step 2. Applying the Change
It is important to note that your changes do not apply automatically.
The system requires clarification on whether the name change should apply to a single activity/event or to all recurring future events. To finalize your changes, follow these steps:
Click on the three dots in the upper right-hand corner of your activity again.
Select Edit to view the changes reflected in your activity name.
Hit Save.
Choose whether you want the changes to apply to This Event or All Events.
Need More Help?
If you need further assistance, you can reach out to our support team by emailing support@storii.com. Our support team is ready to help you with any questions or issues you may have.