
Participant Profile Creation Using Forms
StoriiCare has simplified the enrollment process for care providers by allowing participant profiles to be automatically created when a form is completed. This applies whether the form is completed internally by staff or externally by a prospective participant or family caregiver.
When enabled, key data collected in the form is mapped directly to the participant’s Face Sheet, reducing duplicate data entry and streamlining onboarding.
Watch our VIDEO TUTORIAL
What This Means for Your Organization
With this functionality enabled:
Participant profiles are created automatically upon form submission
Face Sheet fields are populated using Linked Properties
External enrollment forms can now include Linked Properties
Prospective clients can complete paperwork from home
Administrative workload is significantly reduced
What’s New:
Previously, Linked Properties were not available on external forms. Now, when Allow Participant creation is enabled in a form template, Linked Properties appear on both internal and external forms.
How to Identify Forms That Create New Profiles
In Form Builder and Forms, any template configured to generate a new participant profile is clearly marked with a green person icon.
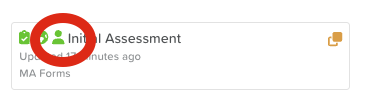
This icon appears on both internal and external forms
It indicates that submitting the form will create a new participant profile
This applies regardless of whether the form is completed by staff or by a family caregiver.
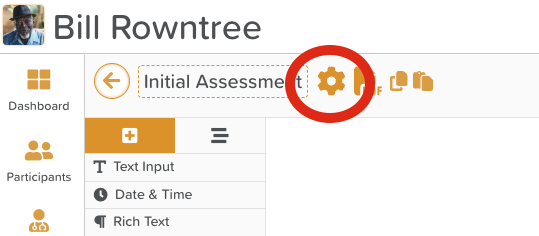
How to Enable Participant Creation from a Form
Open Form Builder.
Create a new form or select an existing form template.
Click the settings wheel/cog icon for that form.
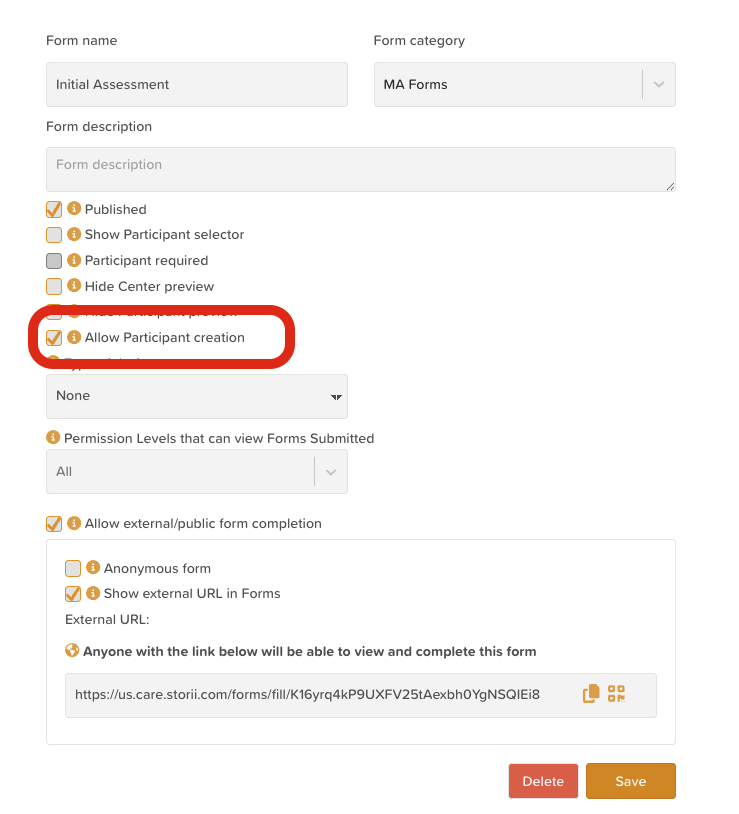
Check the box labeled Allow Participant creation.
Important Notes
When enabled, a participant profile will be created upon form submission
Individual text fields must be mapped for data to be saved correctly
Enabling this option disables:
Participant selector
Anonymous form filling
Click Save to apply the setting.
How to Map Data Fields to the Face Sheet
To ensure form data is saved correctly to the participant profile, fields must be mapped. Some fields are required or require specific components to be mapped. See below.
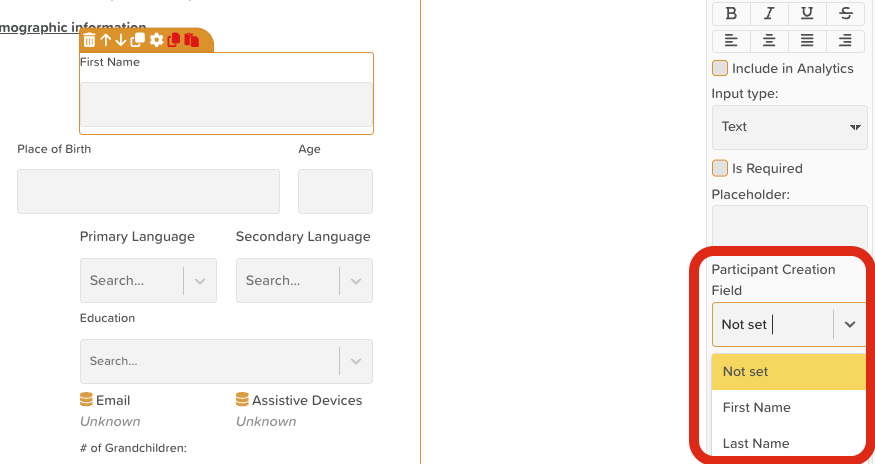
Steps to Map Fields
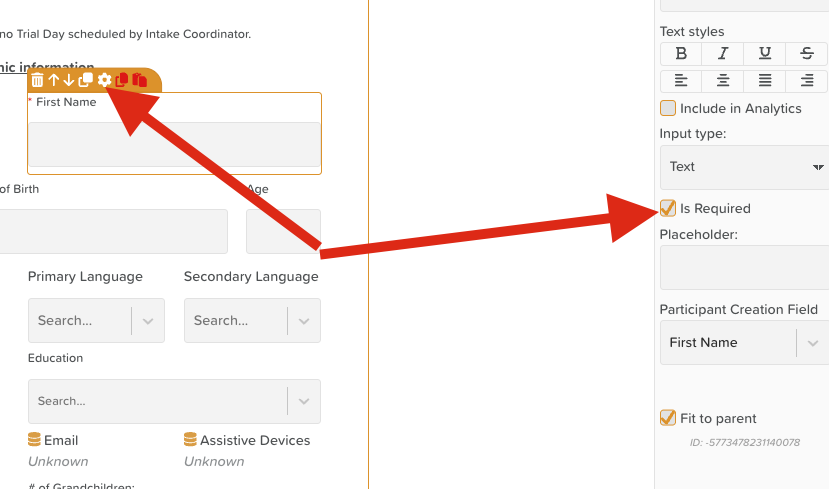
Drag and drop components into your form (or click existing components).
Select the component and click the settings wheel/cog icon.
In the right-hand menu, locate Participant Creation Field.
Use the dropdown to select the corresponding Face Sheet field, such as:
First Name (required - MUST BE a Text Input component - cannot use Linked Property)
Last Name (required - MUST BE a Text Input component - cannot use Linked Property)
Date of Birth (required - MUST BE a Date component)
Gender (MUST BE a Dropdown)
Group (MUST BE a Dropdown)
Participant Creation Helper Tool
Click the person icon in the top-right corner of Form Builder (next to the Last Save indicator) to open the Participant Creation Helper.
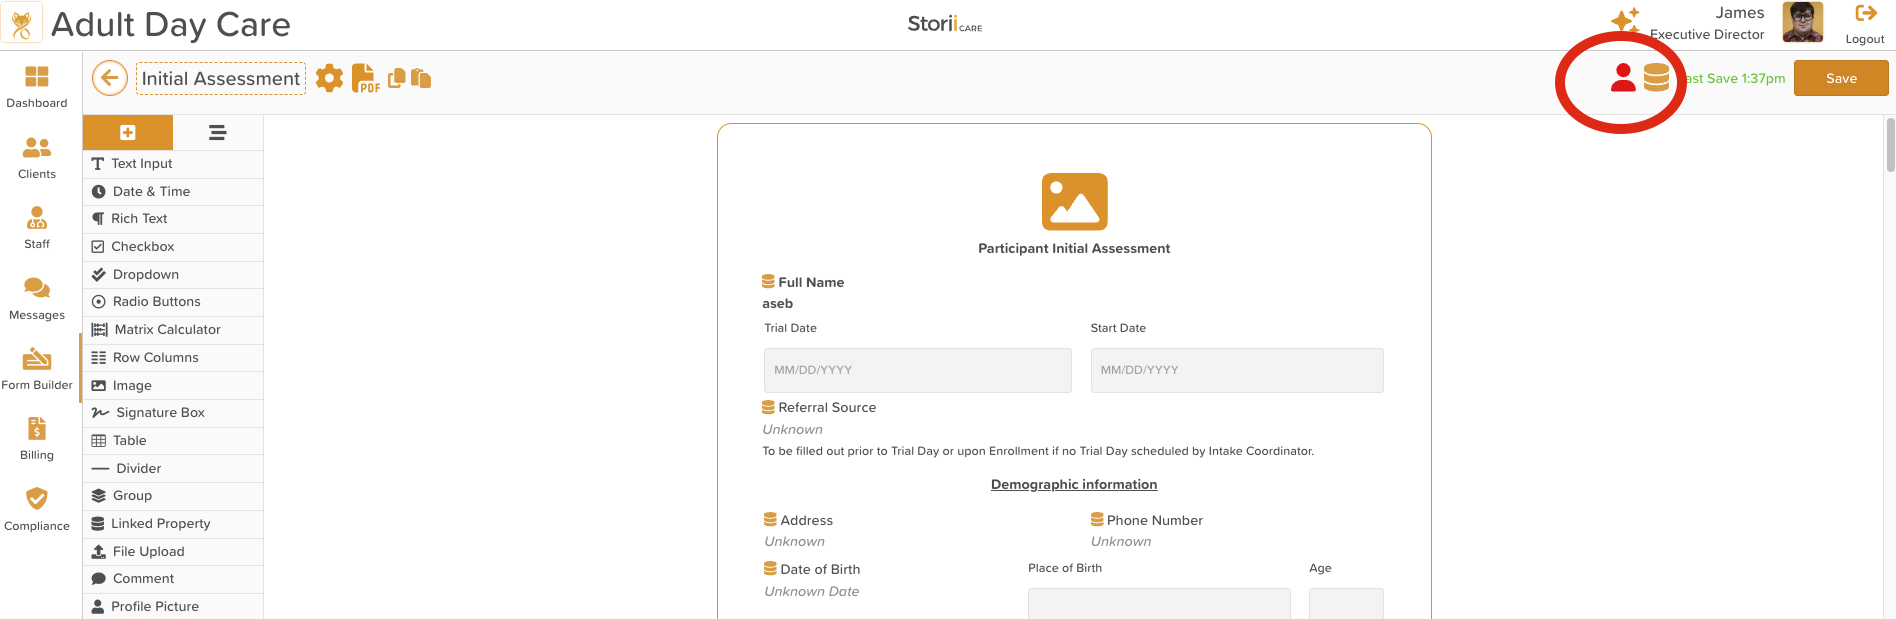
This tool:
Shows which fields are mapped and unmapped
Helps you quickly identify missing mappings
Is especially useful for long or complex forms
Reminds you to make fields required
Recommended Required Fields
We strongly recommend marking the following as required:
First Name
Last Name
Any other fields you want guaranteed on the Face Sheet
To do this:
Click the form component
Open the settings wheel/cog icon
Check Is required in the right-hand menu
This ensures profiles are created with complete, usable data.
What Happens When a Form Is Submitted
Once a form is submitted—either internally or externally:
A participant profile is automatically created
Any mapped fields are populated on the participant’s Face Sheet
The completed form is saved directly to the participant’s profile
Staff no longer need to:
Edit the form entry
Manually select a participant to attach the form
This creates a smoother enrollment experience for families and a more efficient workflow for staff.
Best Practices
Test enrollment forms internally before sharing externally
Use the Participant Creation Helper to verify mappings
Keep required fields to a minimum while ensuring essentials are captured
Use Linked Properties to eliminate duplicate data entry
Need More Help?
If you need further assistance, you can reach out to our support team by emailing support@storii.com. Our support team is ready to help you with any questions or issues you may have.