
How to Customize & Apply Register Tags
Register Tags in StoriiCare help you categorize and organize attendance data for participants, staff, and visitors. Tags can indicate things like AM/PM attendance, transport use, reasons for absence, or specific services. These tags can be customized to suit your organization’s needs. Custom tags can be created for each category: Participants, Staff, and Visitors.
Tags can also be linked to Services, generating a specific charge on an invoice when used. Fore more information on this, check out our Billing articles.
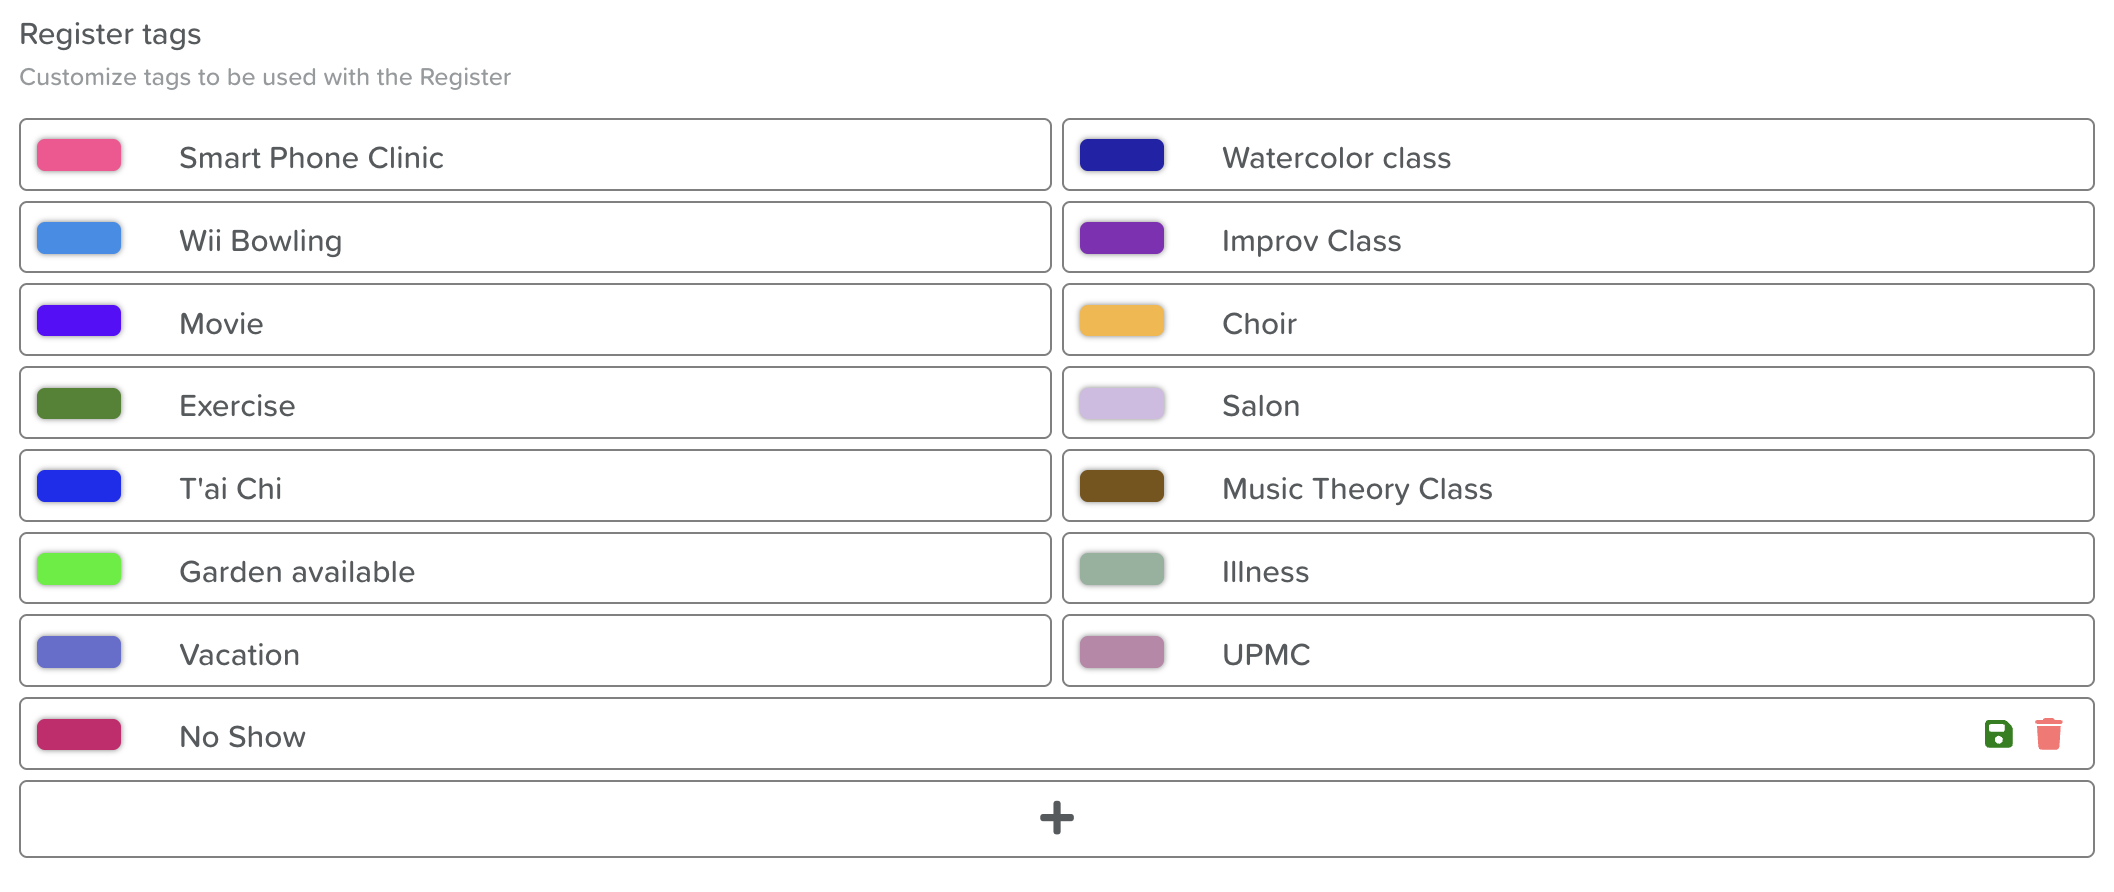
Creating and Customizing Register Tags
Go to the Register:
From the Dashboard, click Register.
Open Register Settings:
Click the Settings Cog icon at the top of the Register screen. If you do not see this icon, please contact a manager or administrator in regard to your permission level access.
Select the desired tab: Participants, Staff, or Visitors
Add a New Tag:
Click the “+” icon to create a new tag.
Customize the Tag:
Name: Enter a clear label (e.g., “Transport”, “AM Only”).
Color: Select a color to visually differentiate the tag.
Save the Tag:
Click the green disc (Save) icon to finalize your tag.
Applying Tags During Sign-In
When signing in a participant, staff member, or visitor, select one or more tags from the dropdown menu.
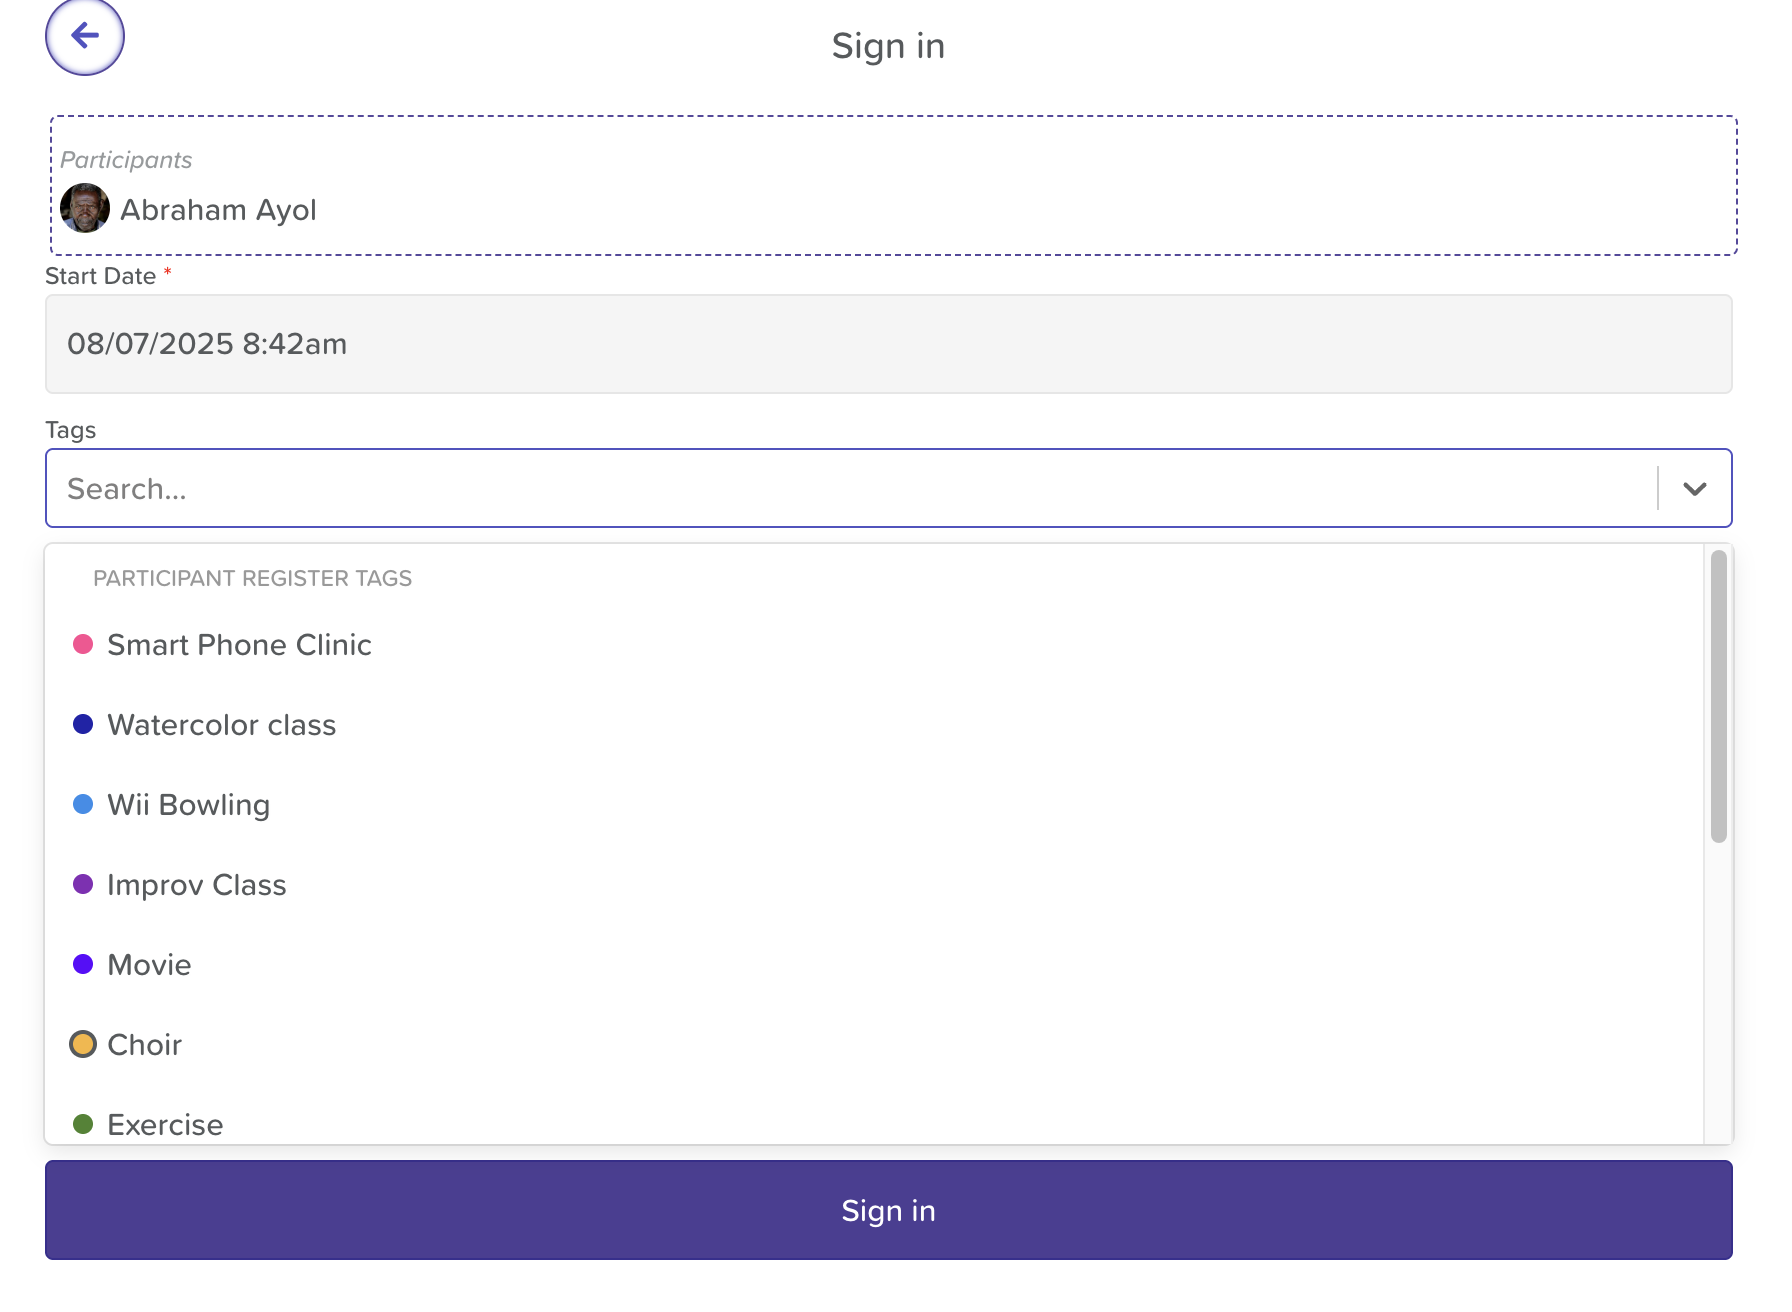
Tags will appear under the individual’s name in the Register once signed in.

Need More Help?
If you need further assistance, you can reach out to our support team by emailing support@storii.com. Our support team is ready to help you with any questions or issues you may have.