
A Guide to Using eMAR
Introduction
The eMAR feature in StoriiCare is now in Beta. There will be ongoing updates and improvements. Your feedback is encouraged!
This feature allows care providers to schedule, track, and record medication administration. With eMAR, staff can manage scheduled and PRN (as-needed) medications, complete administration tasks with a simple checkbox, and maintain an optional medication inventory to monitor stock levels. Once a task is marked as complete, the administering staff member's initials are automatically recorded, enabling electronically pre-filled MAR PDFs to be exported individually or in bulk.
This guide will walk you through everything you need to get started, from initial setup to exporting your MARs.
Before You Begin
Please review these key points before setting up eMAR:
eMAR is currently only accessible from participant profiles - not yet from the main dashboard. We will shortly enable access to the main dashboard, similar to our Vital Signs feature.
For now, existing medications will need to be manually copied into the eMAR feature. Instructions are included below.
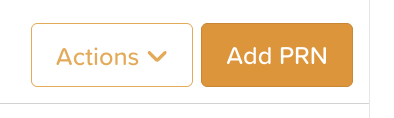
To switch between the Medication and eMAR views, use the Actions button in the top-right corner of either screen.
eMAR works similarly to StoriiCare's Tasks feature. If you currently use Tasks for medication distribution, we recommend switching to eMAR.
When a medication task is completed, the administering staff member's initials will appear on the MAR PDF, enabling electronically pre-filled MAR exports.
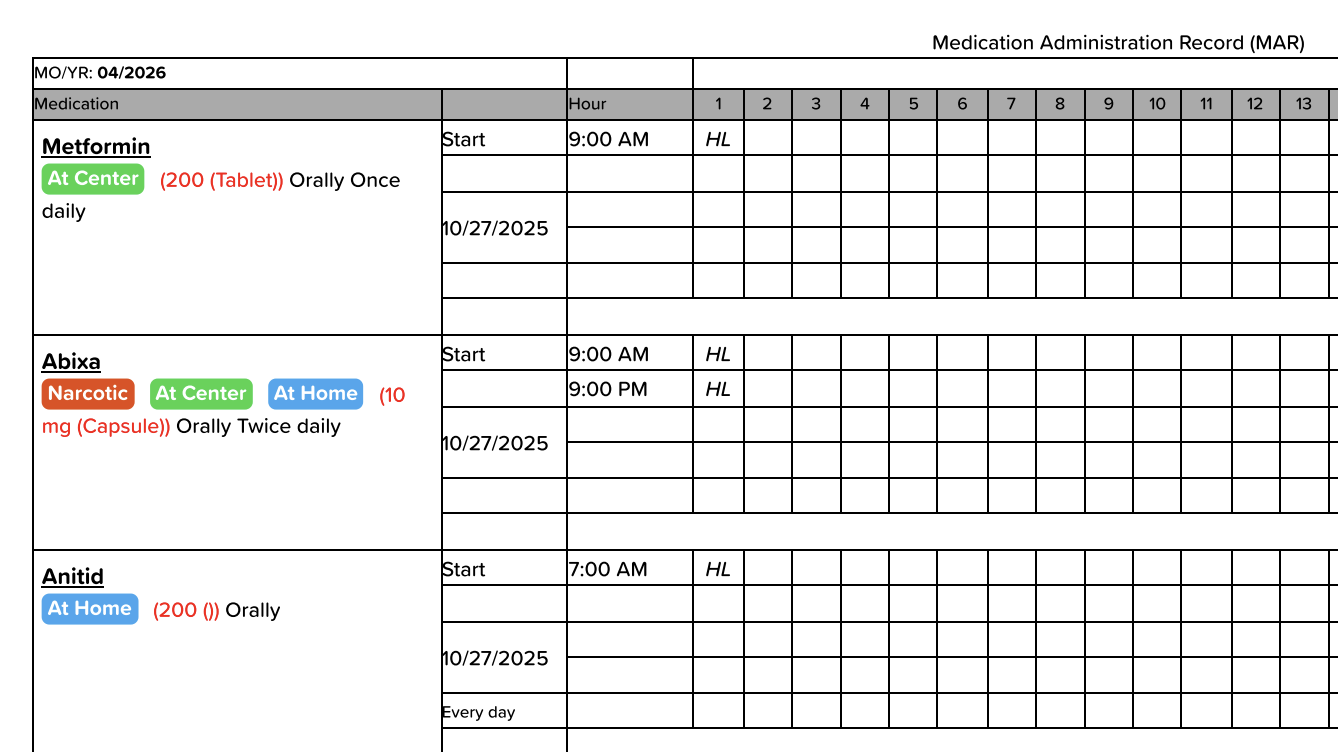
The MAR will now group medications in 1-hour blocks (e.g., if you enter a medication for 12:15 or 12:30, it will appear on the MAR as a 12:00 PM med). Rest assured, the eMAR captures the actual administration time with precision (12:07, 12:23, etc.).
An Inventory function is available for tracking medication stock. Users who want to use this will need to set up inventory batches before completing eMAR tasks. Access Inventory from either the Medication or eMAR feature on a participant profile via Actions > Inventory.
Step 1 - Configure eMAR Settings
Open any participant profile.
Click on the Medical Info feature, then select Medication.
Click on the settings wheel at the top of the page to open Medication Settings.
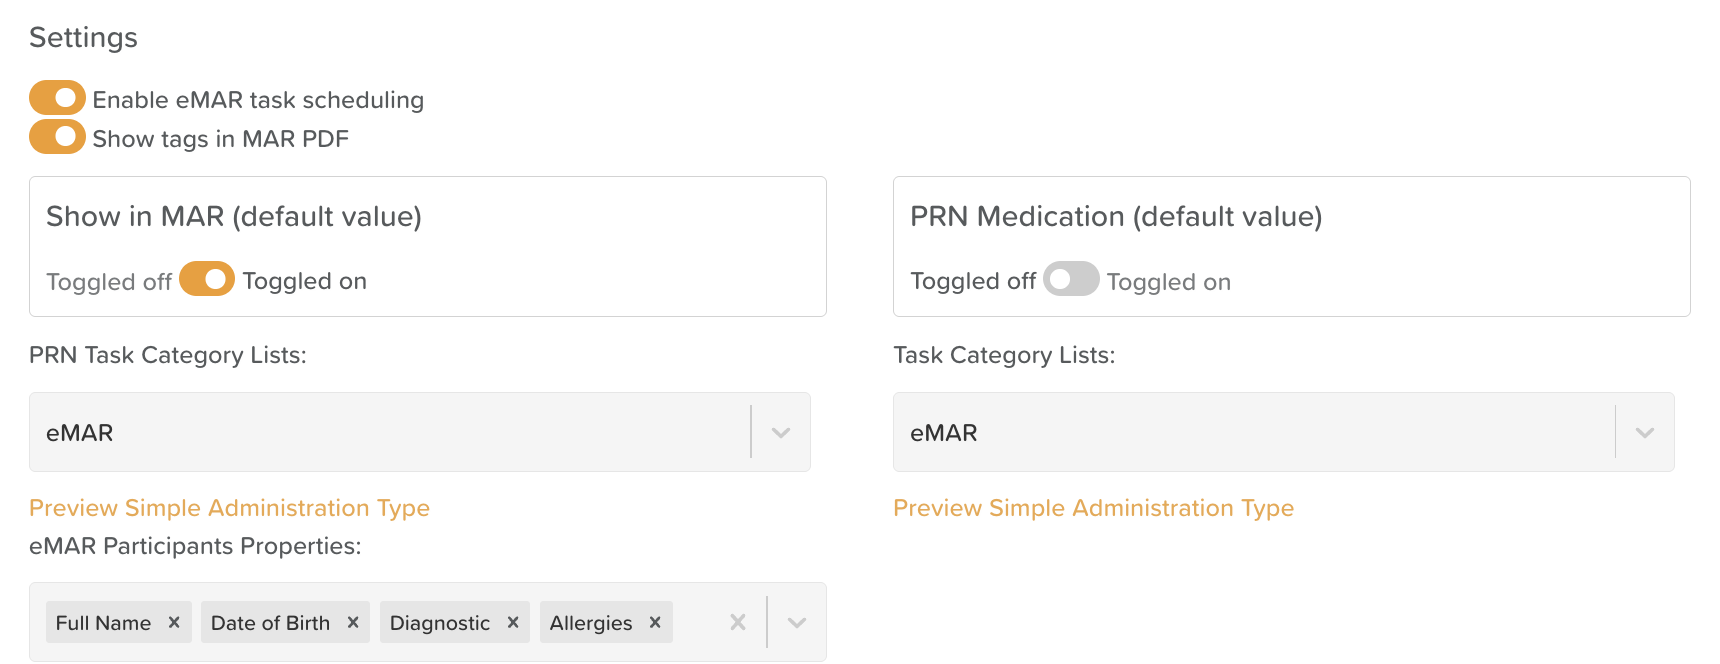
"Enable eMAR task scheduling" should be toggled on.
Show in MAR (default value) vs. PRN Medication (default value): Choose whether the default when adding a new medication is a scheduled medication or a PRN (as-needed) medication. This can always be changed when adding individual medications — it is just setting a default.
Show tags in MAR PDF: If you use medication tags to classify medications, toggle this on.
PRN Task Category Lists and Task Category Lists: Select eMAR for both dropdowns, if it is not already selected.
eMAR Participant Properties: Select which data fields should appear on the eMAR dashboard for each participant. These pull from the Face Sheet. Common selections include: Name, Date of Birth, Diagnoses, and Allergies.
Click Save at the bottom of the page.
Click the back arrow at the top to return.
A Note on Configuring Buffer Time for eMAR Tasks
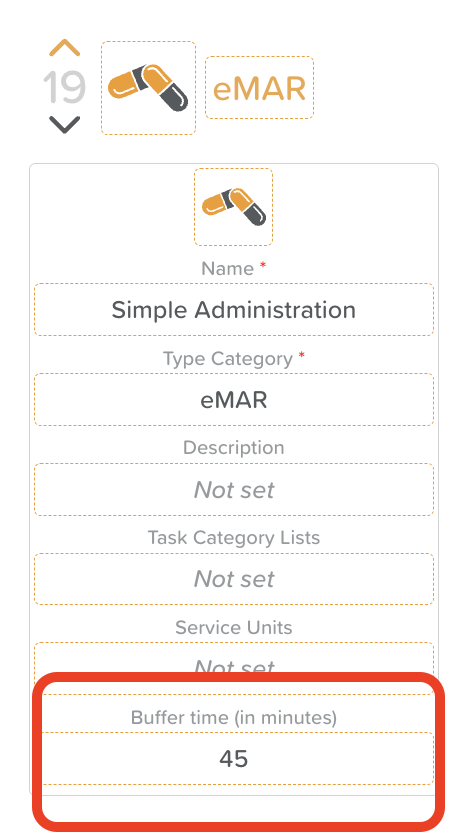
Buffer time creates a window around a scheduled medication time during which a completed task will not be marked as overdue. For example, if a medication is scheduled for 9:00 AM and a staff member marks it as complete at 9:13 AM, it will appear as completed on time — rather than "Completed when overdue" — as long as the completion falls within the buffer window.
To set up Buffer times that match your workflow:
Go to Tasks > Task Settings
Ensure "Show completed when overdue information on tasks" is toggled on.

Search for the eMAR task. You can then adjust the buffer time on the relevant task type. Consider how long your medication rounds typically take when deciding on a buffer window.
Step 2 - How to Copy Existing Medications to eMAR
Currently, medications do not automatically transfer to eMAR — they must be manually copied. Follow these steps for each medication:
From a participant profile, go to Medical Info > Medication.
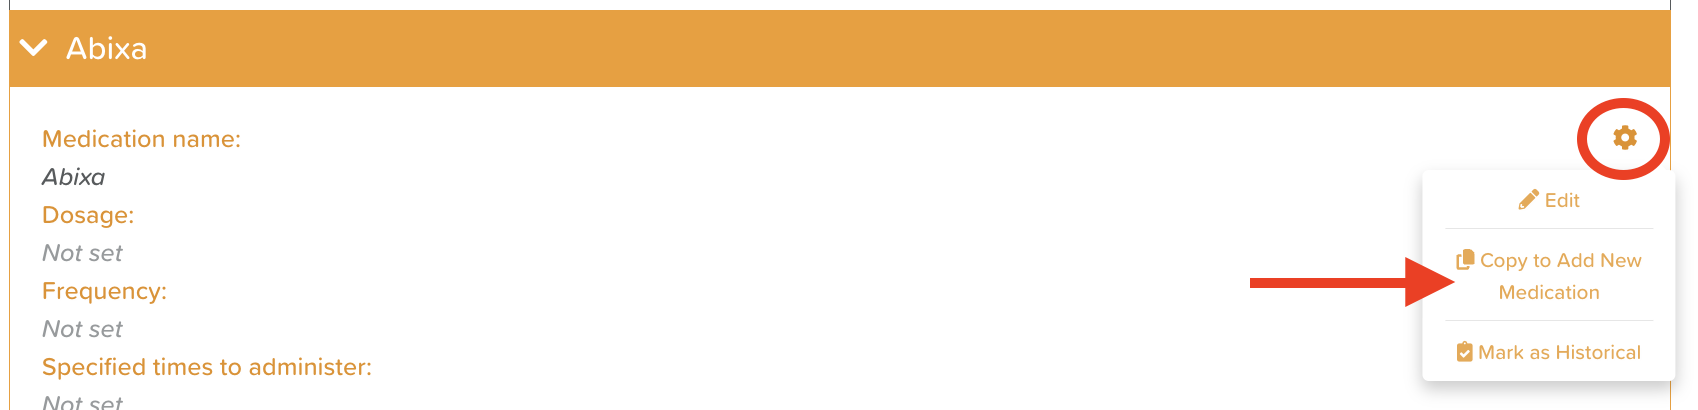
Click on the medication you want to copy.
Click the settings wheel within the medication view.
Select "Copy to Add New Medication."
Review all fields carefully to confirm the medication details are accurate.
⚠️ Quantity, dosage, Frequency, and Schedule will need to be re-entered
Ensure the Show in eMAR toggle is turned on.
If this is a PRN medication, ensure the PRN Medication toggle is also turned on.
Click Save new medication.
Repeat this process for each existing medication that needs to appear in eMAR.
You can mark the "old version" of medications as historical.
Step 3 - How to Add New Medications
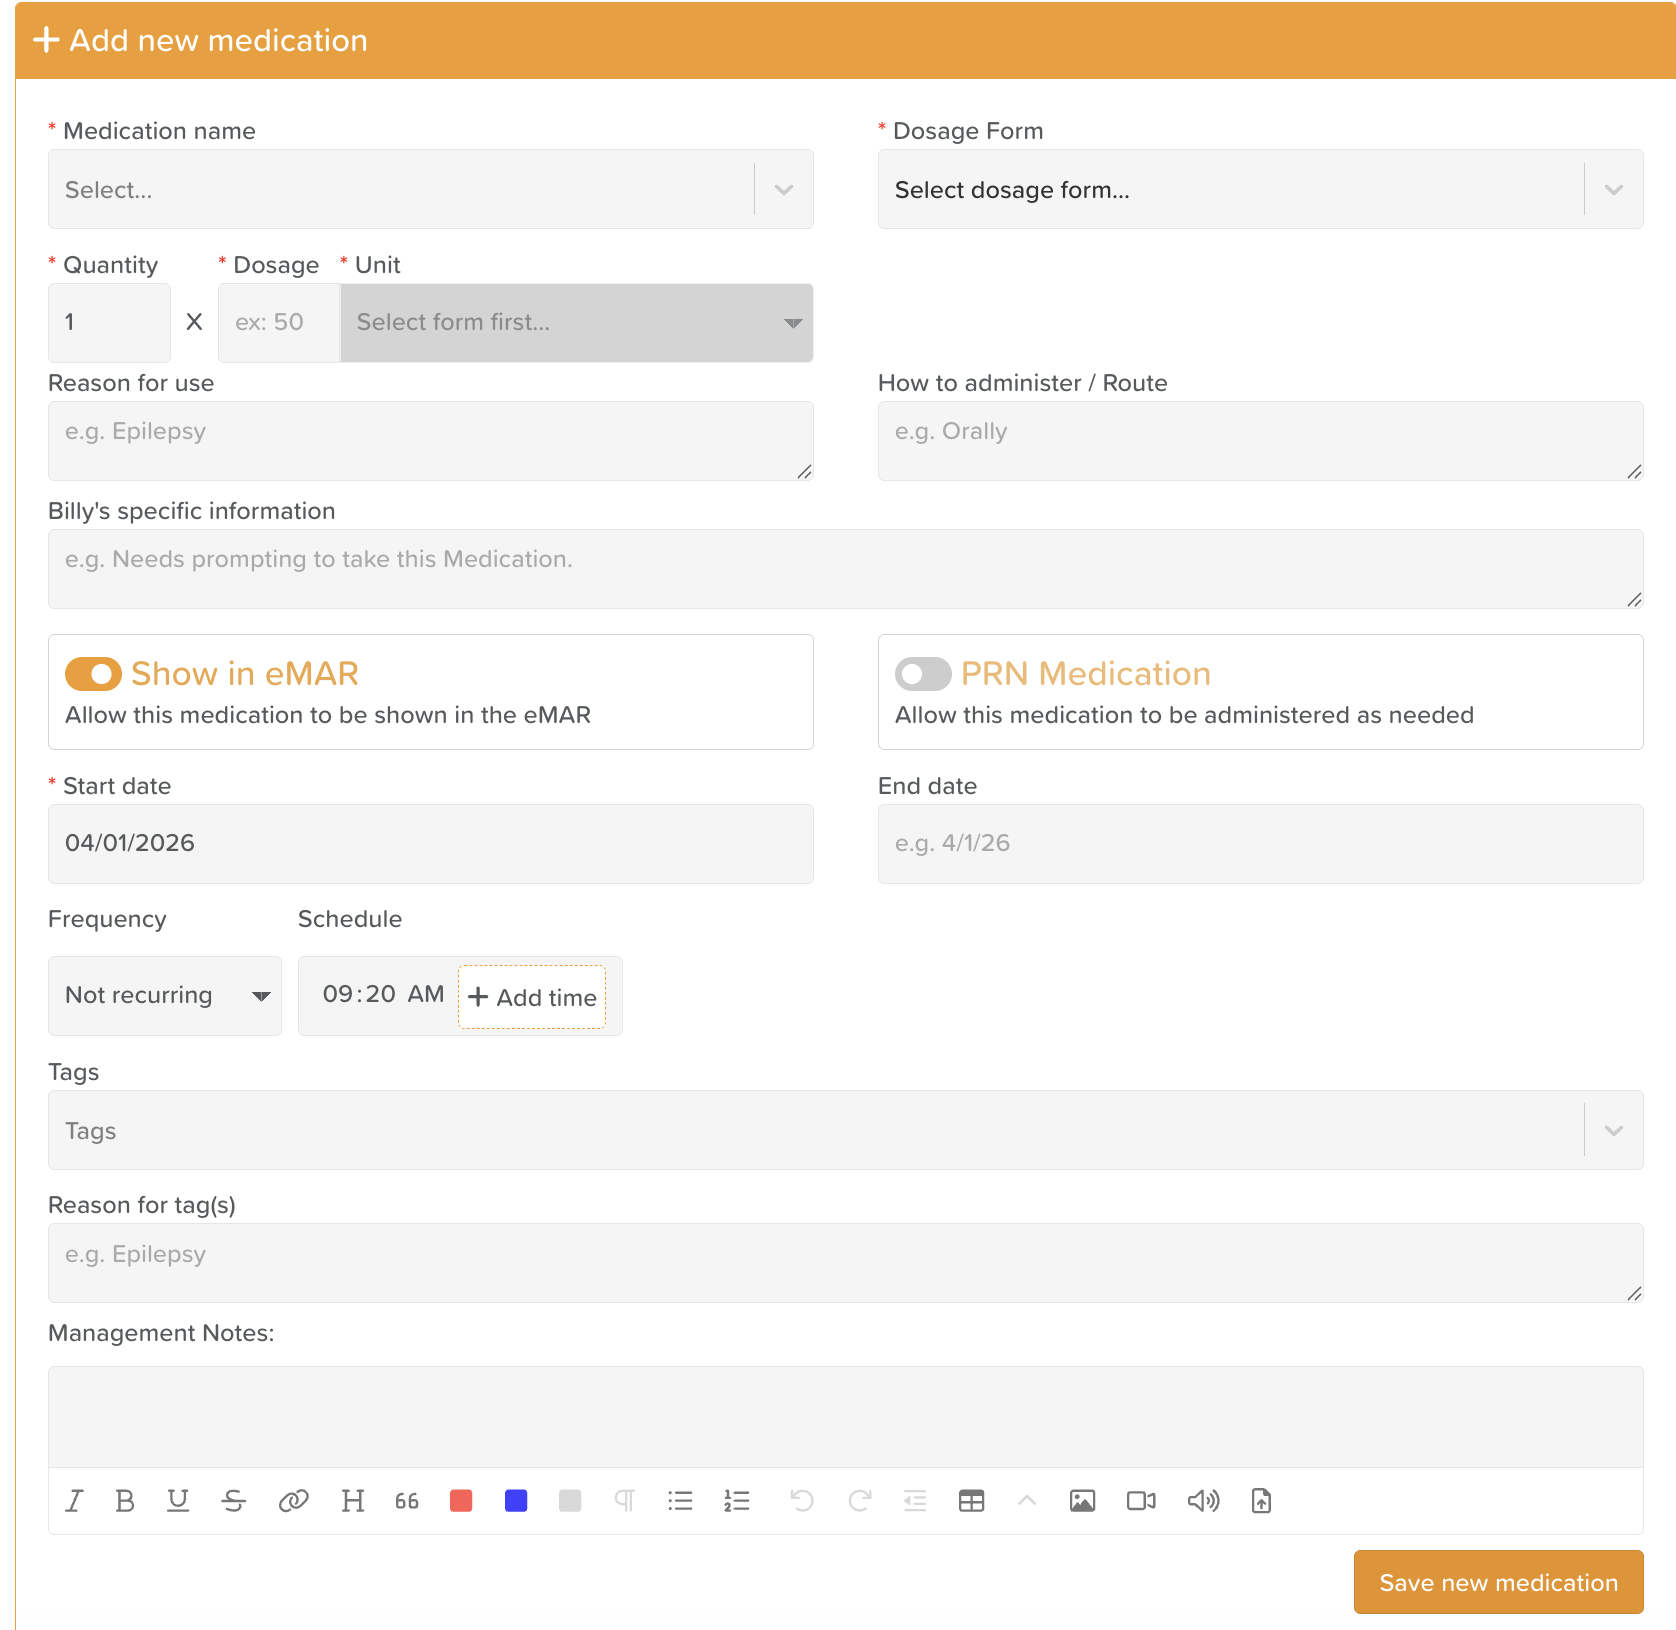
From the Medication view, click Add new medication.
Complete the medication details:
Required fields:
Name
Dosage Form
Quantity and Unit
Administration Start Date
Optional fields:
Reason for use
How to administer
Participant-specific information
End Date
Frequency
Schedule — Enter a time and click + Add time. Repeat as needed for all required administration times.
Tag(s) and Reasons for tag(s)
Management Notes
eMAR toggles:
Show in eMAR will be toggled on by default.
PRN Medication can be turned on if this is an as-needed medication
Click Save new medication.
⚠️ Important: After saving, a medication cannot be fully edited. Only the End Date and Management Notes can be updated. Please review all fields carefully before saving.
How to Set Up Medication Inventory
The Inventory feature allows you to track medication stock levels. Setting up inventory is optional but recommended for accurate record-keeping.
From a participant profile, open either the Medication or eMAR feature. Click the Actions button > Inventory. You will see a list of all medications for that participant.

Click the + sign next to a medication to add an inventory batch.
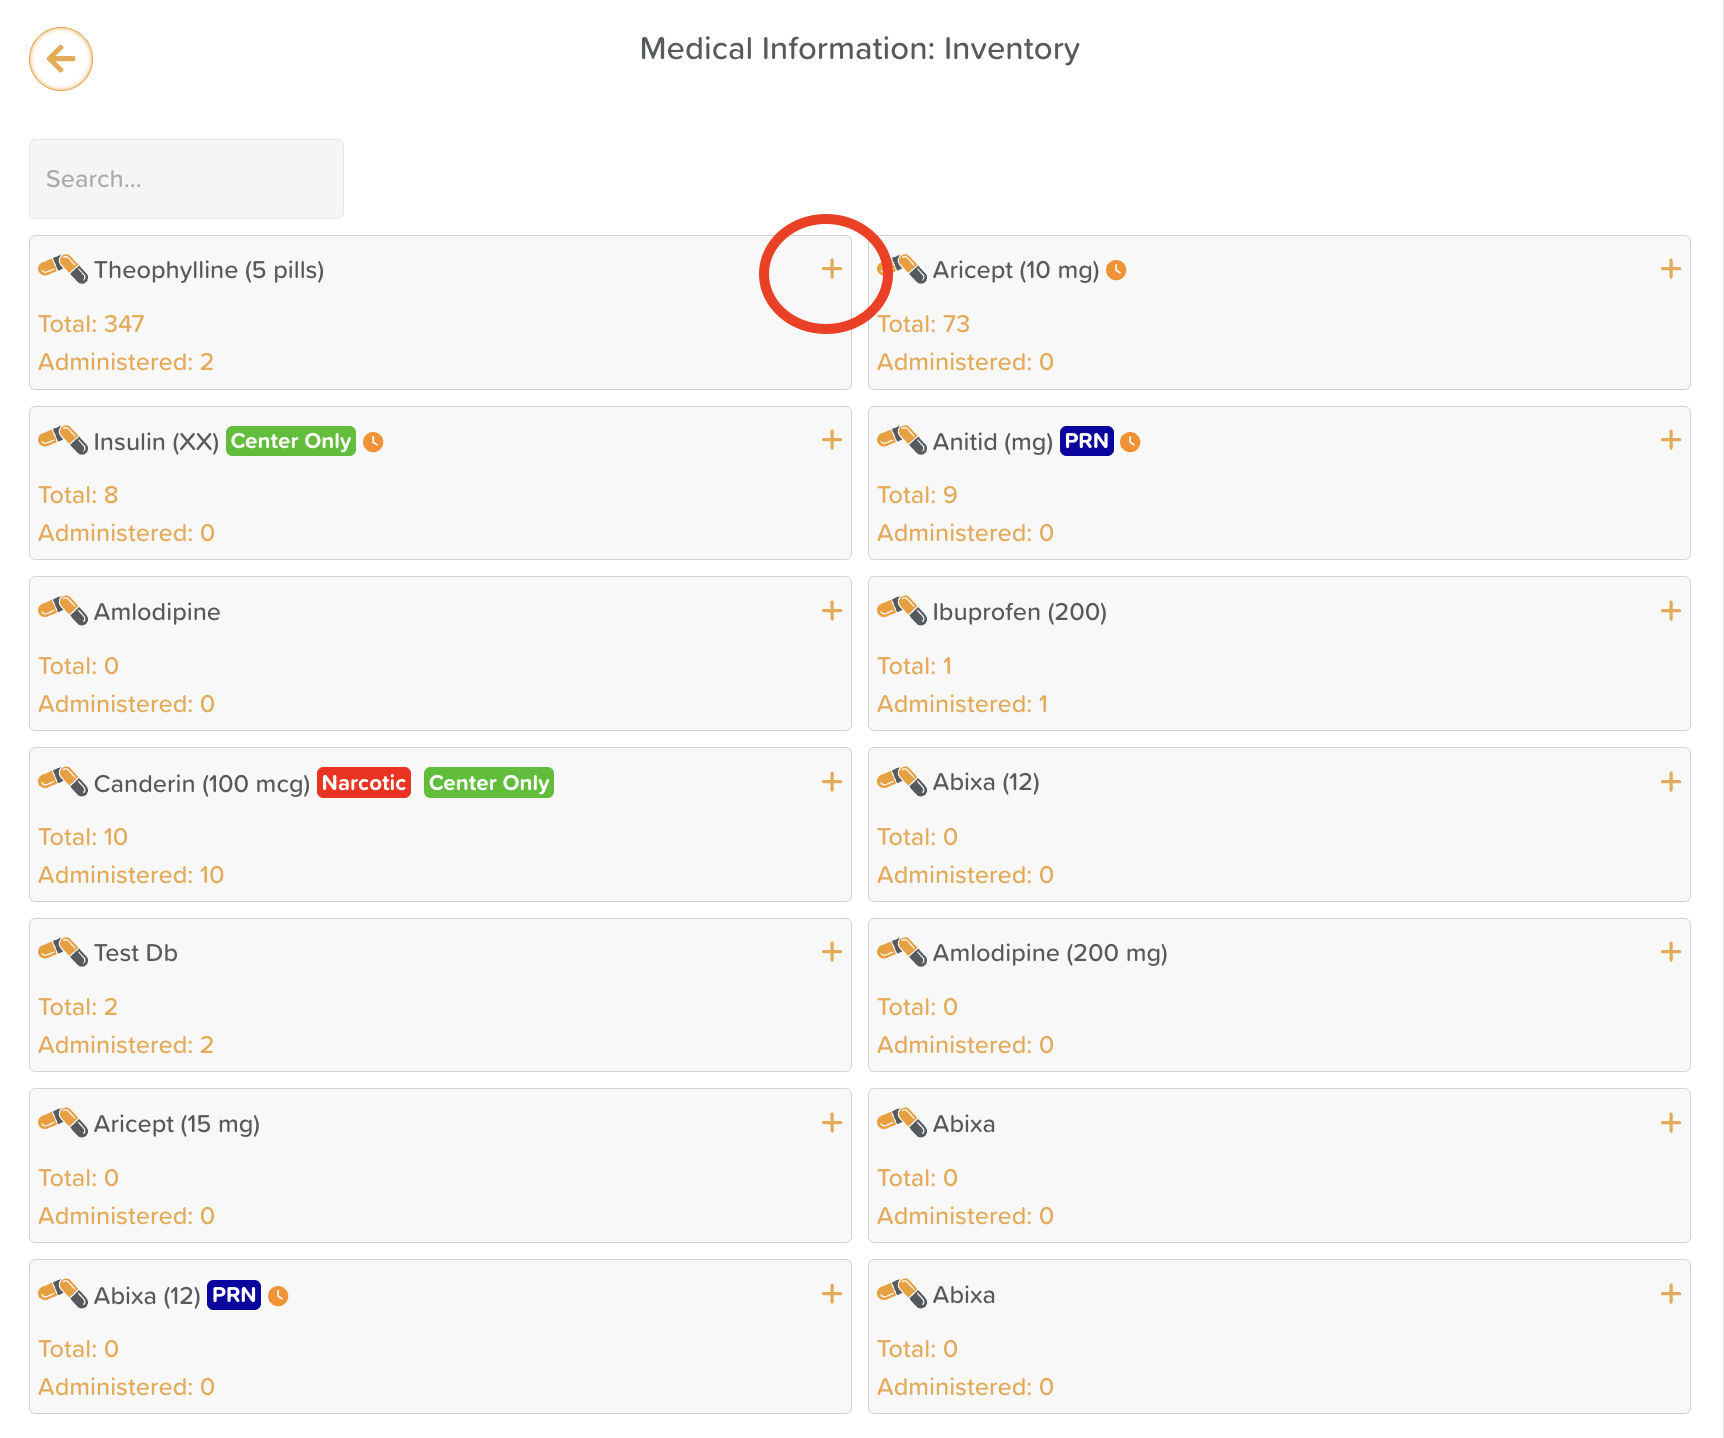
Enter the total dose number for that batch.
Enter a batch note or label to identify the batch.
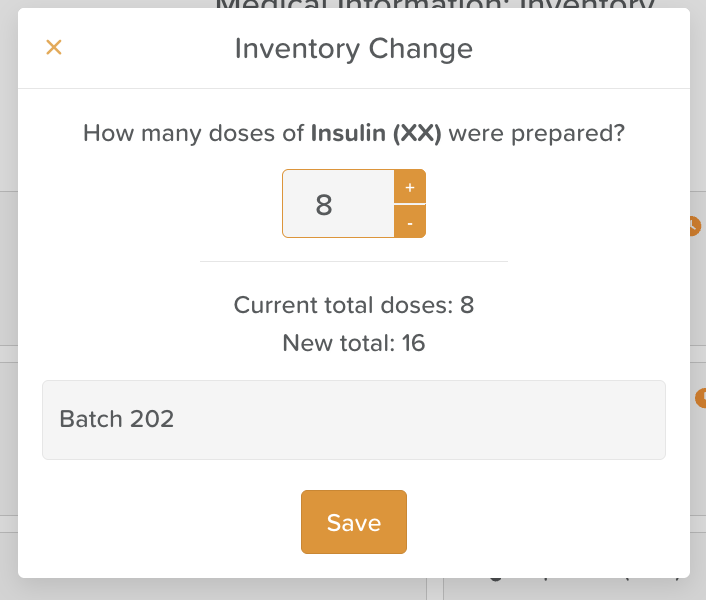
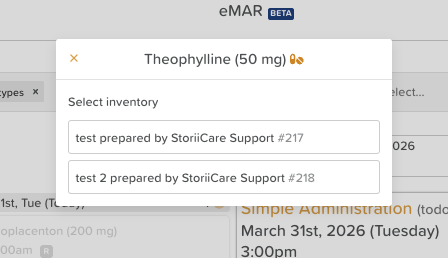
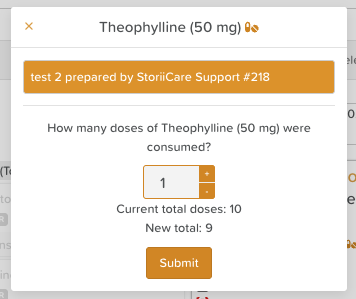
How Inventory Works During eMAR Tasks
When Inventory is set up, staff completing an eMAR task will be prompted to select the relevant inventory batch and enter how many doses were consumed. The screen will display the Current total doses and New total doses before the staff member submits, ensuring full visibility.
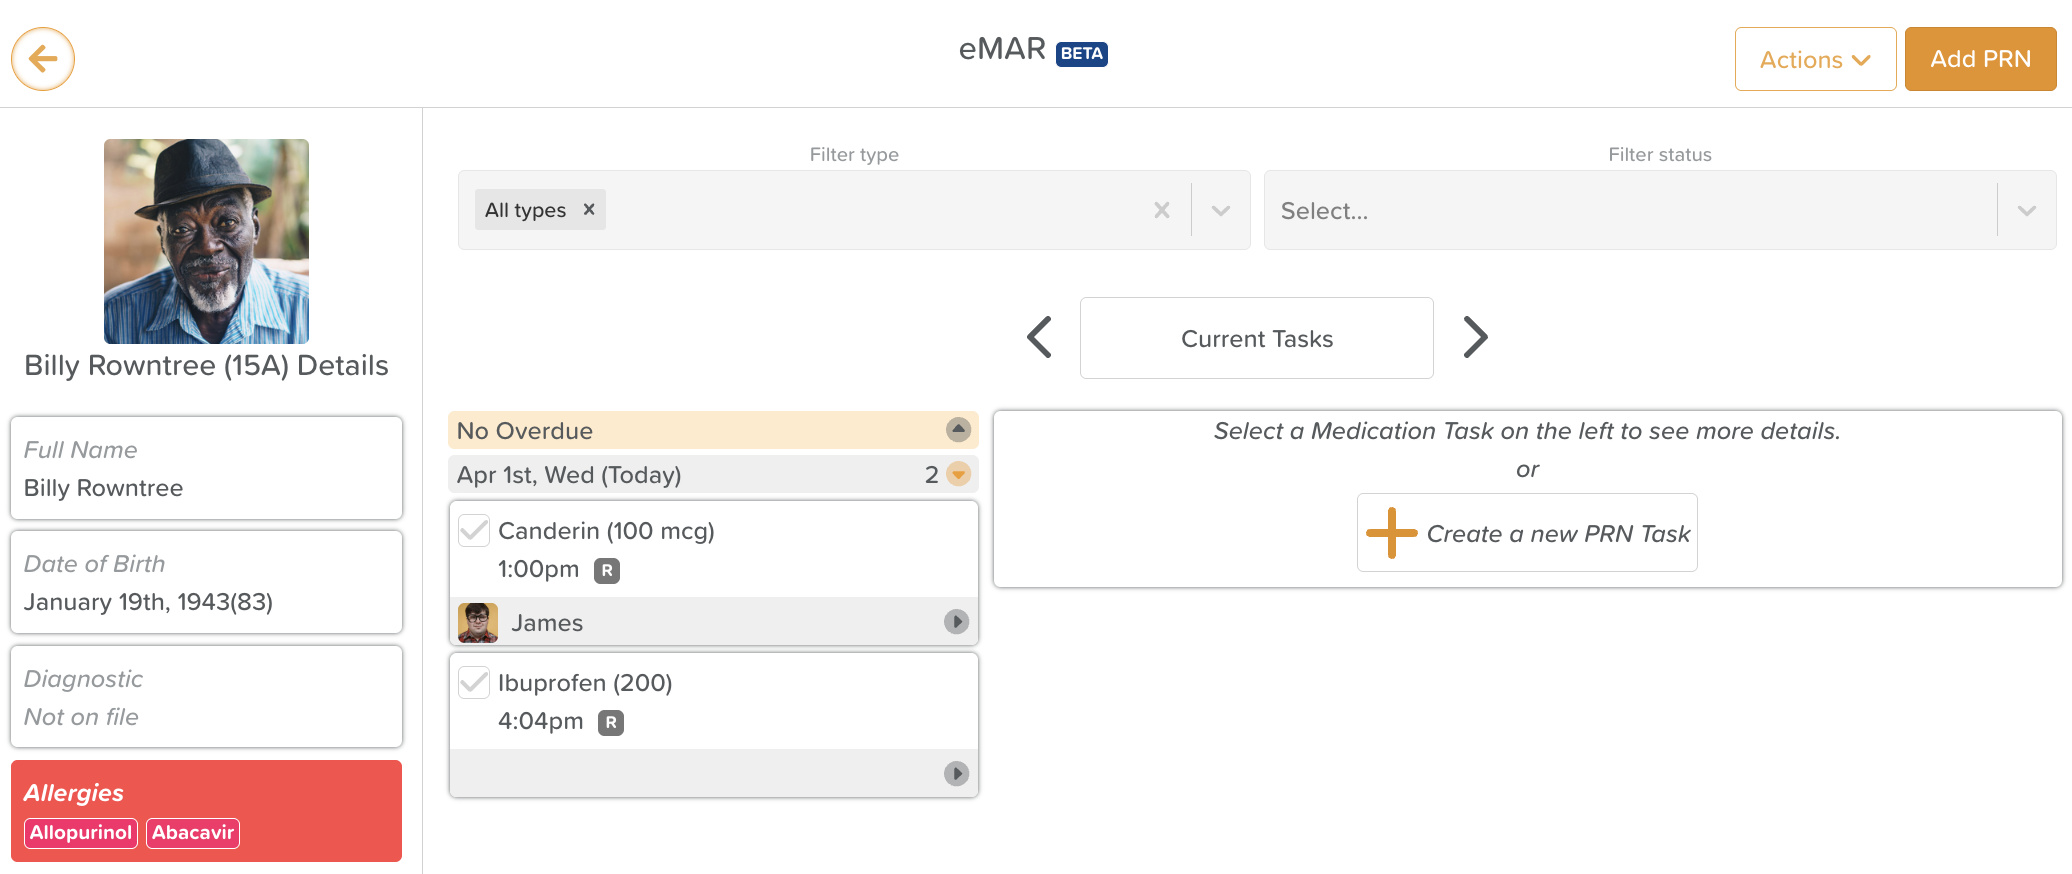
How to View Medication Administration Tasks
From a participant profile, click on the eMAR feature.
On the left, you will see the participant's profile photo and the eMAR Participant Properties you selected in Medication Settings.
Use the Status filter to view tasks by: To Do, Incomplete, or Completed.
Click Current Tasks to change the view. Options include:
Specific Day
Date Range
Upcoming Tasks (Shows the next scheduled recurrence for any active task)
How to Complete Medication Administration Tasks
For Scheduled Medications
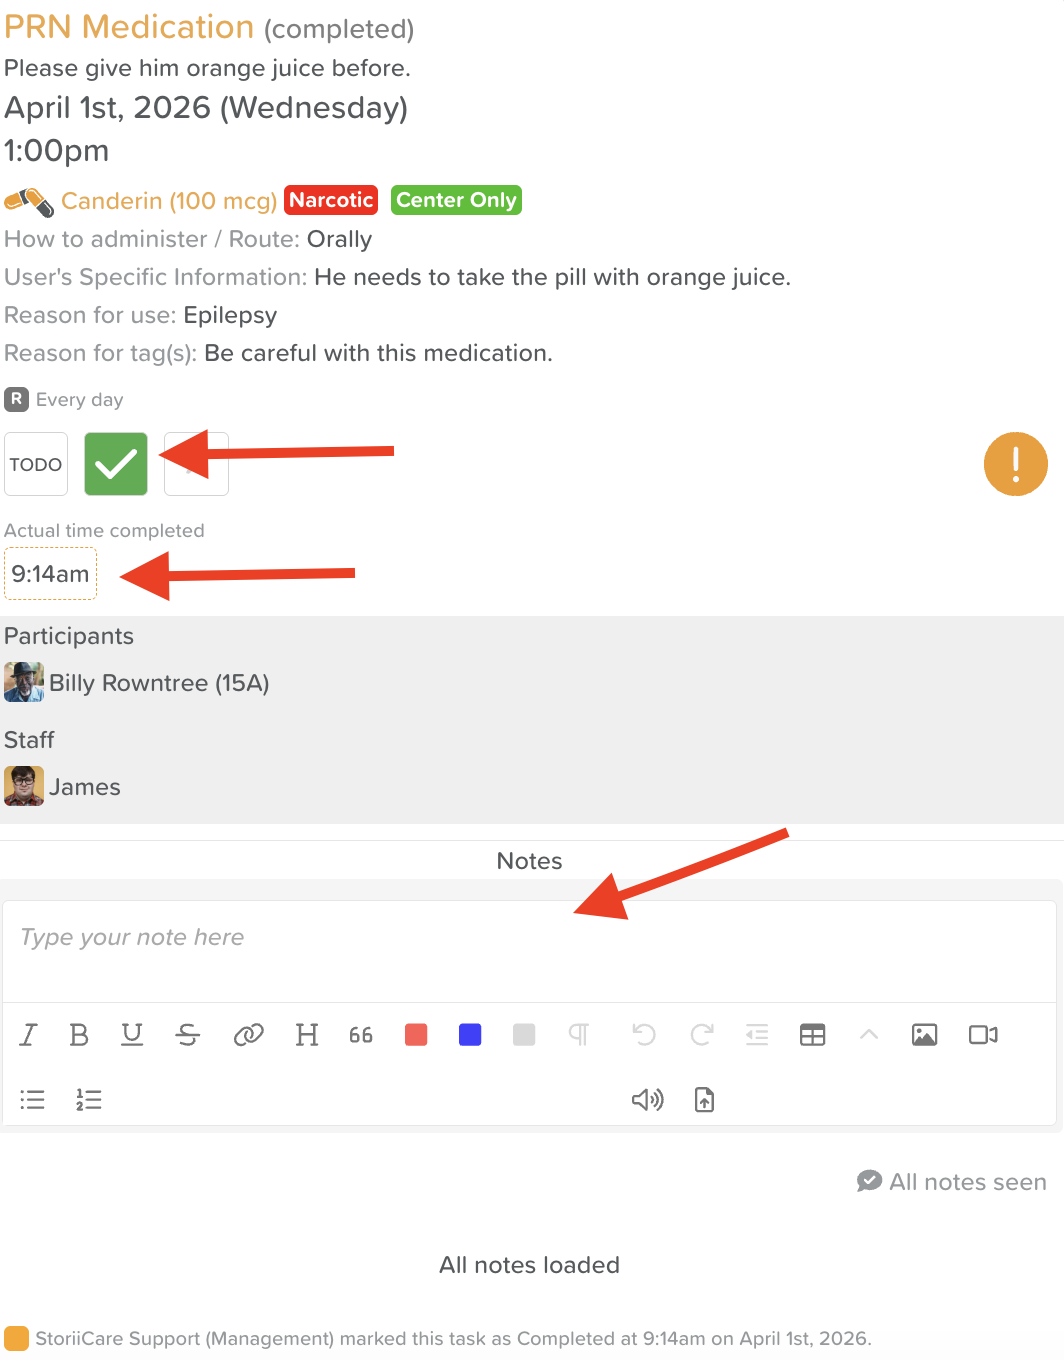
From the eMAR feature, click on the medication you administered.
Click the checkbox to mark the task as complete.
⚠️ Tasks completed after the scheduled time will appear as "Completed when overdue." Note: The task audit trail will still capture the exact time the task was marked as complete, even if the actual time is updated.
If needed, add any comments in the Notes area.
Some tasks may show a Category option. If so, select the appropriate option from the list before saving.
For PRN (As-Needed) Medications
From the eMAR feature, click the Add PRN button in the top-right corner.
Select the PRN medication from the list.
Either:
Schedule the task and assign it to a staff member, or
Mark the task as completed immediately and save.
When Medications are Refused/Incomplete
From the eMAR feature, click the X on the medication task — this flags it as incomplete.
For audit purposes, we recommend staff add a note directly on the eMAR task to document the reason the medication was not given (e.g., refused, participant left early, etc.). This keeps the record clear and accountable without requiring any additional documentation.
On the printed MAR PDF, an X will appear in the corresponding box to reflect this.

How to Export MARs
Bulk Export
From the main dashboard, go to Dashboard > Exports > MAR Export.
Select the relevant participants and date range, then export.
From a Participant Profile
From a participant profile, go to Medical Info > Medication.
Click the Actions button.
Select Print MAR.
💡 Tip: MAR Chart Settings It's worth reviewing MAR Chart Settings from the Medication Settings section to ensure that the correct fields are pulling information from the participant's Face Sheet (e.g., name, date of birth, allergies, diagnoses). This ensures your exported MARs are complete and accurate. |
Need Help?
Our support team is here for you. Email us at support@storii.com or reach out via Live Chat within the platform.