
How to Cancel a Schedule
Introduction
In some cases, users may want a schedule entry to stay visible on the Schedule but display as cancelled, rather than completely removing/deleting it. StoriiCare allows users to mark specific schedule entries as canceled without deleting them. This is particularly useful for managing situations such as Service User absences or canceled transport trips, ensuring the schedule remains clear and accurate while retaining a record of the original entry.
Steps to Cancel a Schedule:
On the StoriiCare Dashboard, select Schedule.
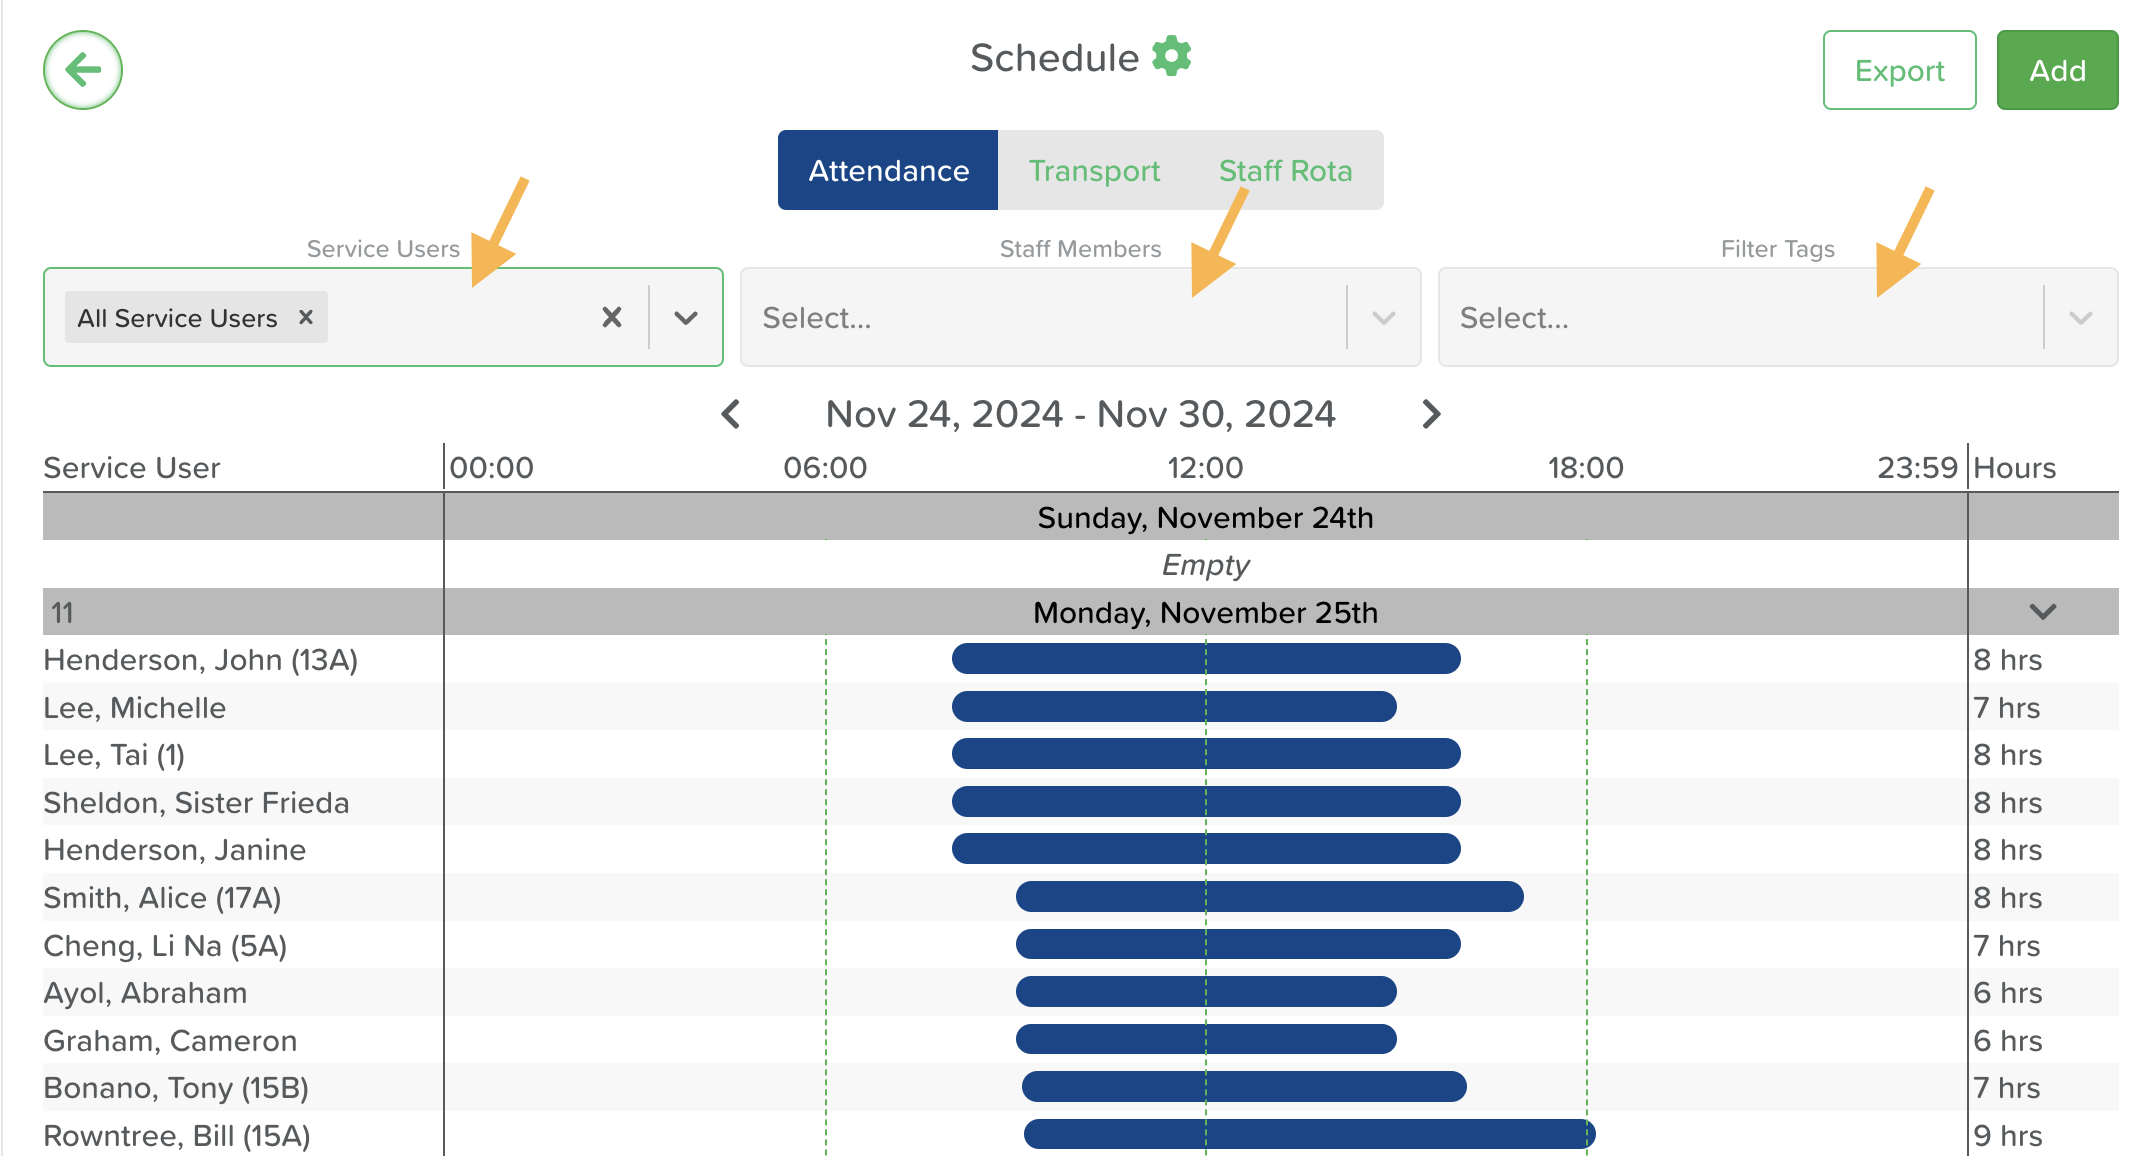
Select Attendance/Transport/Staff Rota depending on the schedule you want to delete.
If needed, select one or more from the 3 filter menus to refine by Service User, Staff Member, or Tags.
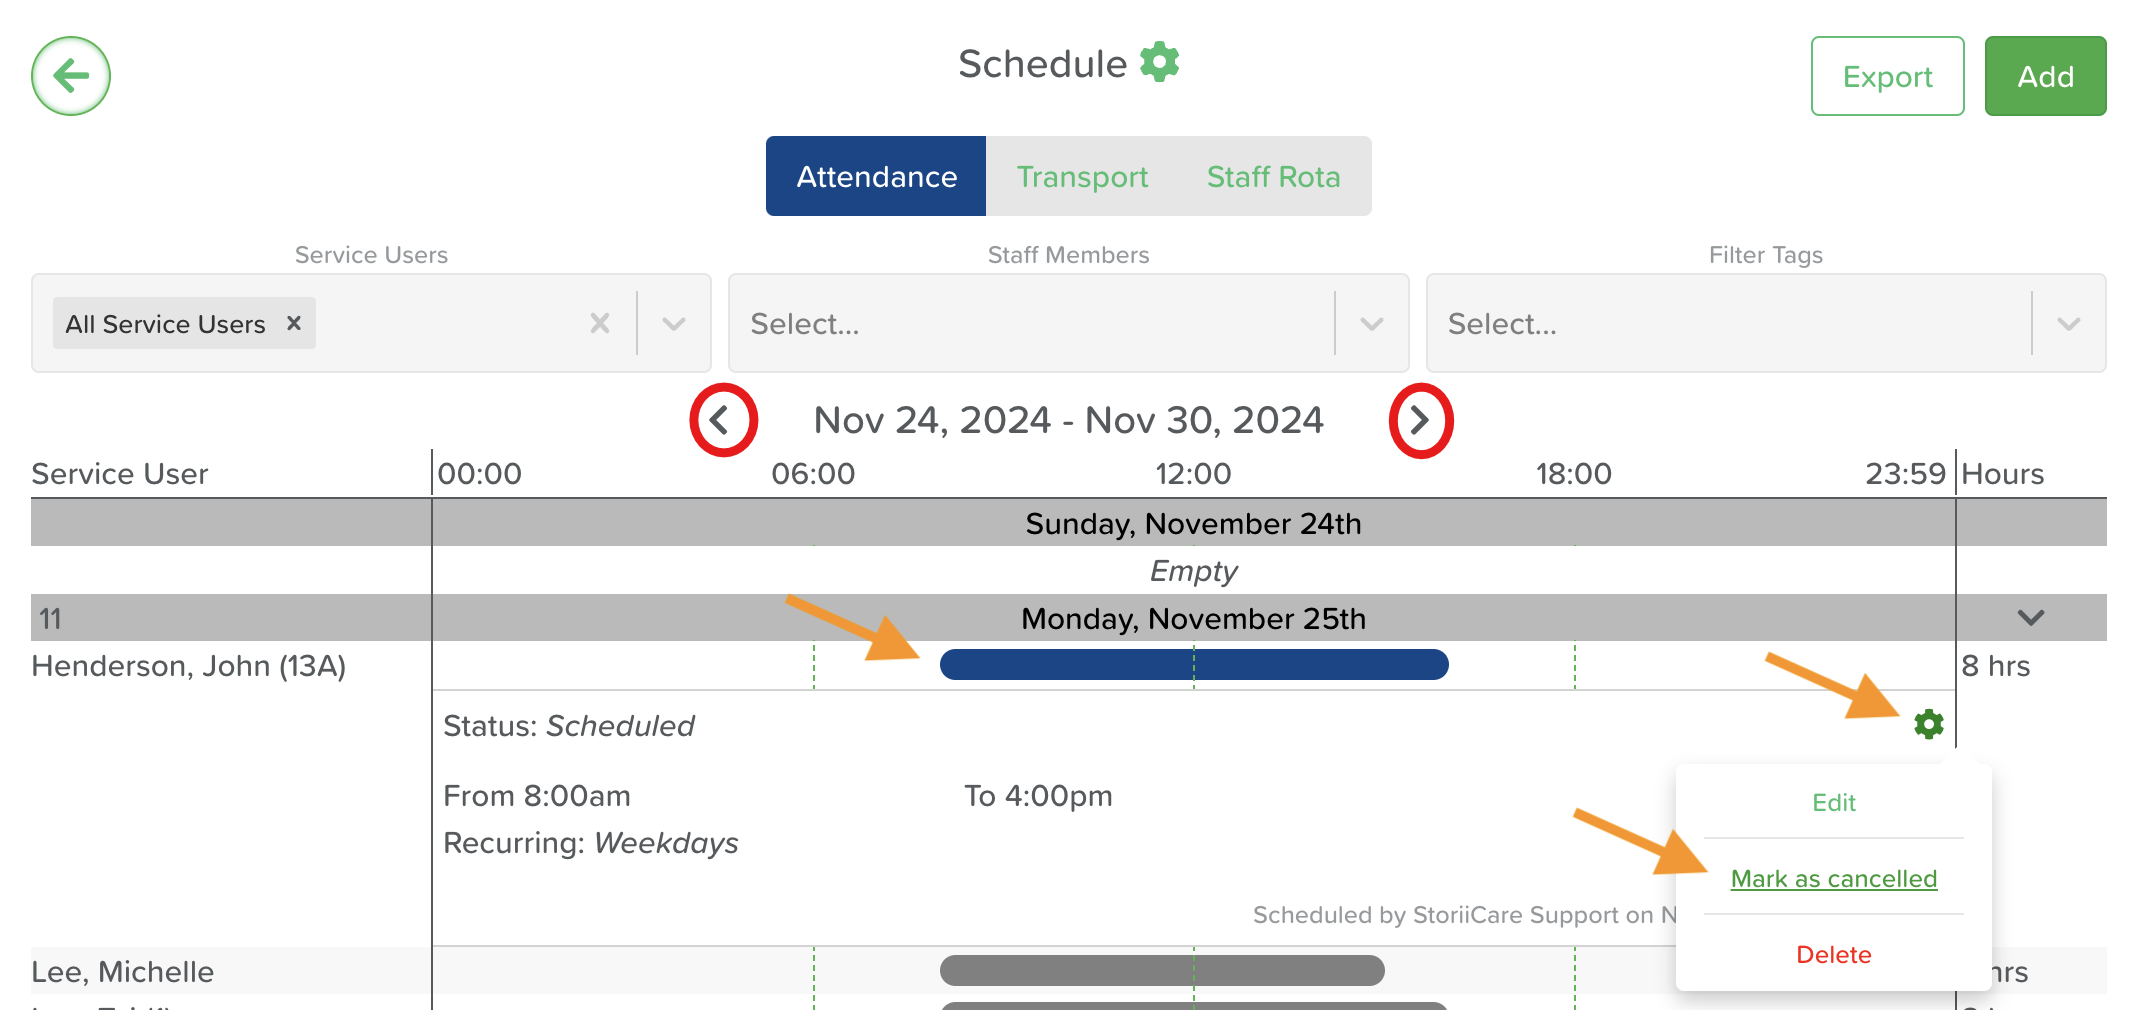
Look up the date and Service User for the schedule entry you want to edit. You can use the arrows to navigate across weeks. Click on the blue Time Progress Bar, then on the Settings Wheel, and select Mark as Cancelled.
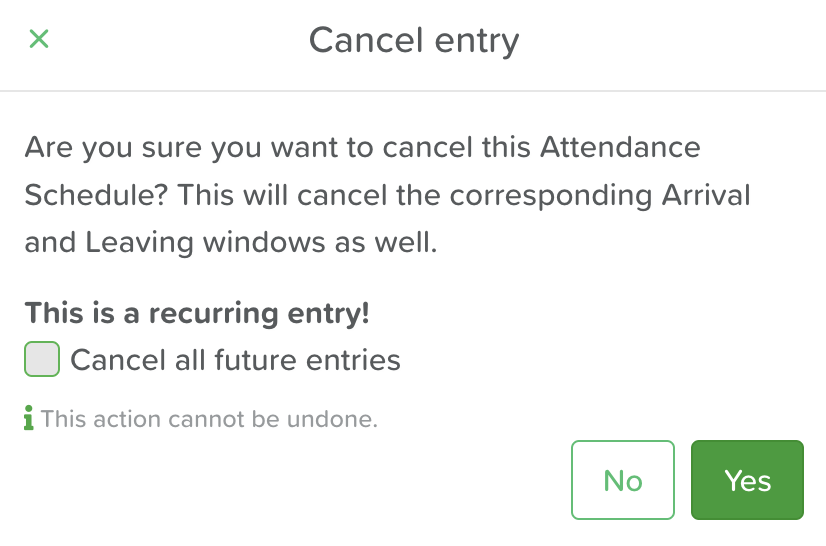
When prompted, click Yes to confirm the cancellation. For recurring entries, tick Cancel all future entries if you want to remove them all, then click Yes.
A successfully cancelled schedule is easily recognisable by the striped time bar.

Conclusion
With the ability to cancel schedule entries, StoriiCare provides a practical solution for handling unexpected changes, helping you maintain transparency and accurate records while keeping your operations running smoothly.
Need More Help?
If you need further assistance, you can schedule a support call by emailing support@storii.com. Our support team is ready to help you with any questions or issues you may have.