How to Add an Attendance Schedule
Introduction
The Schedule feature in StoriiCare simplifies planning and organizing Service User and Staff attendance, as well as transportation. It allows users to pre-schedule arrival and departure times for each Service User and specify any transport needs. This feature is also integrated with the Register, ensuring that a Service User’s expected attendance is displayed daily. By using the Schedule tool, users can efficiently manage daily operations with a clear and organized overview.
Steps to Add an Attendance Schedule:
On the StoriiCare Dashboard, select Schedule.
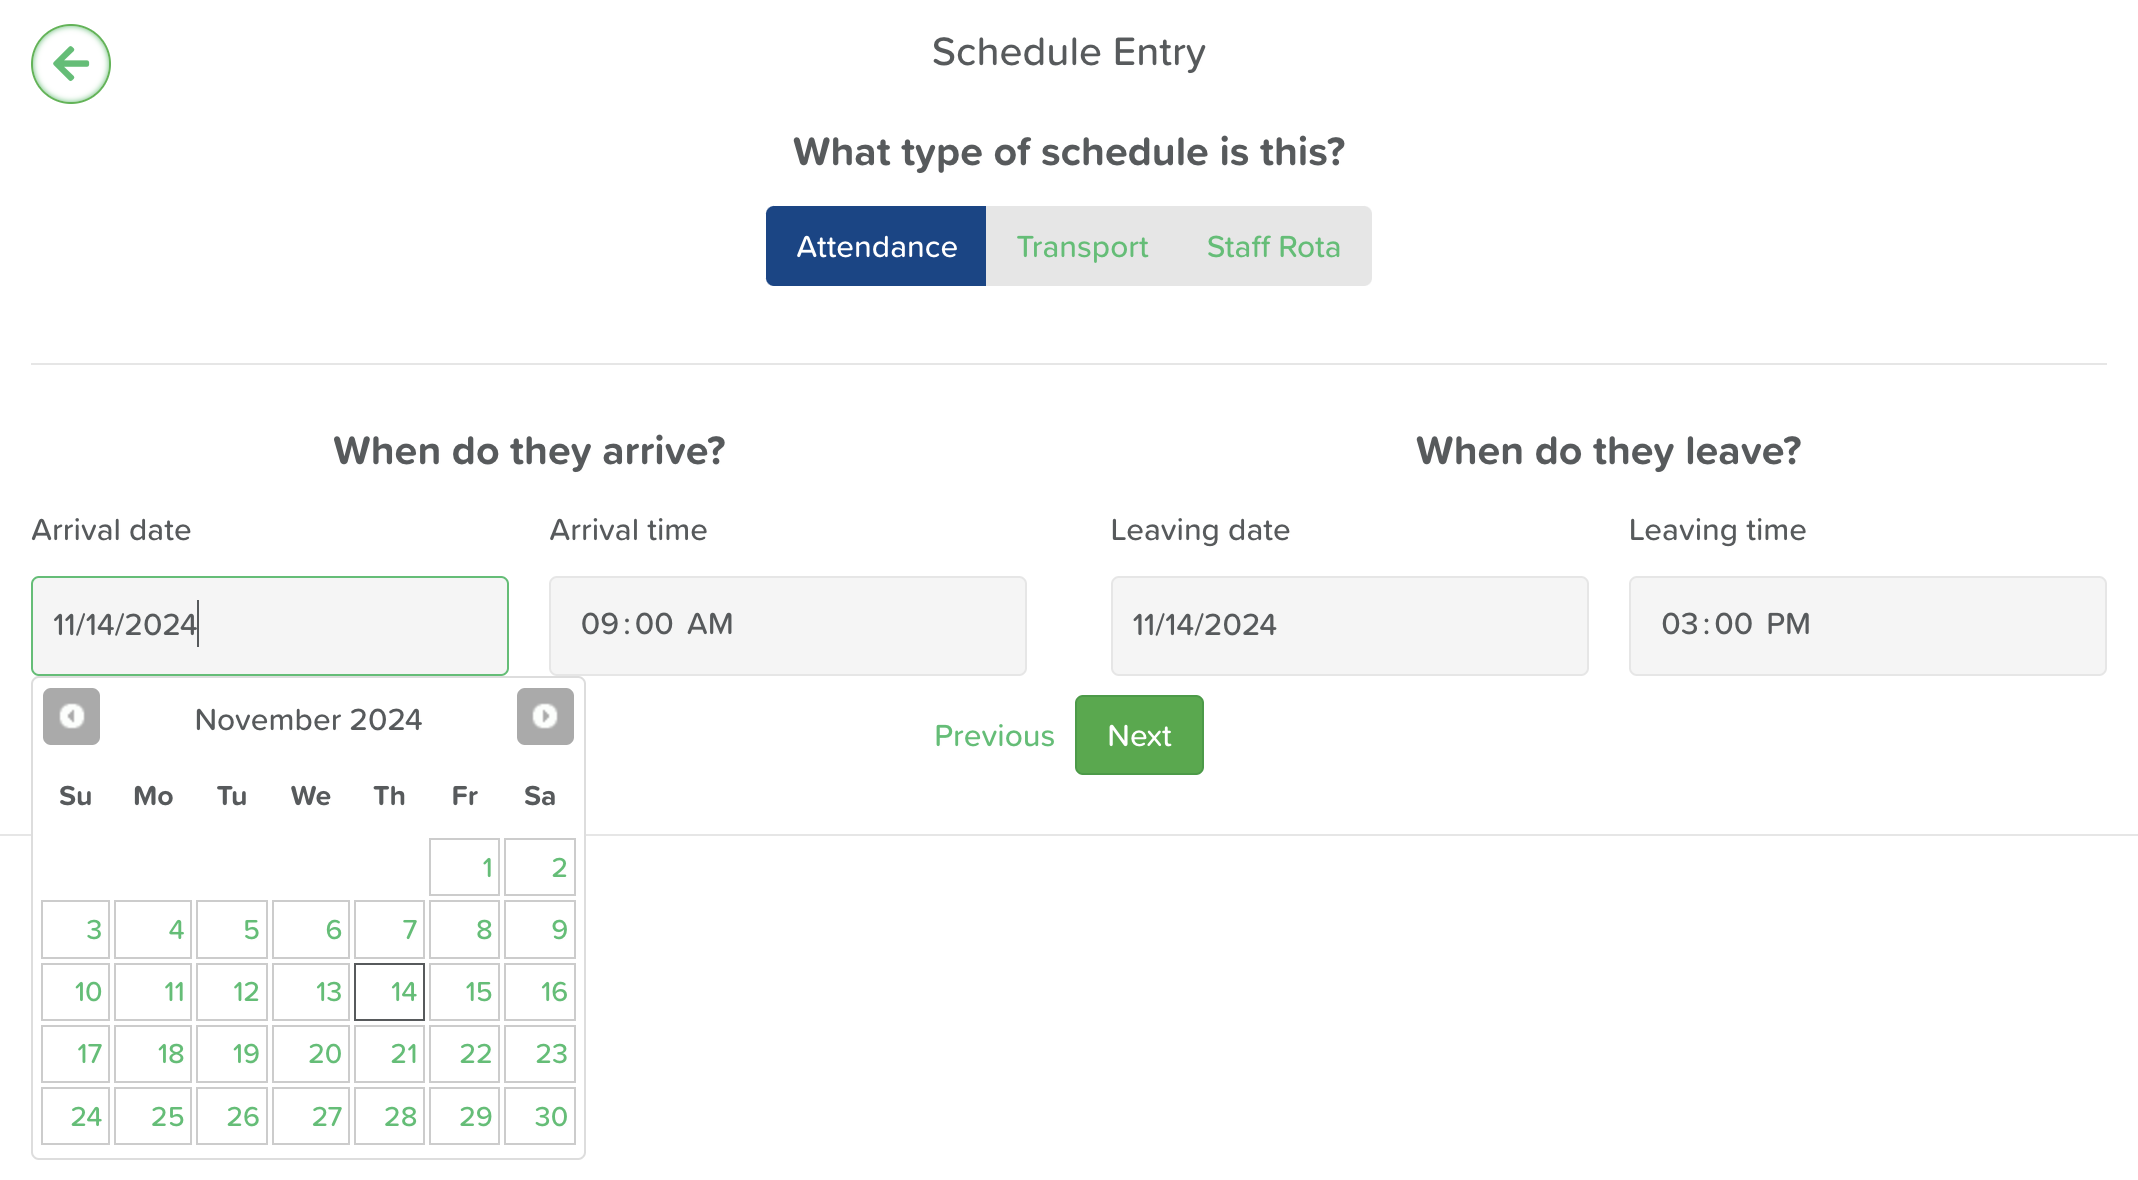
Select Attendance and click Add.
In the date box:
Transport Options:
Schedule Frequency:
For a one-time schedule, select Not Recurring from the drop-down menu.
For recurring schedules, choose Weekdays to easily schedule attendance for multiple days within a week.
If the schedule should recur until a specific date, click the toggle Recurring Indefinitely and set the end date using the using the calendar selection tool.
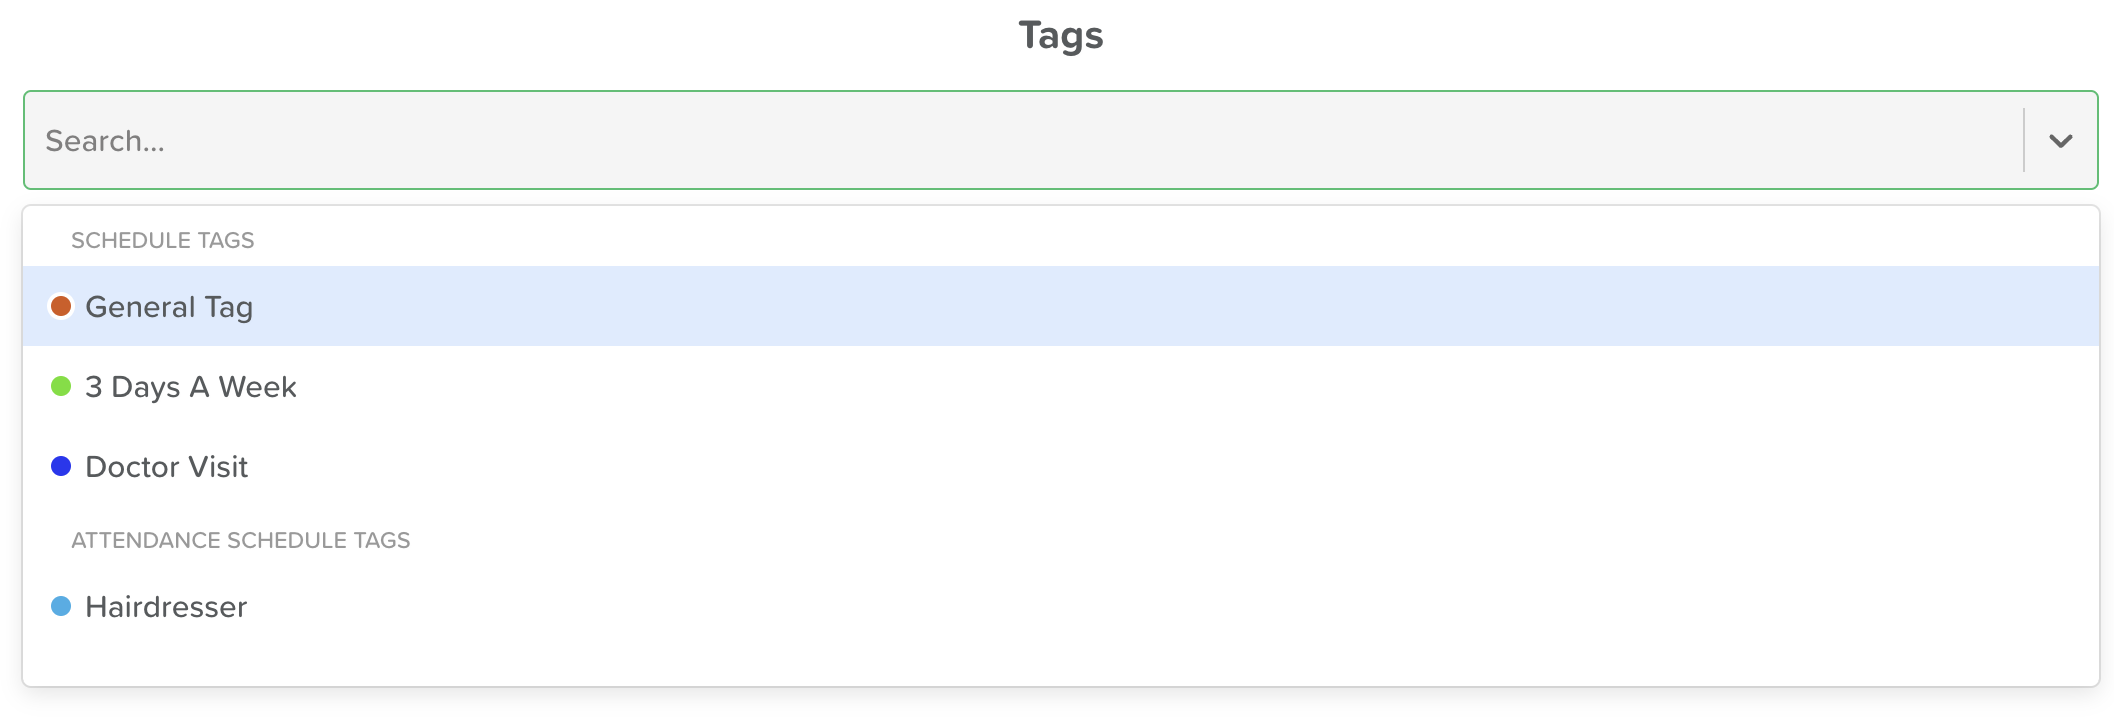
Tags: To assign a tag to this schedule, select from the drop-down menu. If a new tag is needed, follow -this article- on how to add it. Tags are optional, but can be helpful for organizing schedule entries and displaying important information. When viewing the Schedule you can filter by Tags to see all Service Users with ‘Hairdresser’ appointments, for example.
Assigning Service Users and Staff:
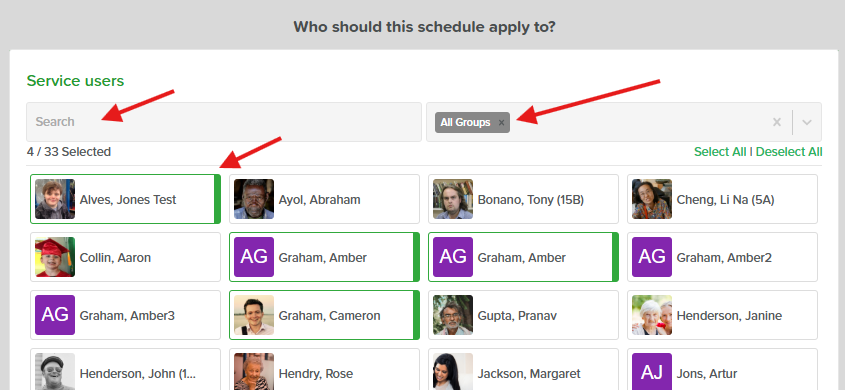
Click the No Service Users box to open a drop-down menu where you can select one or multiple Service Users.
Selected Service Users will show a green band by their name. You will notice the selection number update in real time just below the search bar as you select or unselect Service Users.
Use the search bar to find Service Users by name or group tags for those already assigned to a group.
Once selected, click outside the box to close the list.
If needed, add a note to the schedule.
Click Save to complete the schedule setup.
Conclusion
With the Schedule feature, organizing Service User attendance and transportation is simple and efficient. This tool enhances planning, ensuring all details are managed in advance, creating a more structured and reliable experience for both Service Users and Staff.
Need More Help?
If you need further assistance, you can reach out to our support team by emailing support@storii.com. Our support team is ready to help you with any questions or issues you may have.


