
A Guide to Using Progress Notes
The Progress Notes feature in StoriiCare allows staff to document meaningful observations, care interactions, behavioral updates, and day-to-day support for participants.
Progress Notes includes an automatic save feature to protect your work. If you begin typing a note and get interrupted—whether you’re pulled away or lose internet connection—your draft will be saved so you can resume exactly where you left off.
⚠️ Important: Staff should take care to finish and save their notes. Drafts are only visible to the staff member typing them. Therefore, important clinical information will remain unknown until the note is posted!
Drafts are specific to each staff profile, meaning you cannot see another staff member’s in-progress notes. Keep in mind that this also means it’s important to follow through and complete any Progress Notes that remain in draft form.
This guide walks you through how to view, create, customize, and export Progress Notes efficiently.
⚠️ Important: Progress Notes is a feature where the title can be customized. It might be called something else on your account (e.g. Daily Logs, Care Notes, Nurse Notes, etc.).
Configuring Progress Notes Settings
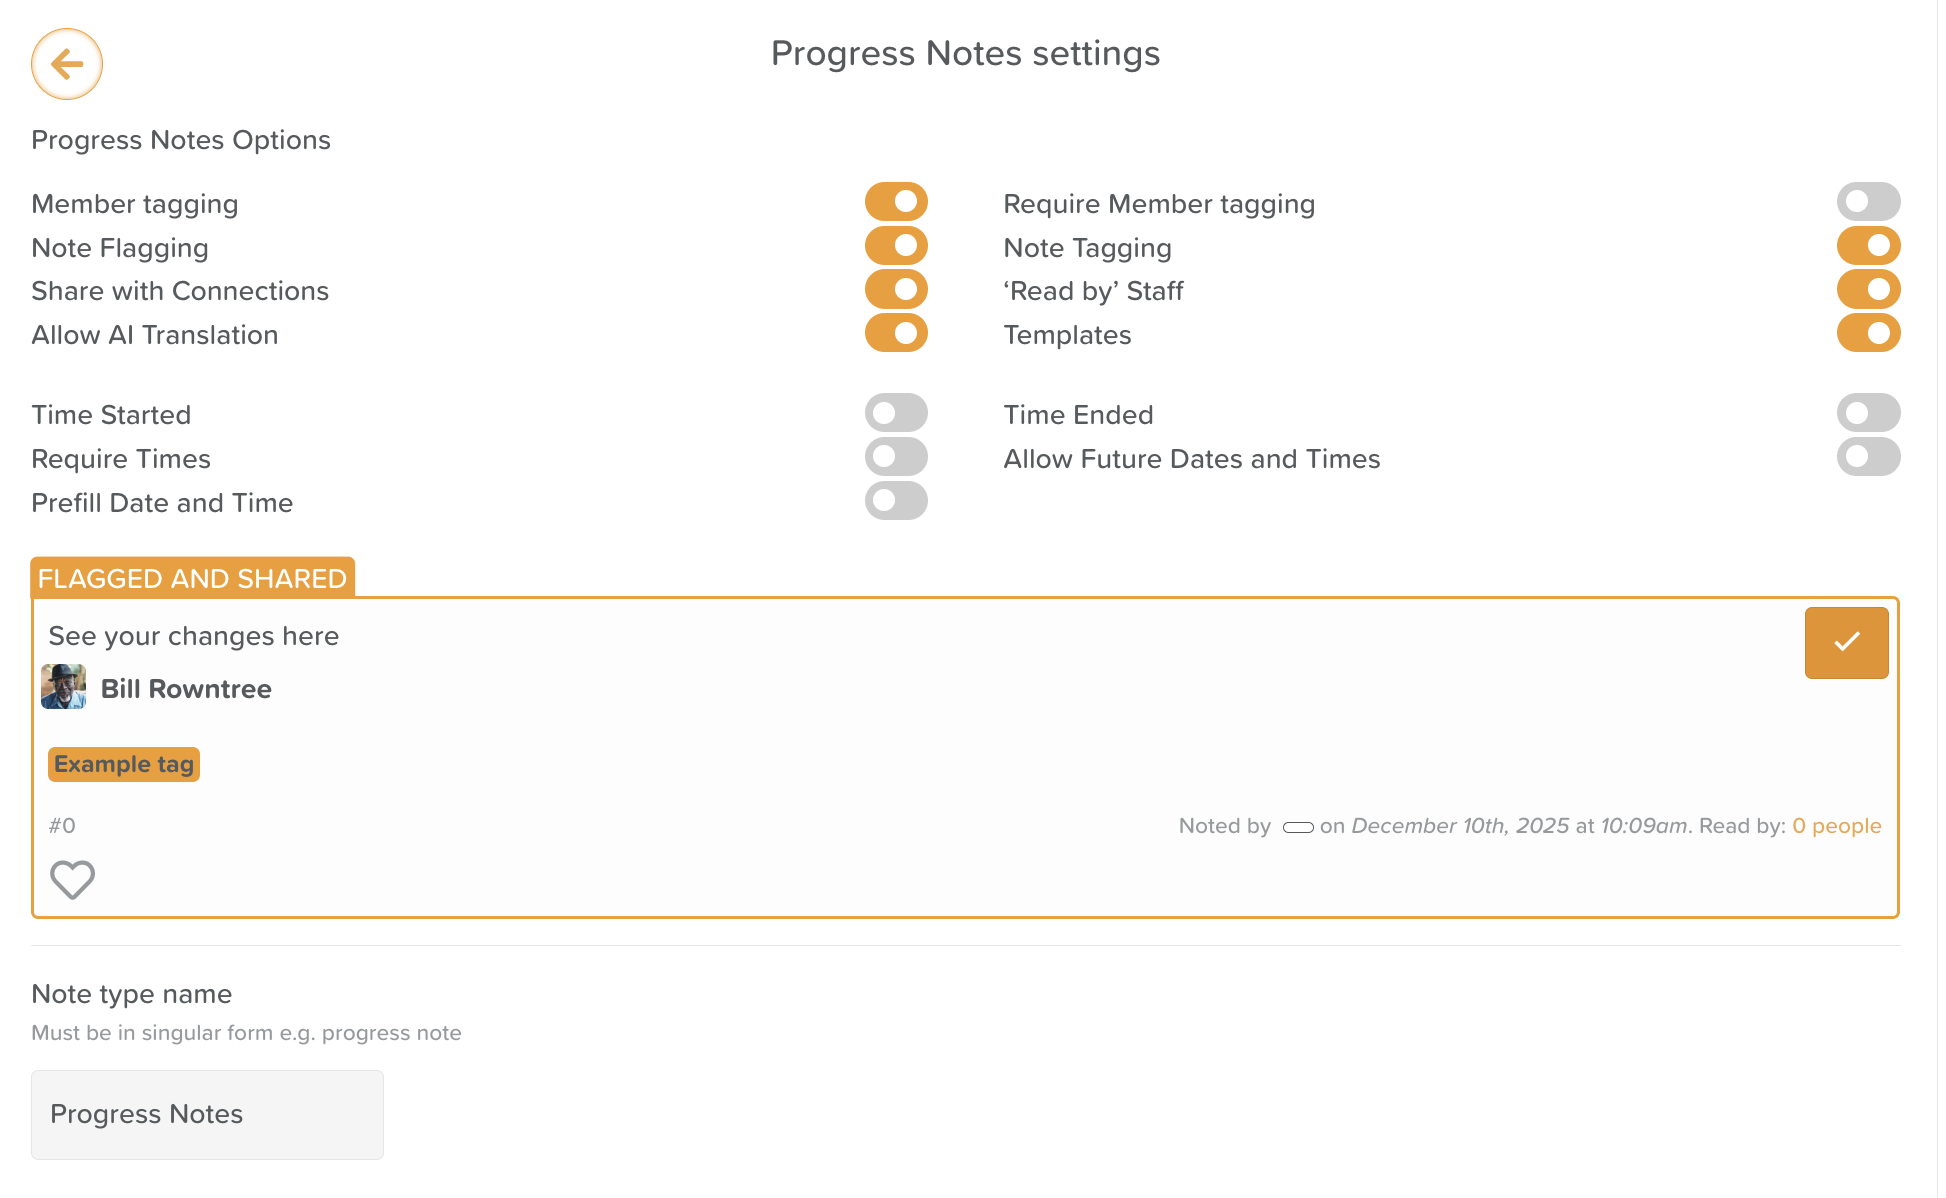
From the Progress Notes feature, click on the wheel / cog icon to access the Settings area.
Here, administrators can decide which elements they want to make available when staff are using Progress Notes. These settings can be enabled or disabled by switching the toggles on and off.
There is also the option to rename Progress Notes to something more fitting for your organization (Daily Logs, Nurse Notes, etc.) and add Note type tags to help organize and categorize Progress Notes. Finally, note Templates can be created to provide standardized, structured notes (e.g. SOAP, BIRP, Handover).
See: Progress Notes Settings Overview
How to View Progress Notes
From the StoriiCare Dashboard, click on Progress Notes to open the main notes log. You can also access Progress Notes from any participant profile.
Use Filters to Quickly Find What You Need
You can filter notes by:
Participant — view notes for one or multiple individuals
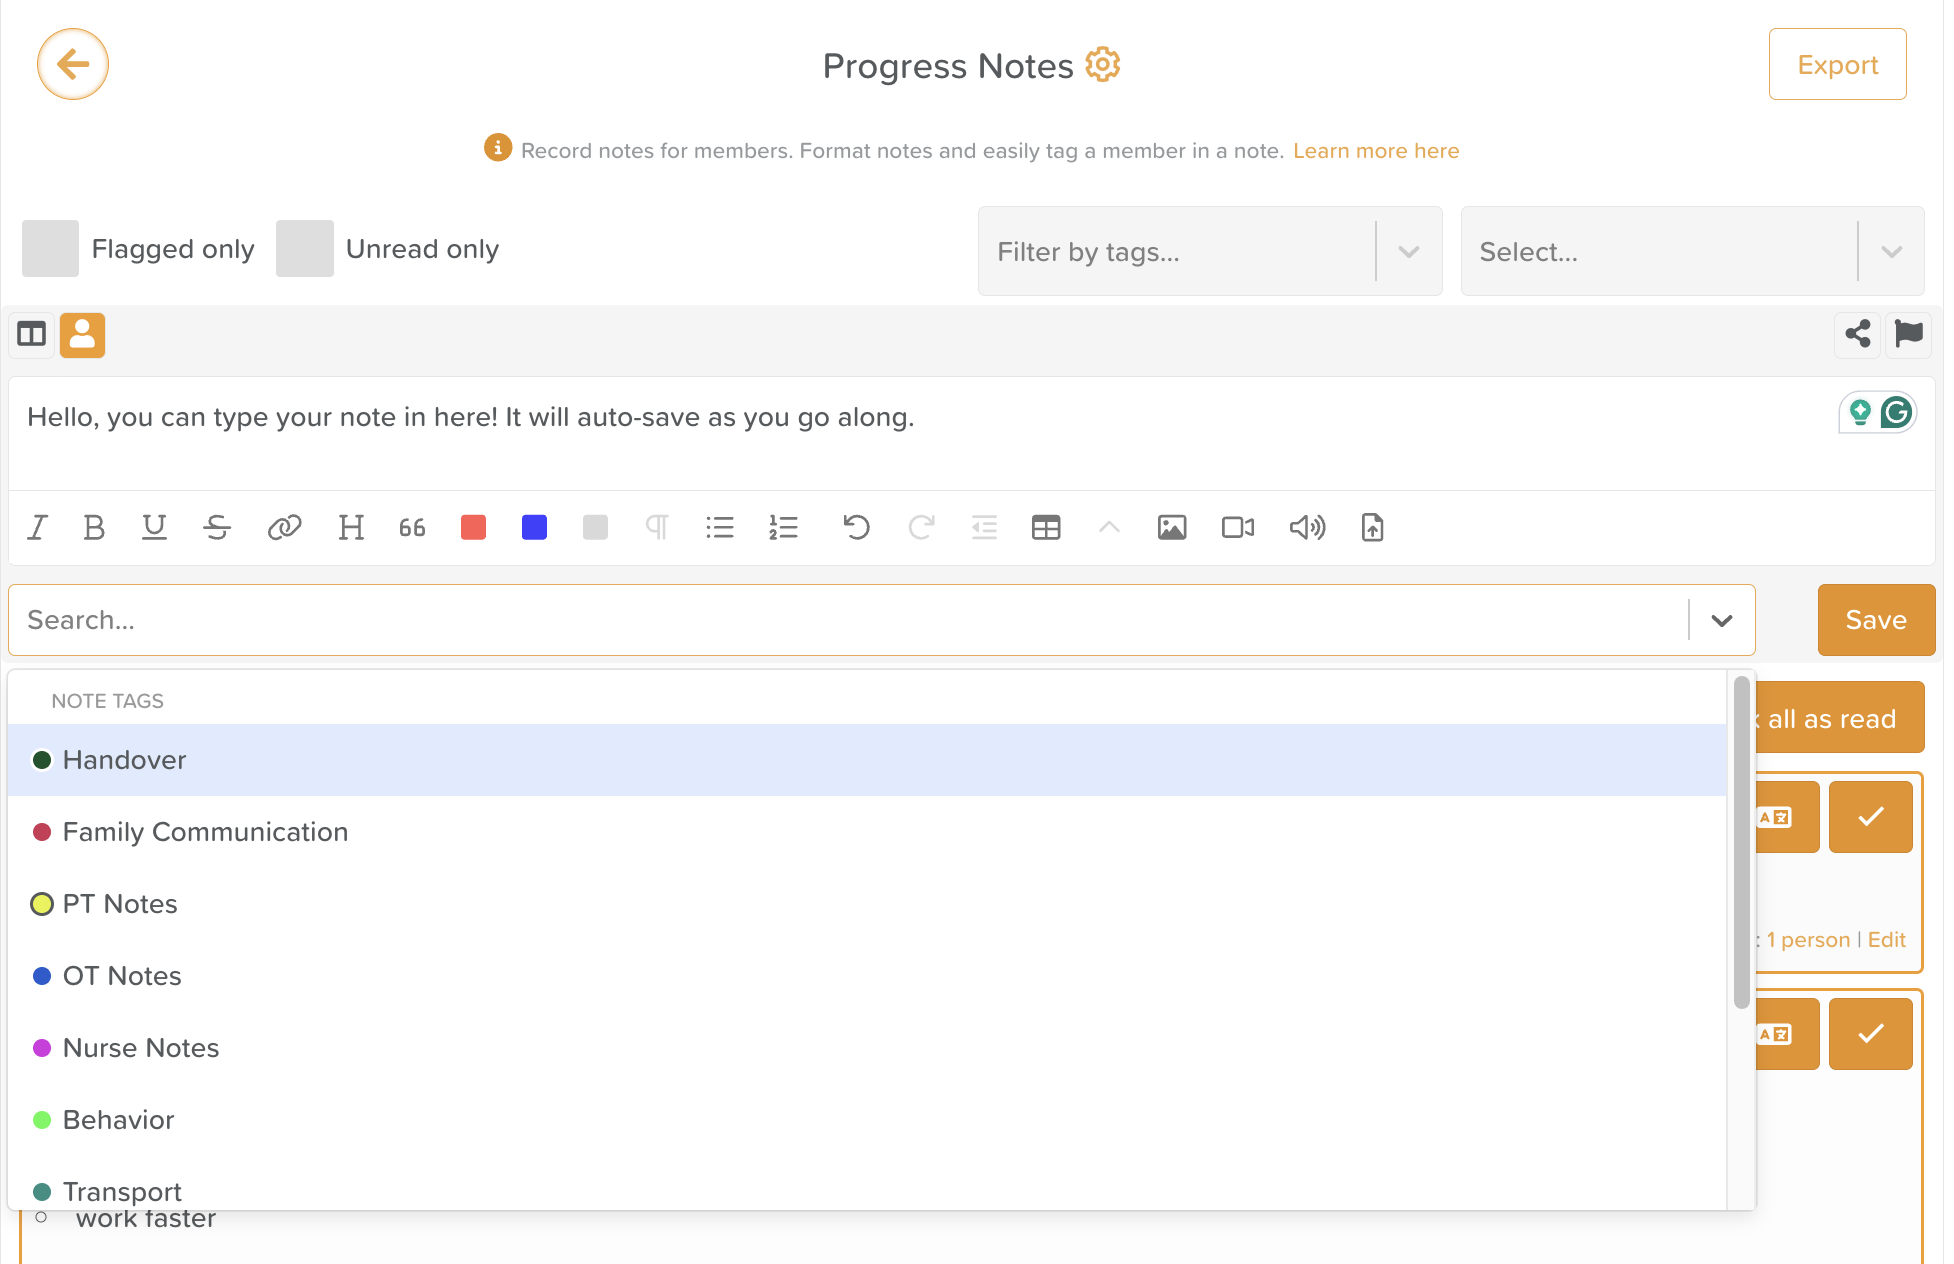
Tags — filter by categories such as “Incident,” “PT,” “Behavior,” “Family Communication,” etc.
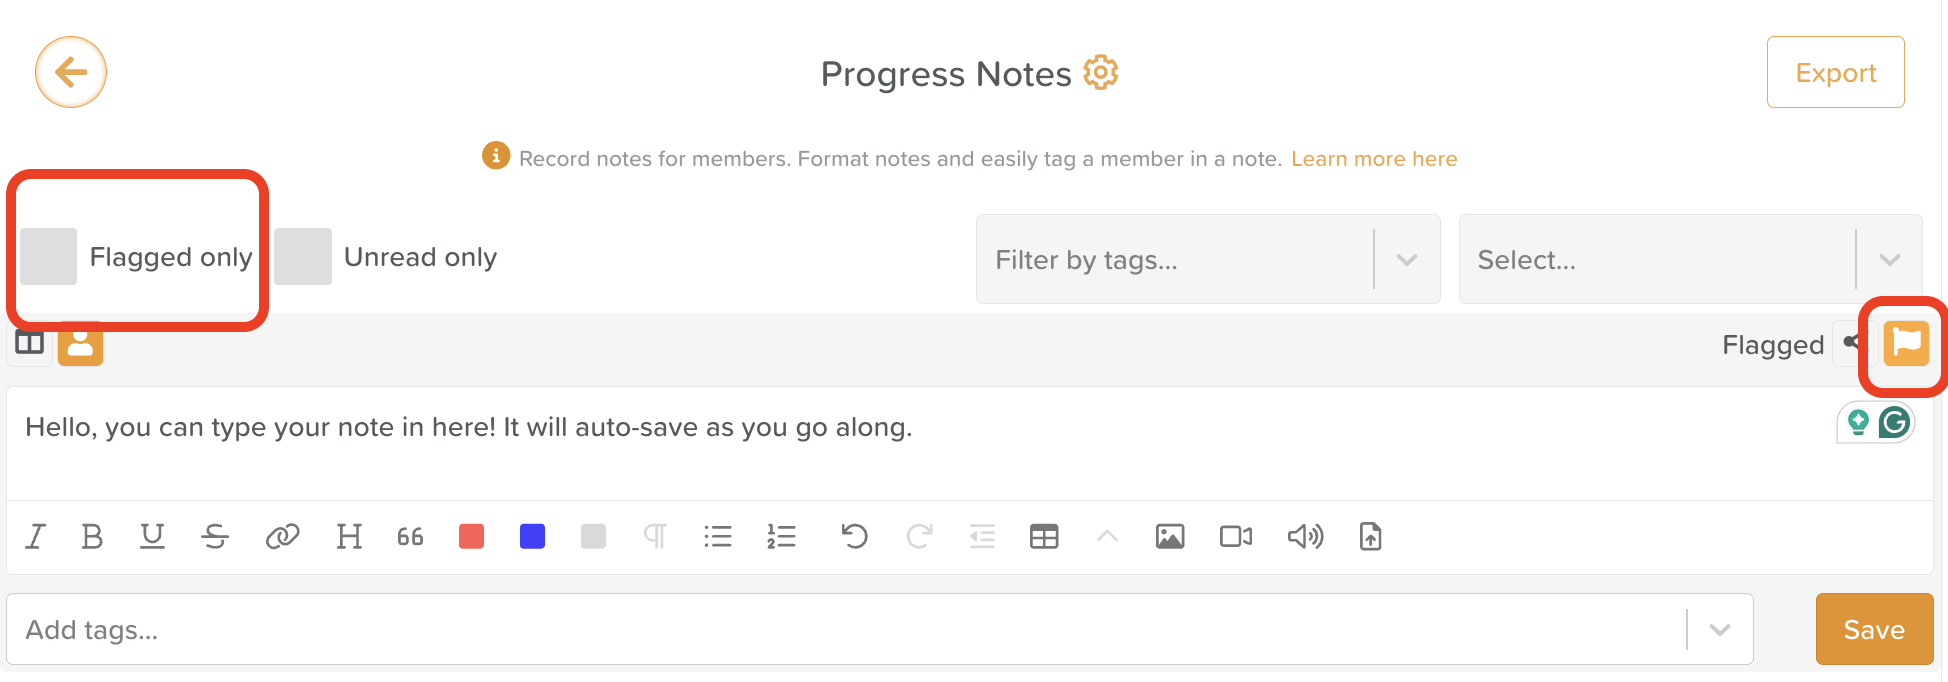
Flagged — view notes marked for follow-up
Unread Only — quickly see new notes that have not yet been reviewed
Date Range — narrow results by day, week, month, or custom dates
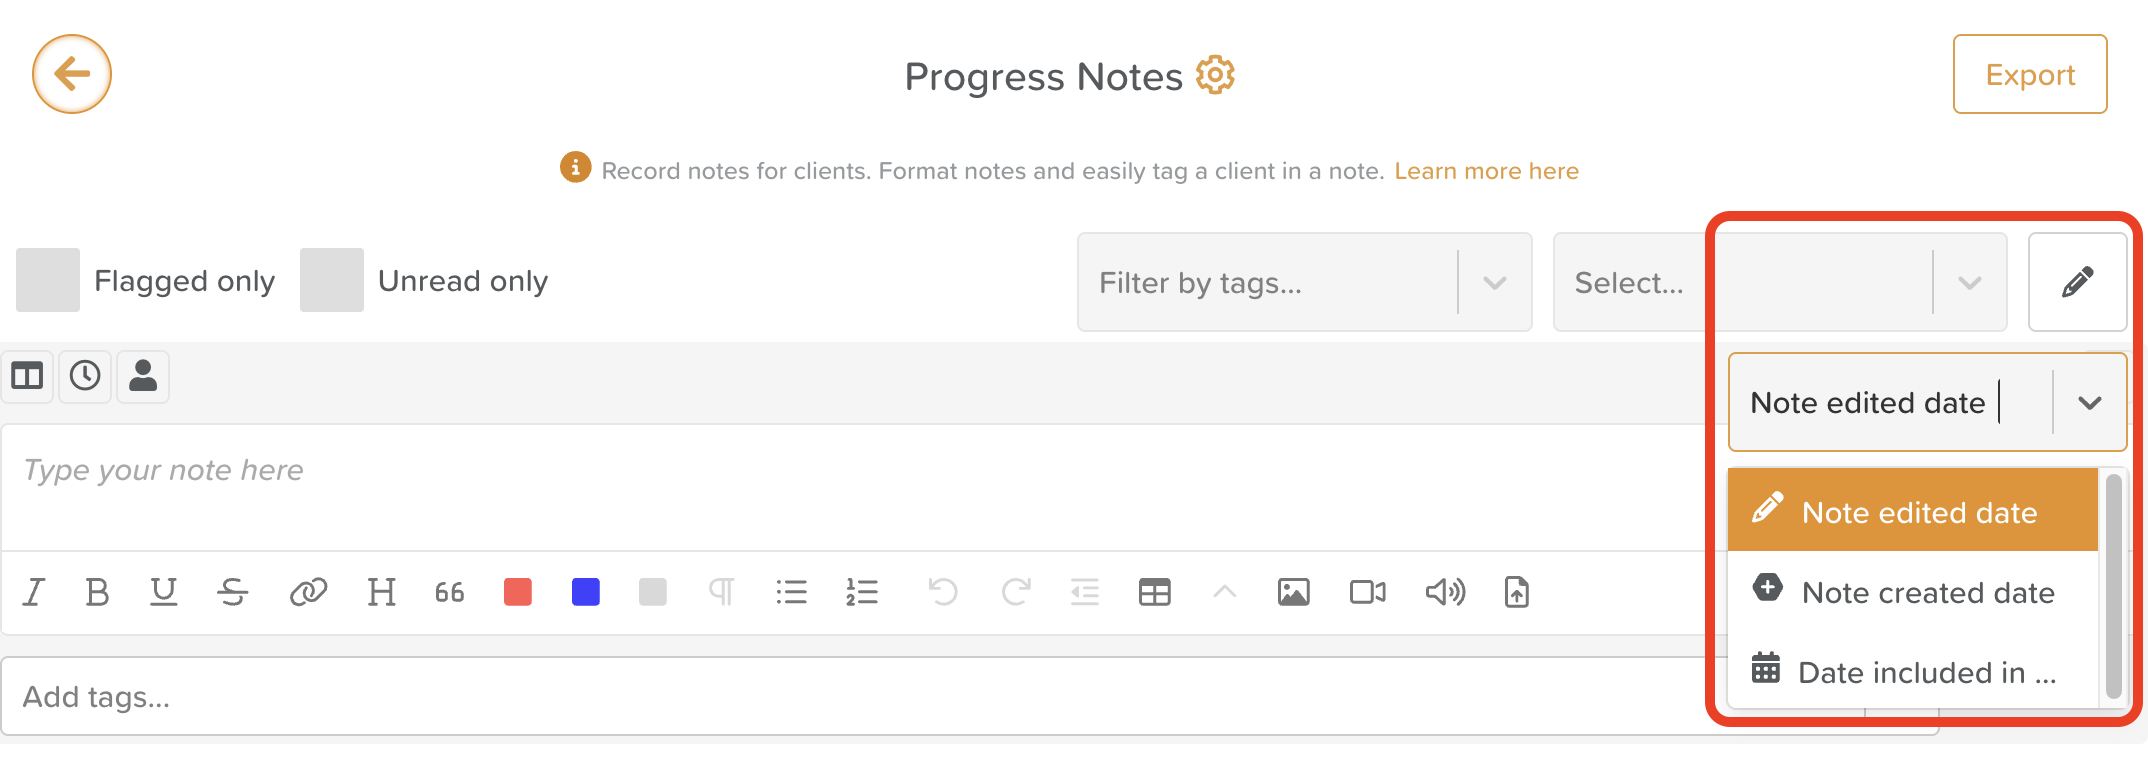
Note creation date — the date a note was written, regardless of the selected date
Note edited date — orders notes by those most recently edited
Date included in note — orders notes by the date entered/selected, regardless of the date the note was actually created
Filters help you locate specific entries quickly and streamline audits or reviews.
Some filters (tags, flagging, unread only) are only applicable if they are turned on in Progress Notes Settings.
How to Add a New Progress Note
When adding a Progress Note for a specific individual, it is best to do this from the individual's profile.
When adding a Progress Note that involves multiple participants, it's necessary to do this from Progress Notes on the Dashboard.

Choose whether to begin with a blank note or Load Template (templates help standardize documentation across staff).
Complete the note using the rich text editor.
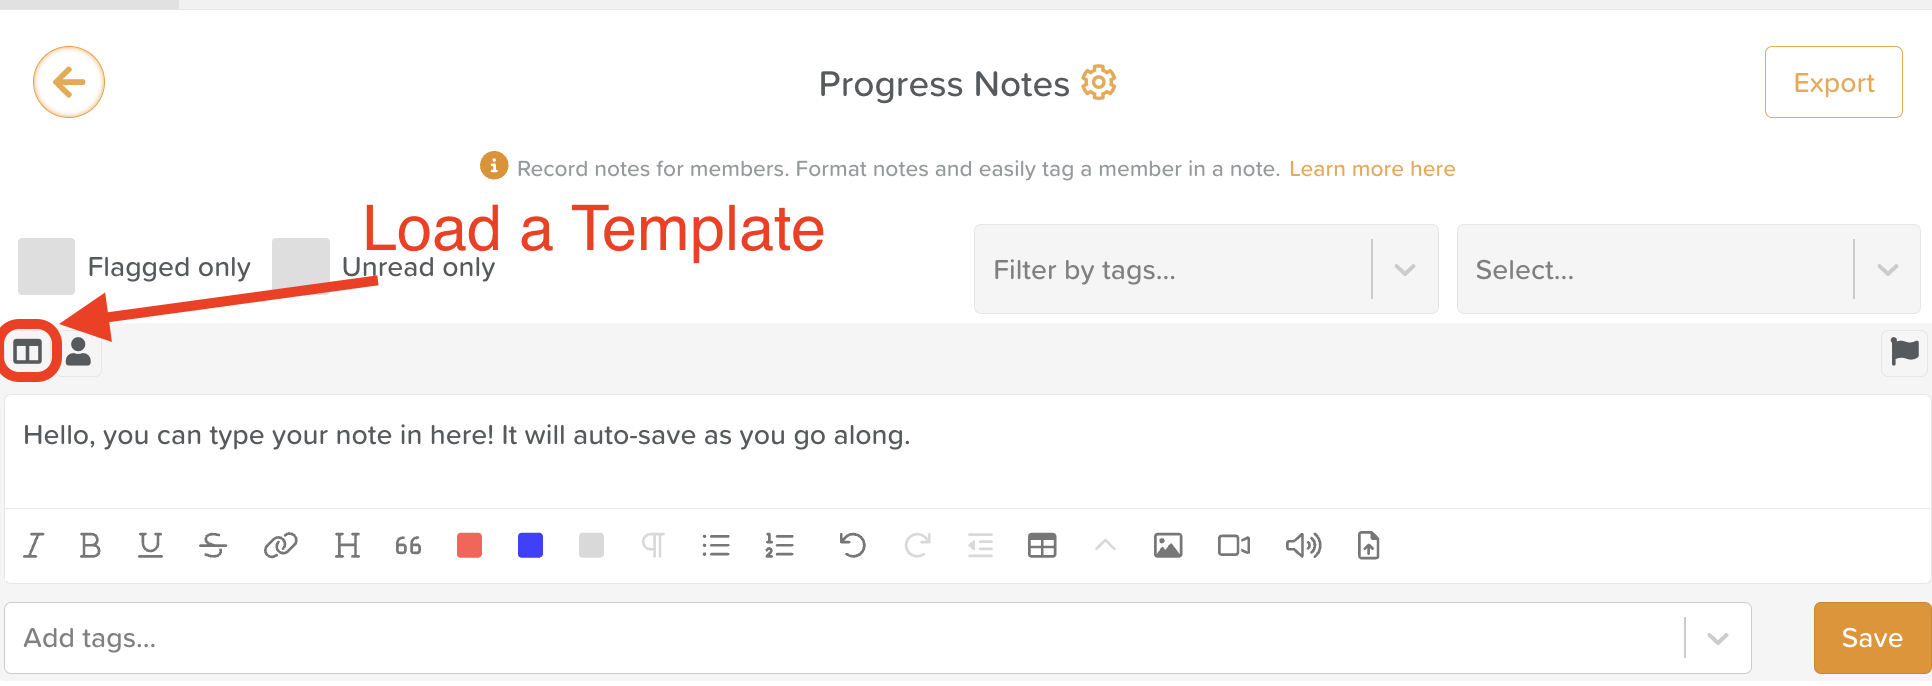
This button will not appear if "Templates" is not enabled in Progress Notes settings.
See: How to Use Progress Notes Templates
Tag One or Multiple Participants
Progress Notes can be written for one participant or several at once — ideal for group activities or shared observations.
If you are adding a Progress Note from a participant's profile, they will be pre-selected.

Add Content
Type within the note box area. Use the Rich Text tools panel to format your text with italics, bold, underline, strike, headings, quotes, color, bullet lists, numbered lists, etc.
You can also attach photos, videos, audio files, or documents to a note.
⚠️ Important: If uploading a document, ensure that the document displays the participant's name and date of birth. The identifiers on the document, photo, media file, etc. should always match those of the record into which it is is being stored.
Add Tags
Tags help categorize notes and make them easier to filter later. Common uses include:
See: How to Use Tags with Progress Notes
Flag the Note
Flag a note to mark it as important or requiring follow-up. Flagged notes can be quickly filtered for supervisors or clinical leads. This button will not appear if "Note flagging" is not enabled in Progress Note settings.
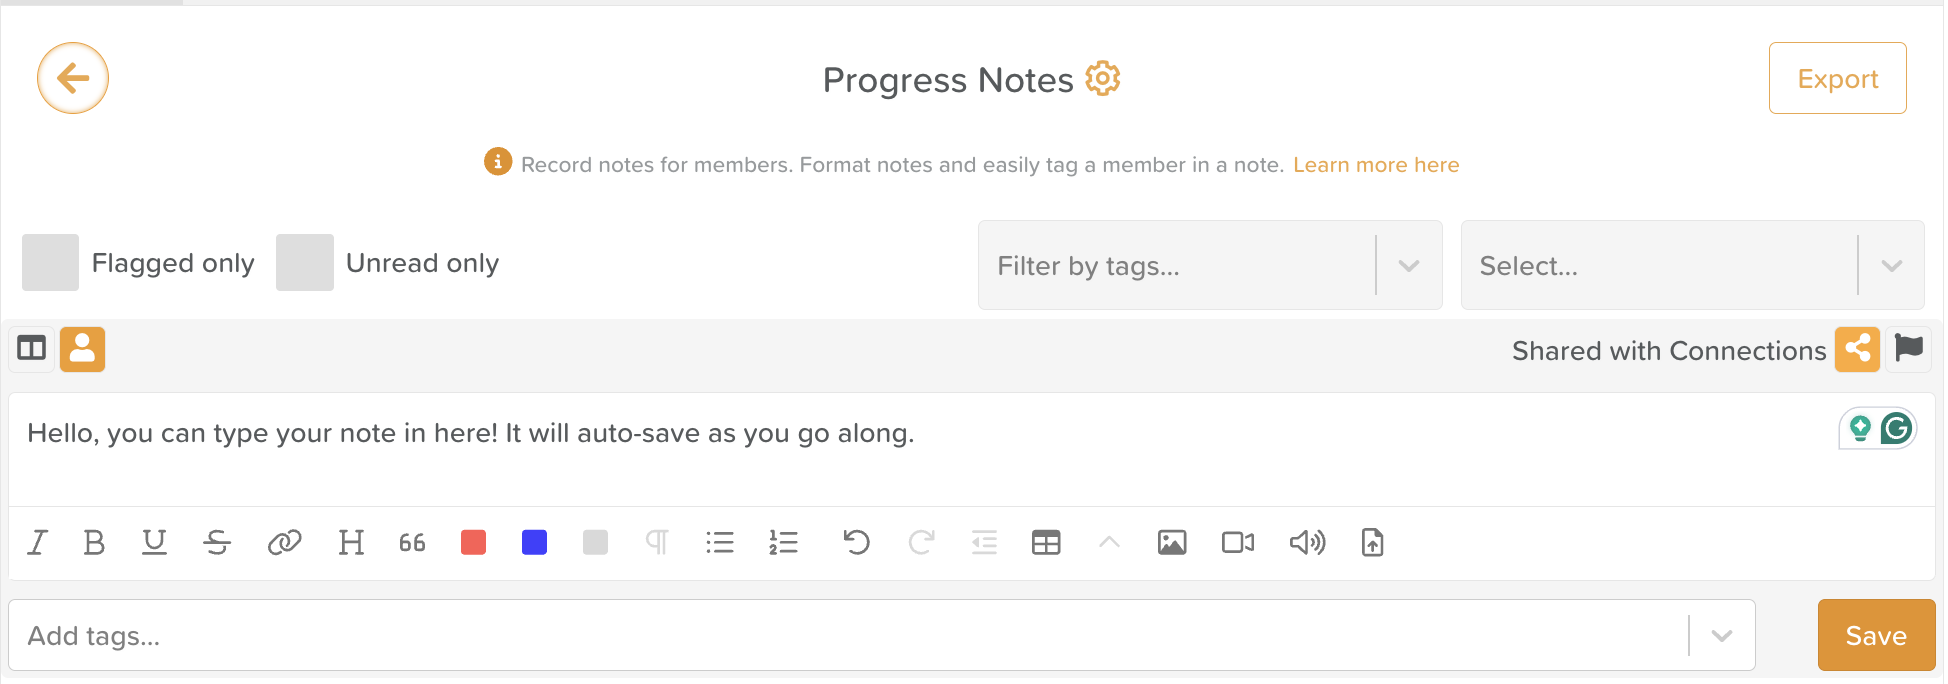
Share with Connections
You can choose whether a note should be visible to the participant’s connections (family or friends) in the Storii Family App. This button will not appear if "Share with Connections" is not enabled in Progress Notes settings.
Progress Notes are not shared with Connections by default. Users must select the share button to share a note with the Connections of the specific individual(s) tagged in the note.
See: How to Share Progress Notes with Connections
Save the Note
When finished, click Save. The note will immediately appear in the Progress Notes list and in the participant’s profile.

How to Edit a Progress Note
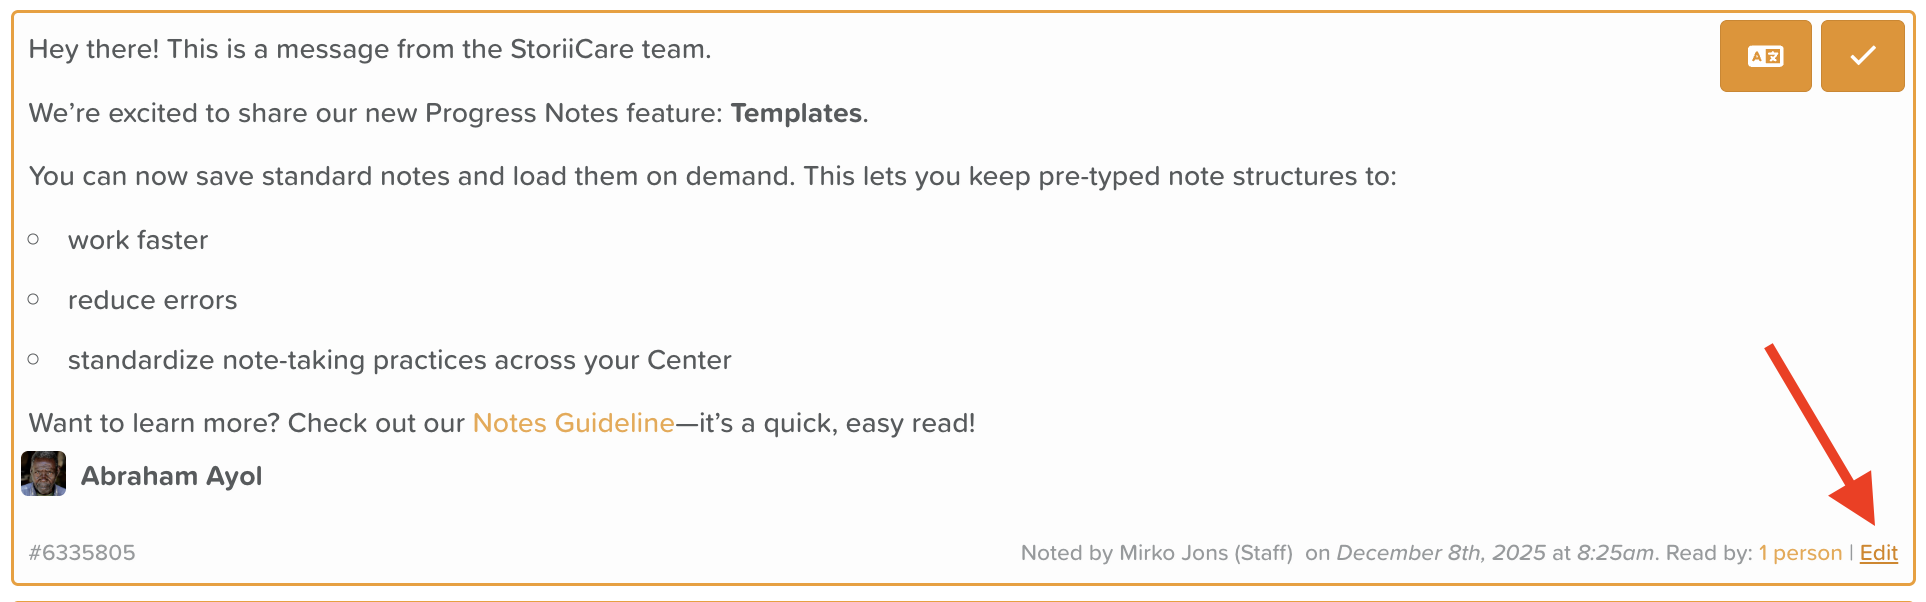
To Edit a Progress Note, click on the Edit text in the bottom, right-hand corner of the note. If you do not see this option, you have not been granted editing permissions. Please see a manager or administrator.
Make any necessary changes and then click Save.
The note will immediately reflect the saved changes and an audit trail log will be present on the note, indicating who made an edit and when.
See: How to Edit a Progress Note
How to Delete a Progress Note
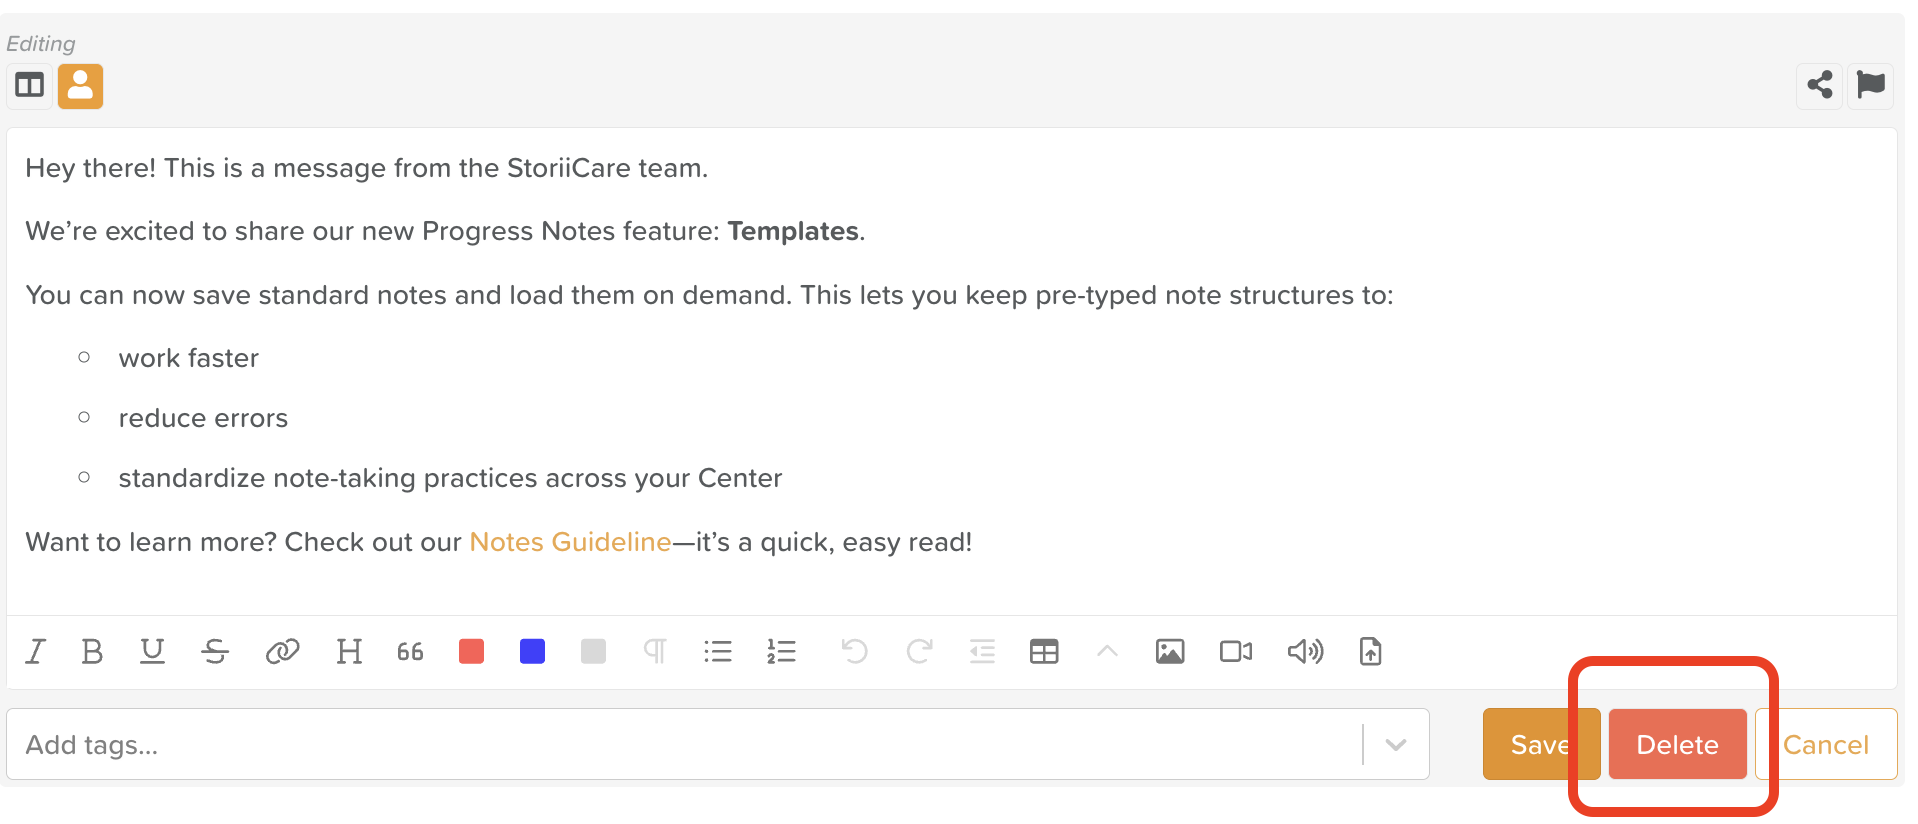
To Delete a Progress Note, click on the Edit text in the bottom, right-hand corner of the note. If you do not see this option, you have not been granted editing permissions. Please see a manager or administrator.
Once you click Edit, the Delete button will appear.
You will be asked to confirm your intention to delete the note.
A log will be recorded that this note was deleted.
See: How to Delete a Progress Note
How to Download or Print Progress Notes
Progress Notes can be exported for review, auditing, care planning, or regulatory documentation.
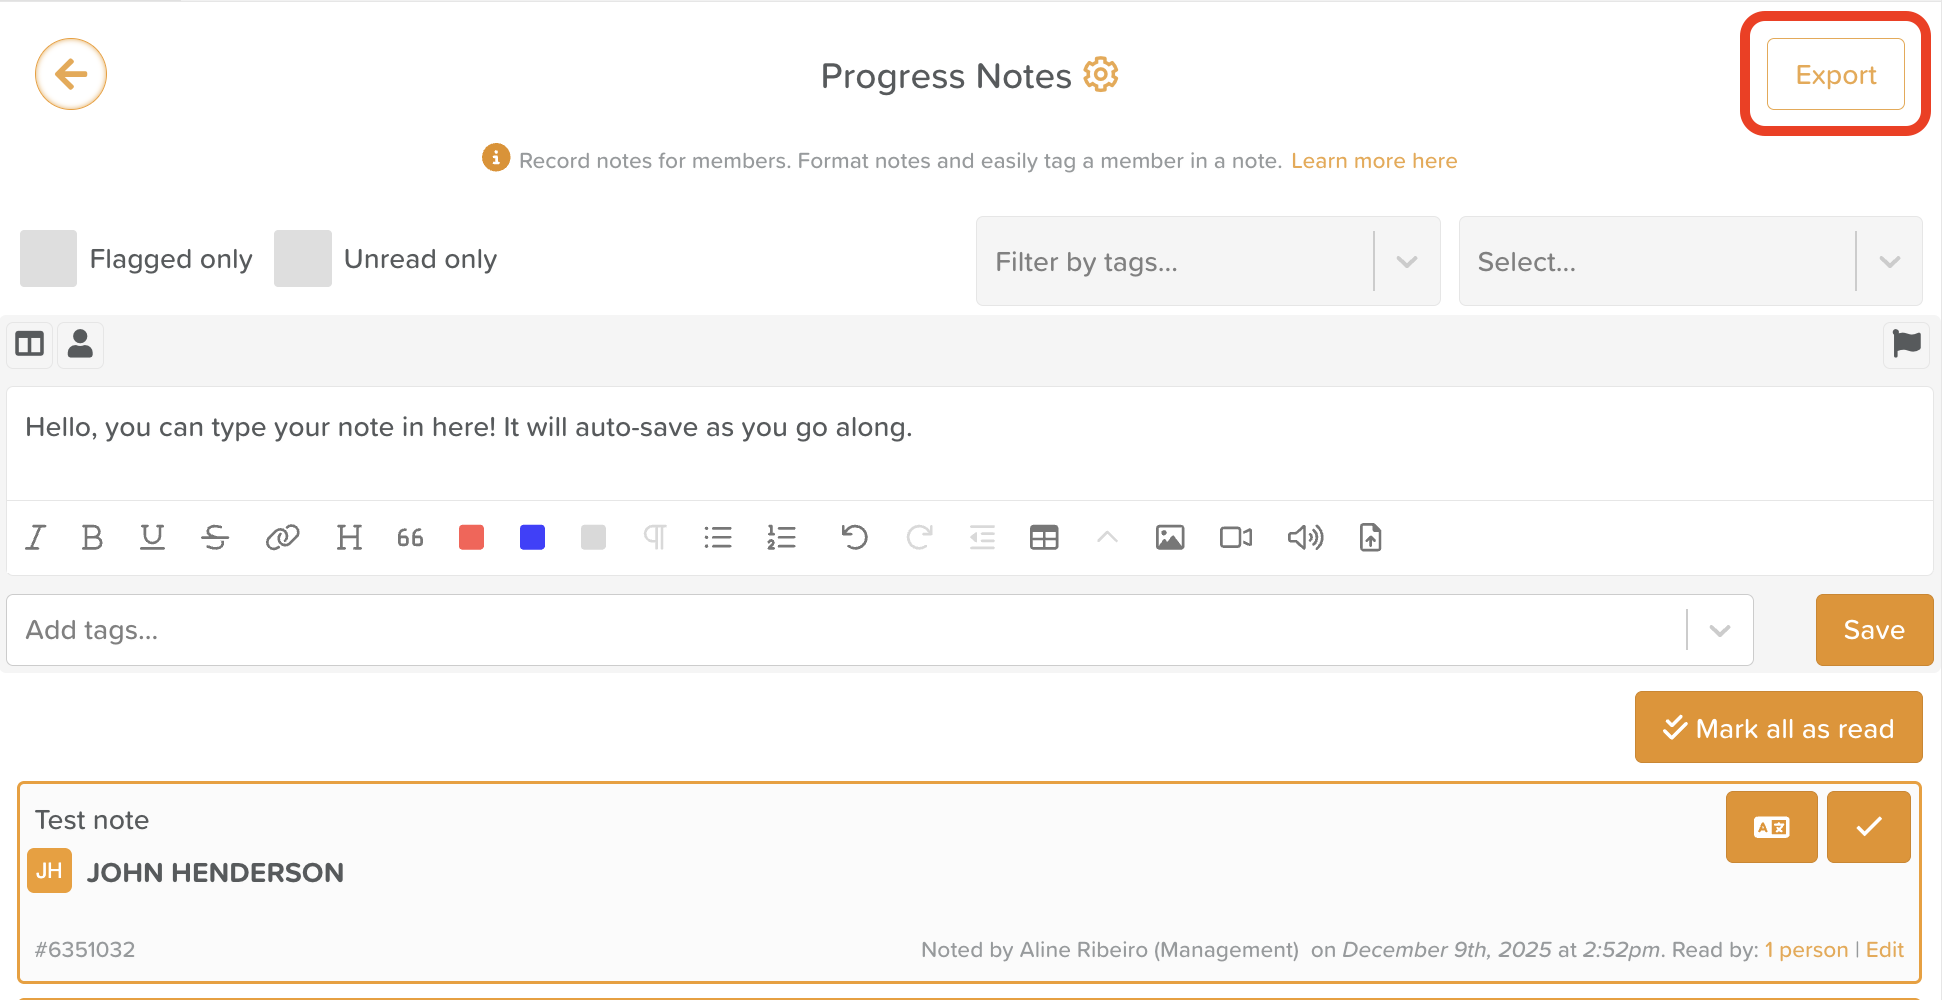
To Export Notes:
Go to Progress Notes.
Click the Export button (top-right corner).
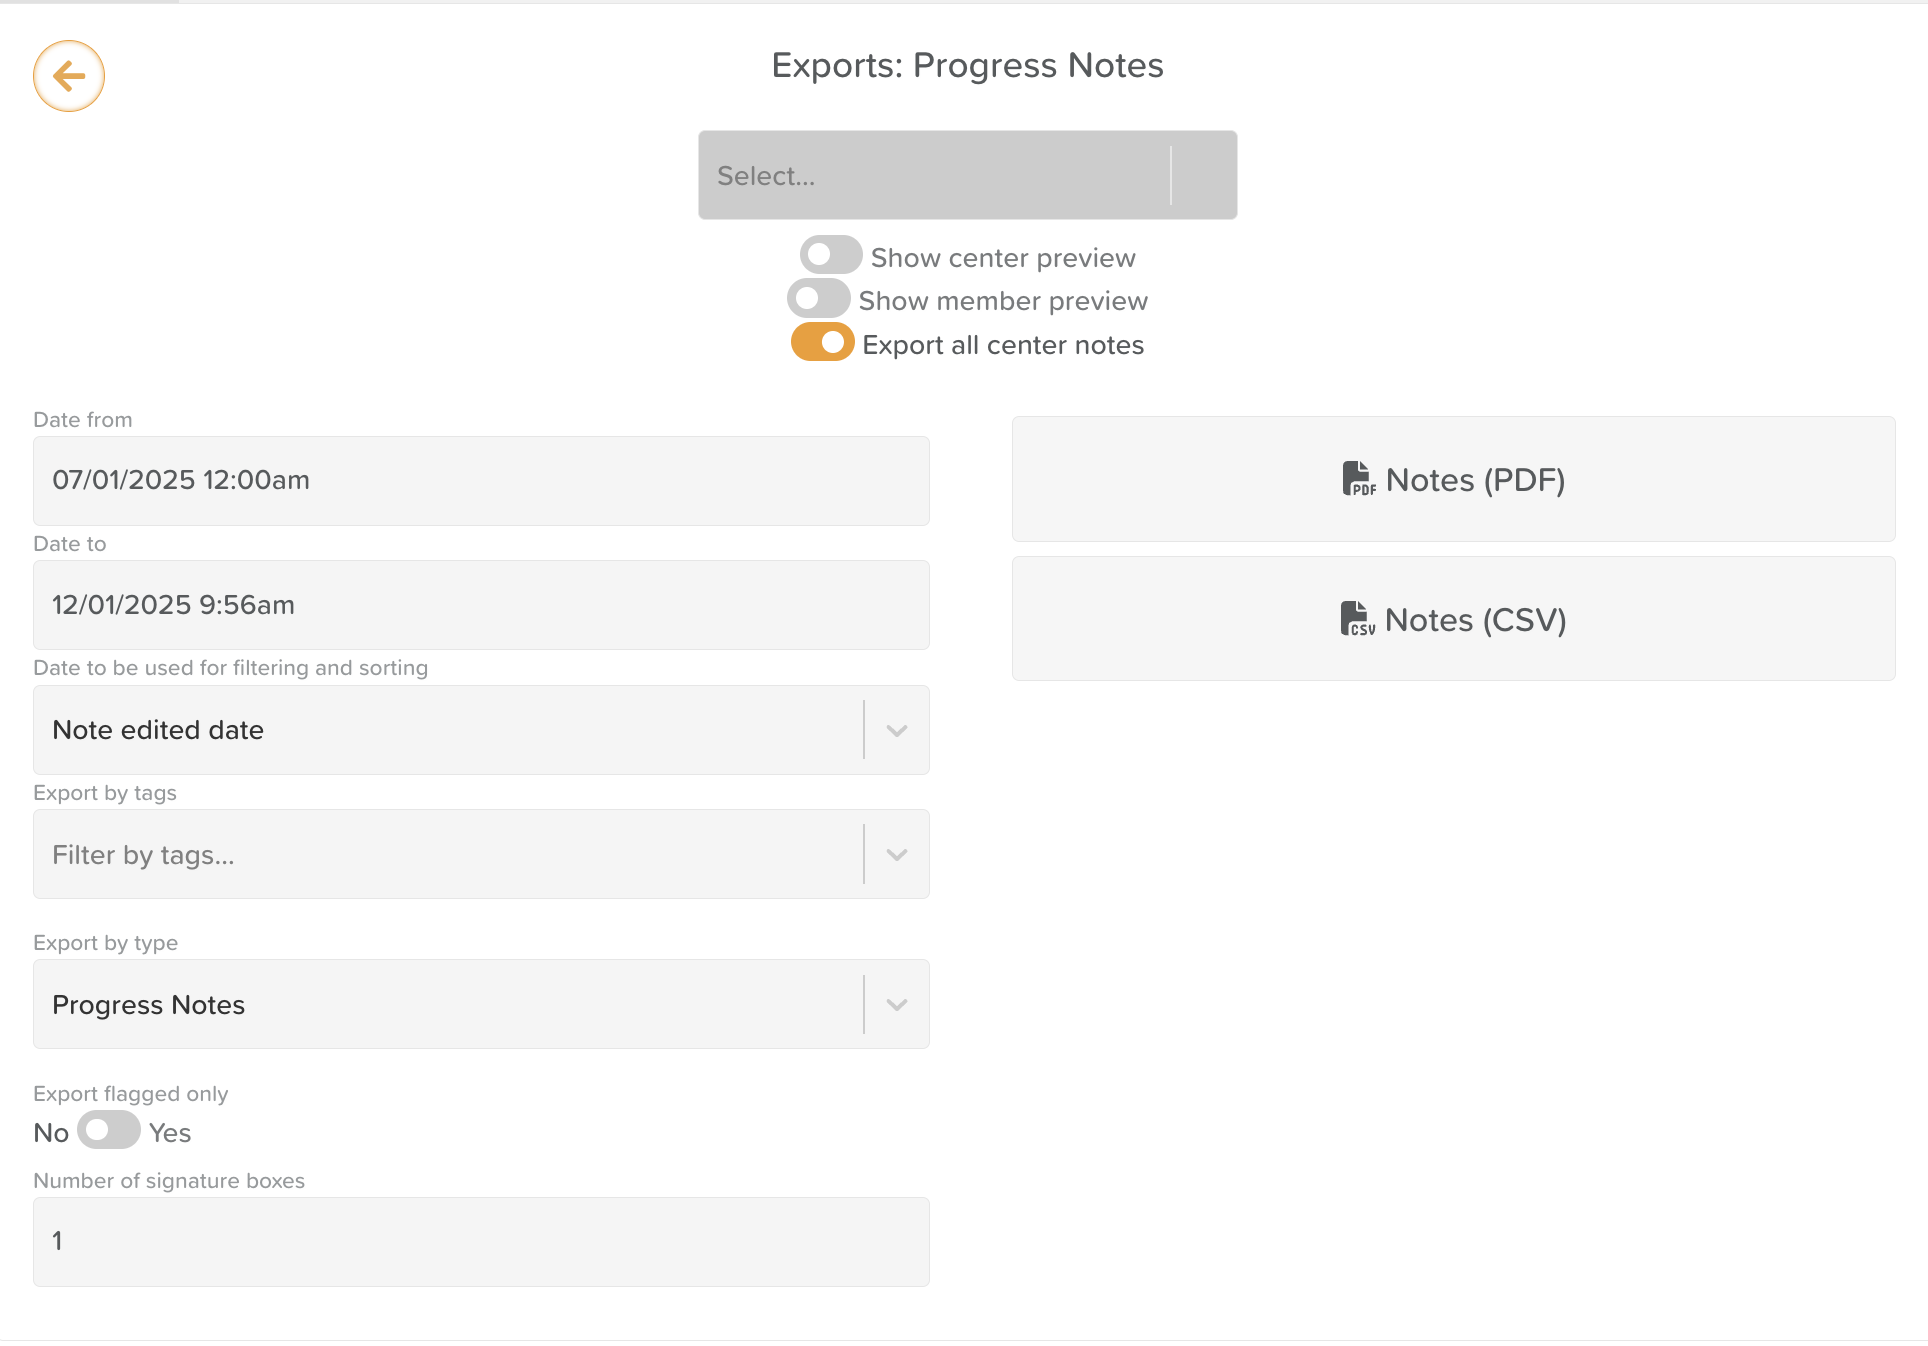
Apply any filters you want (date range, tags, note type, sorting option, etc.).
Available Export Types:
PDF — formatted for printing or sharing
CSV — ideal for data analysis
Only the filtered notes will appear in the export, making it easy to generate targeted reports.
See: How to Export Progress Notes
Need More Help?
If you need further assistance, you can reach out to our support team by emailing support@storii.com. Our support team is ready to help you with any questions or issues you may have.