A Guide to Using the Register
About the Register
The Register captures accurate attendance data for participants, staff, and visitors, and supports multiple sign-in methods including QR code, PIN code, and in-app access.
The Register is not only available to staff on StoriiCare, but also at register.storii.com and via the Storii Register App, available from the App Store and Google Play Store.
From the Register feature, staff can:
Sign users in and out or mark them as absent
View and edit attendance logs
View and export attendance data
Adjust settings (depending on permission level)
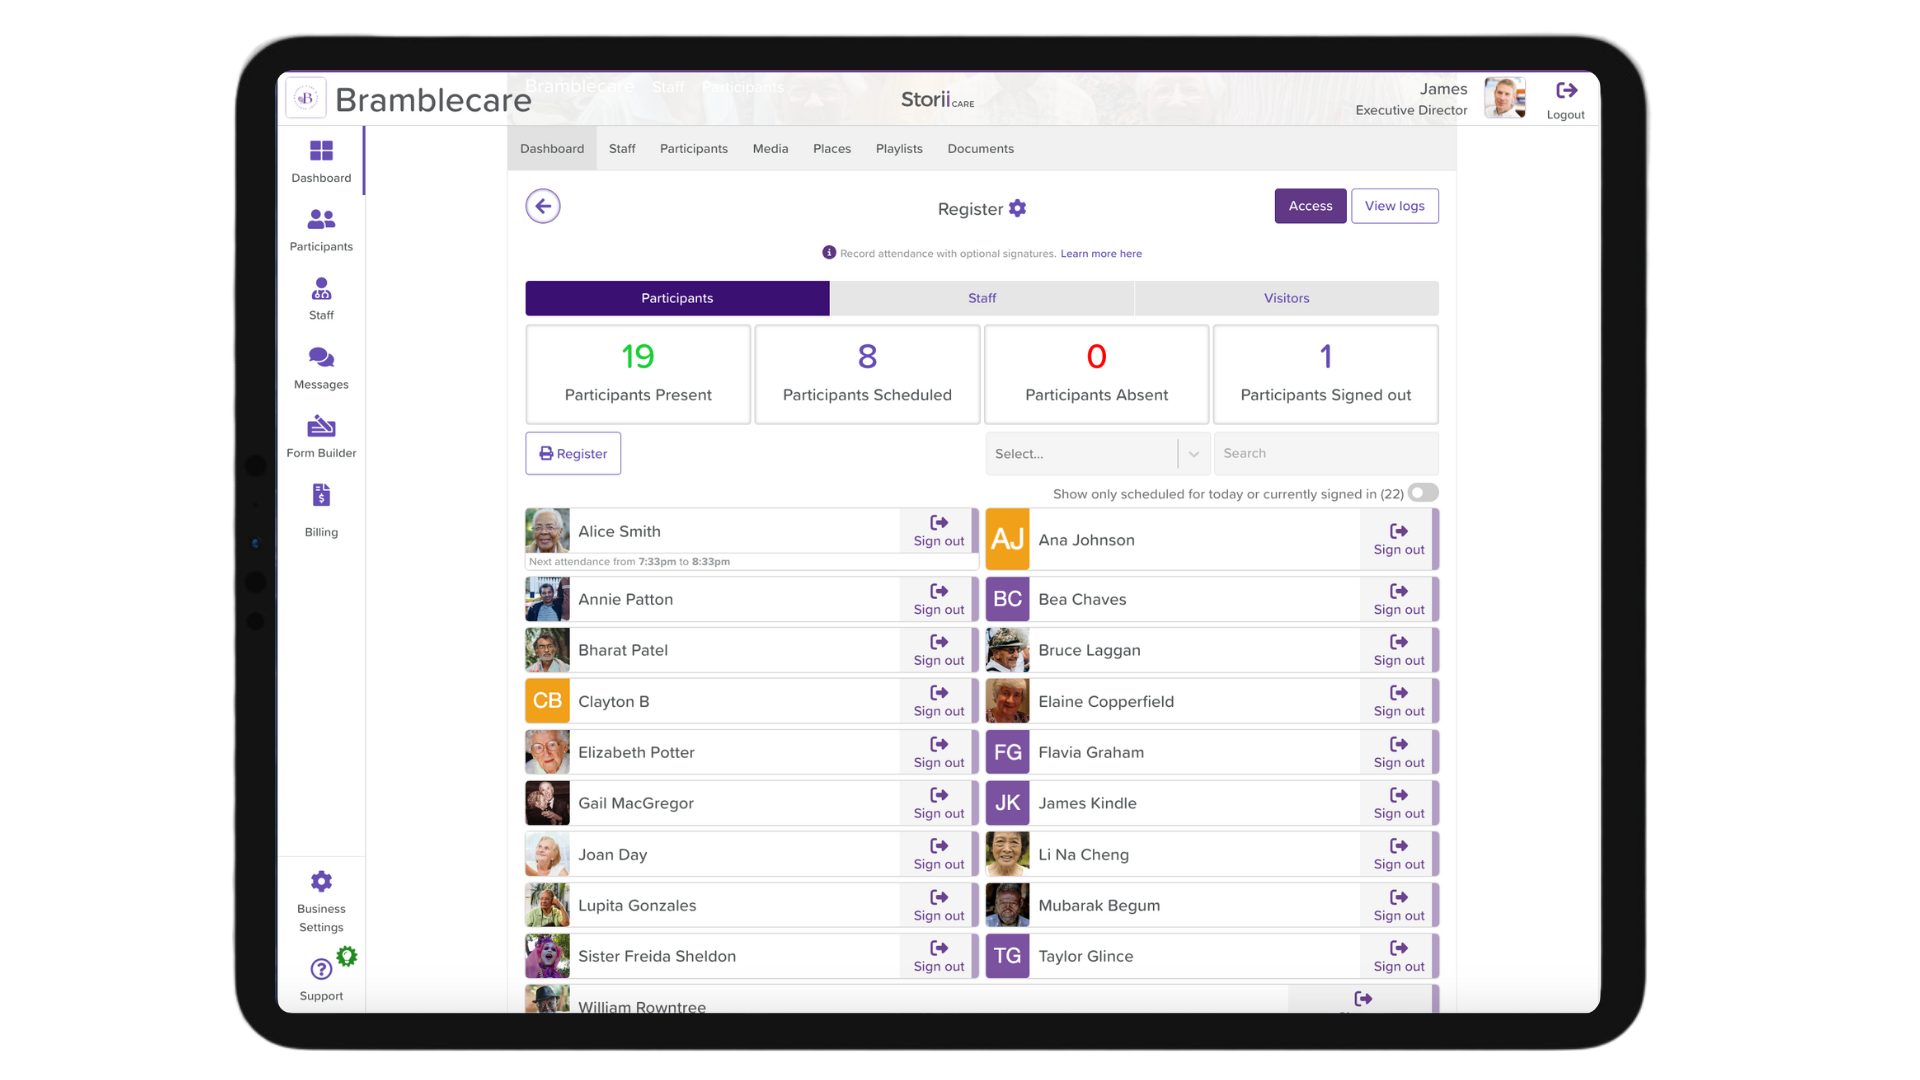
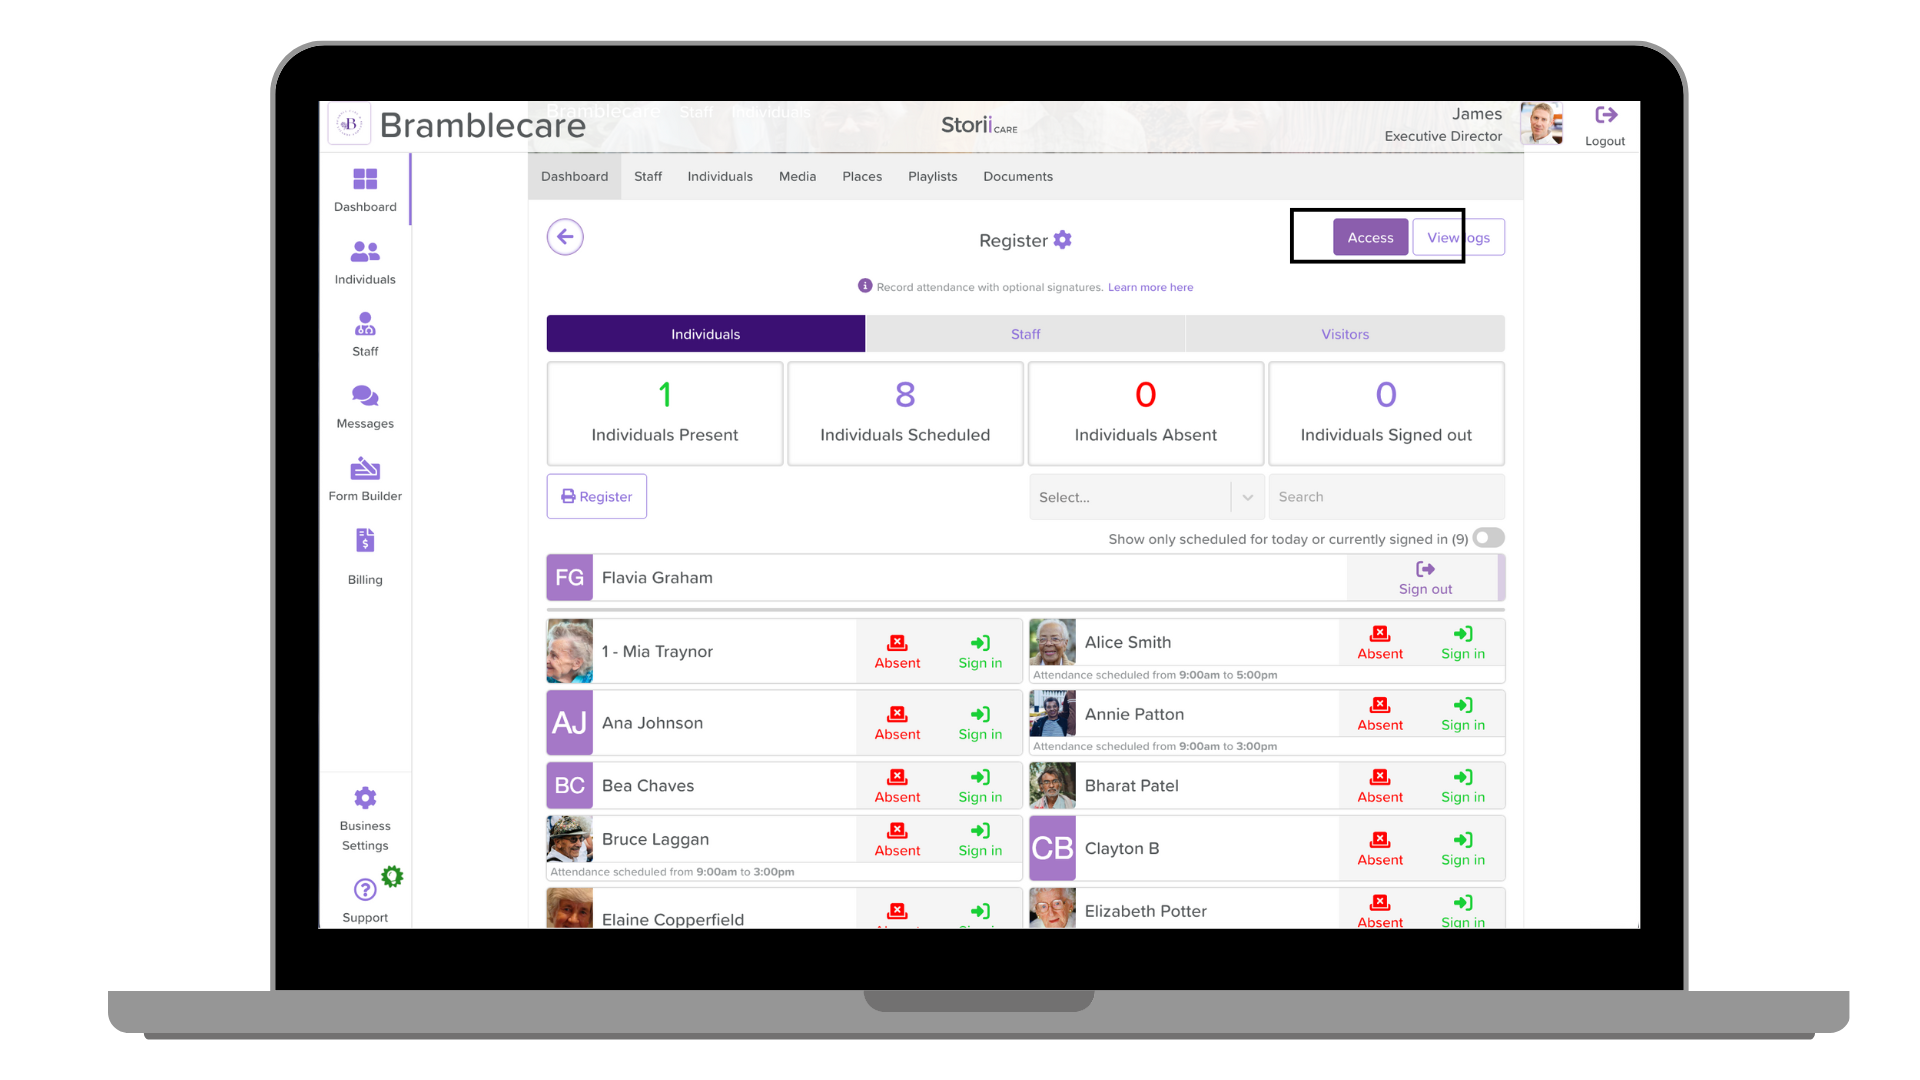
The Register feature displays the following metrics at the top of the page for each tab (Participants, Staff, Visitors):
The number of users present
The number of users scheduled for the day (via the Schedule feature)
The number of users marked as absent
The number of users signed out that day
Signing In & Out Using the Register
Go to Register from the Dashboard.
Select the appropriate Register tab: Participants, Staff, or Visitors.
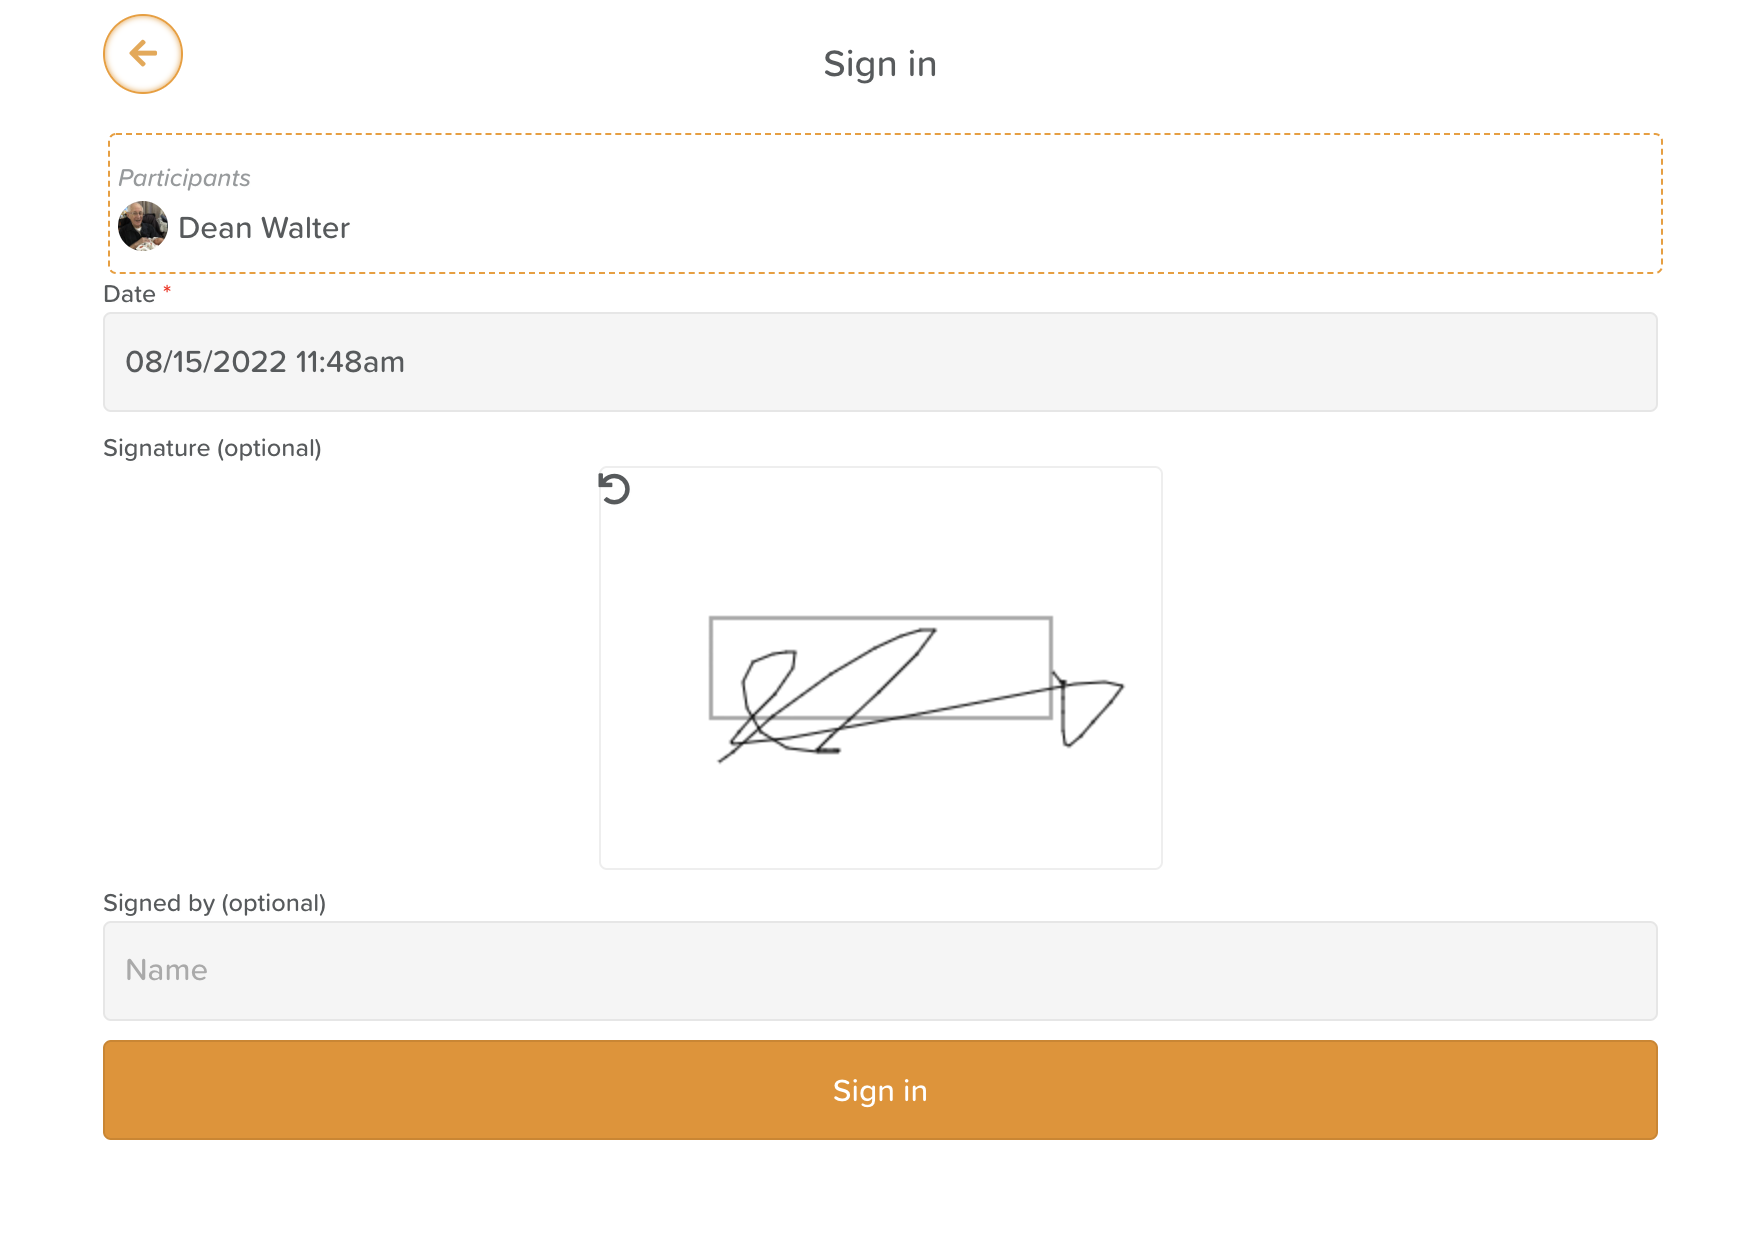
Click Sign In beside the user’s name.
(Optional) Adjust date/time, add tags, or capture a digital signature.
Click Sign In.
Repeat the same process to Sign Out the user.
Marking a Participant as Absent
Click the Absent button beside the user’s name.
On the next screen, use the Tags dropdown menu to select a reason for absence (if applicable).
Click Mark as absent.
If a user arrives later, signing them in will override the absence log. If you want to mark multiple participants as absent at once, follow the steps for bulk options below.
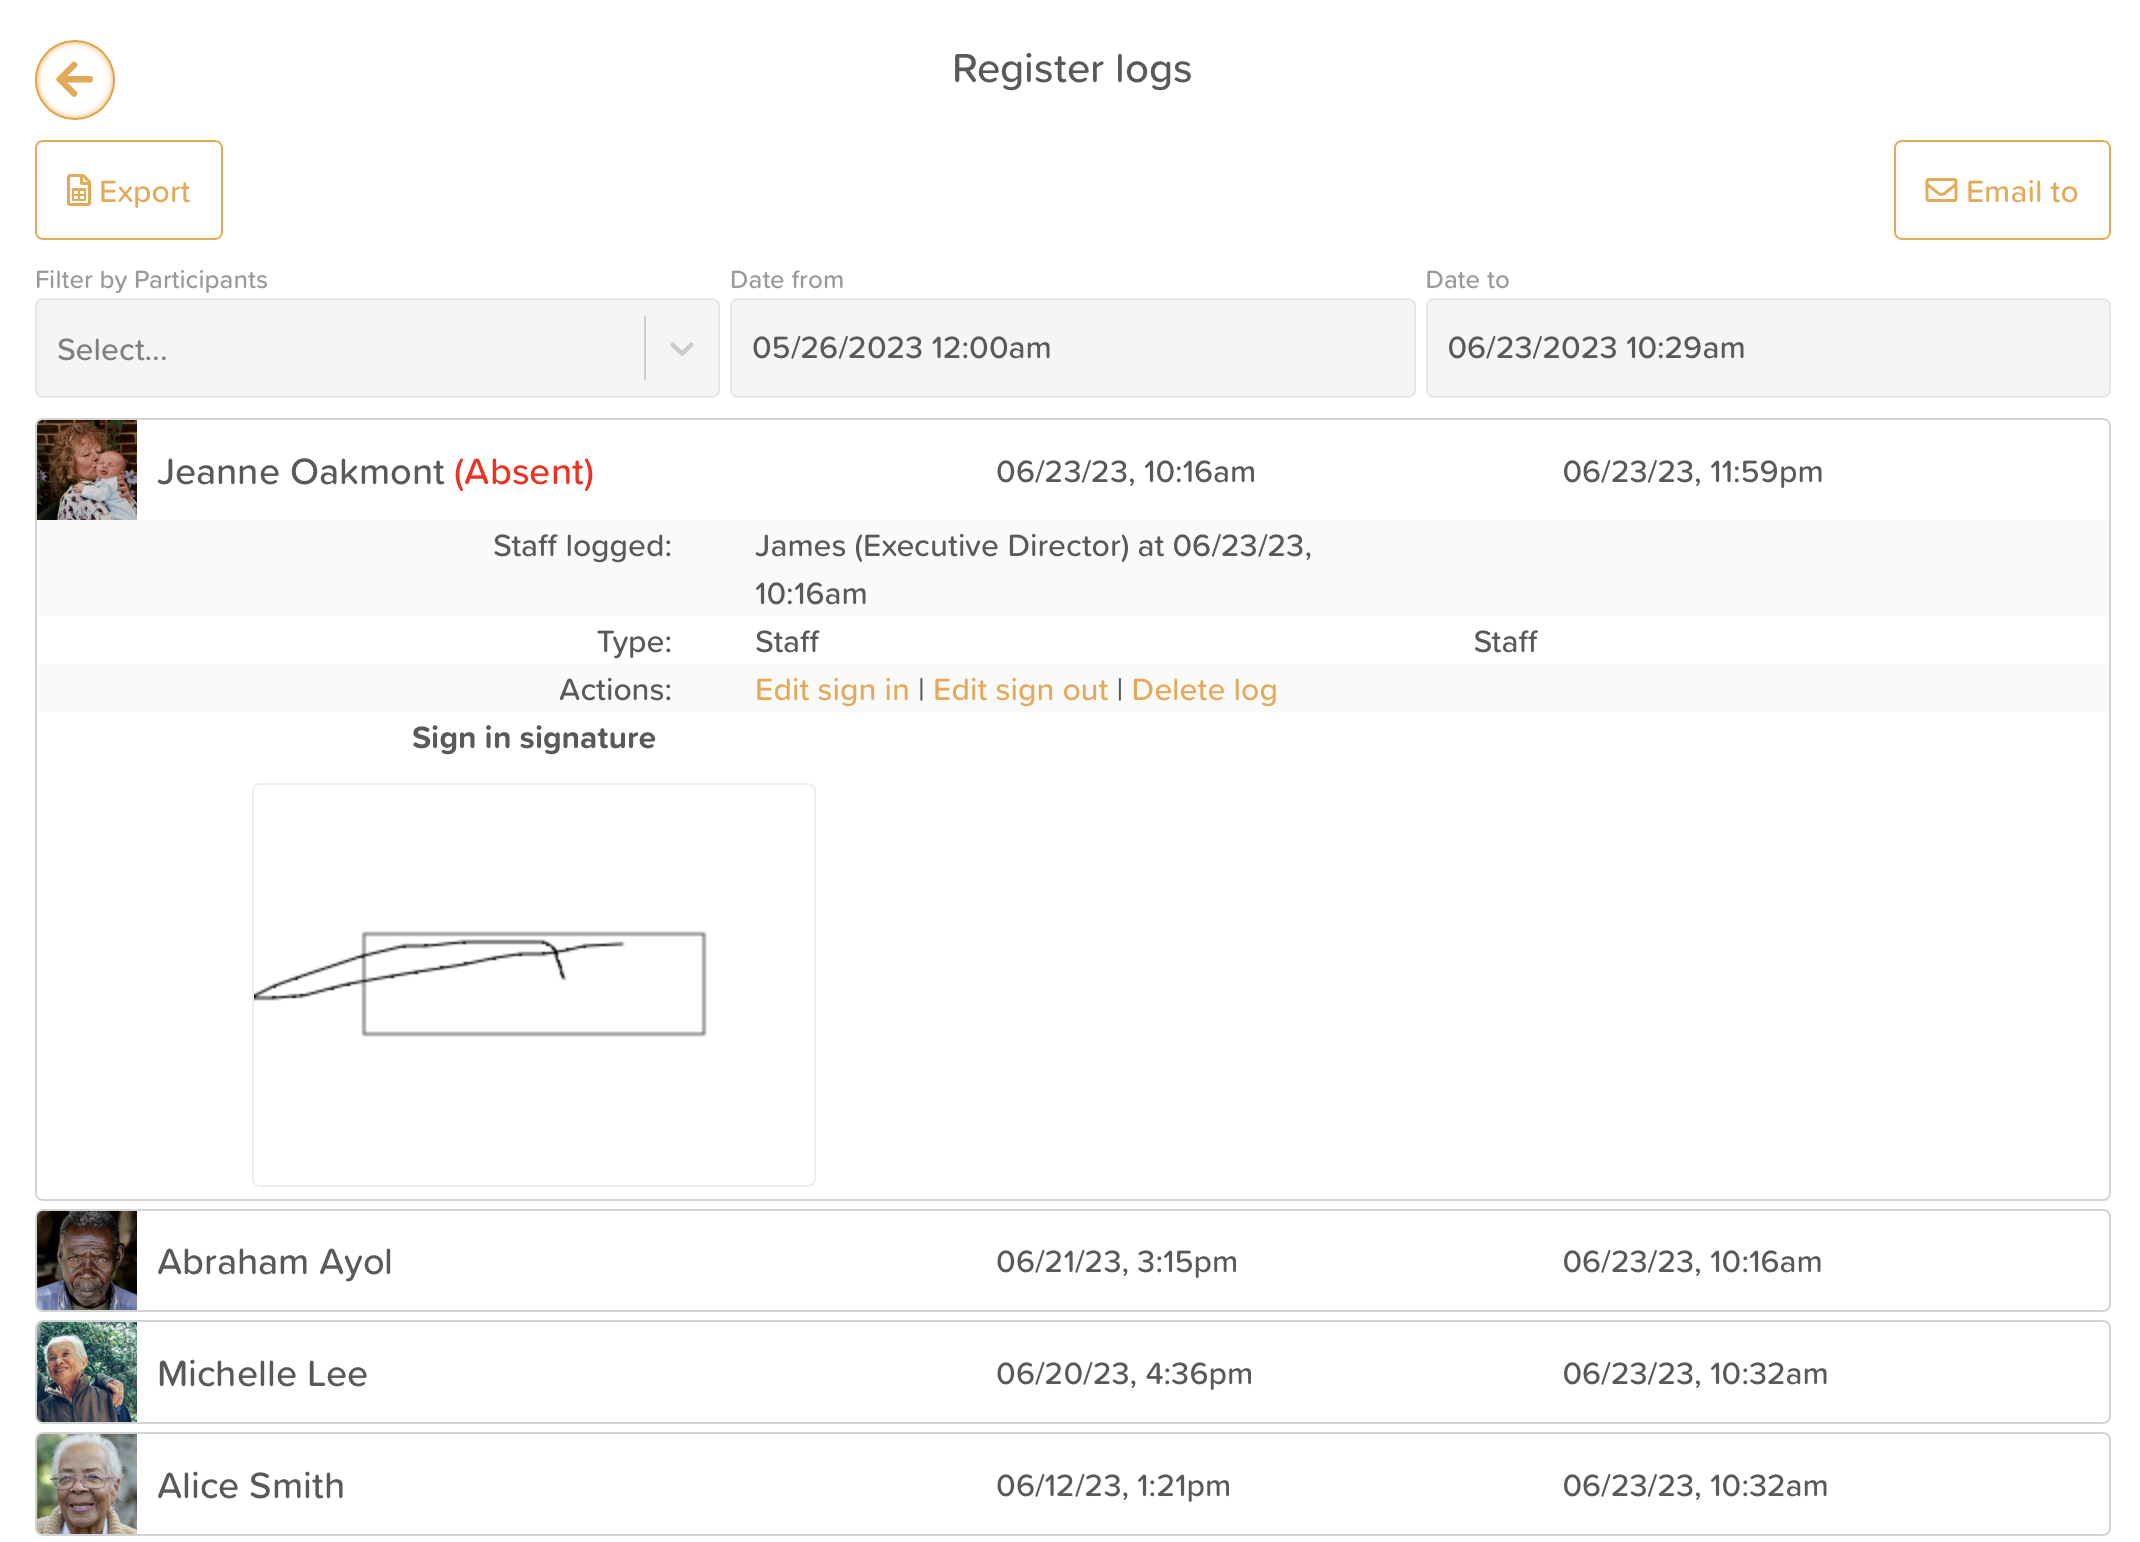
📌 Absences are clearly displayed in the Register Logs with red “Absent” text.
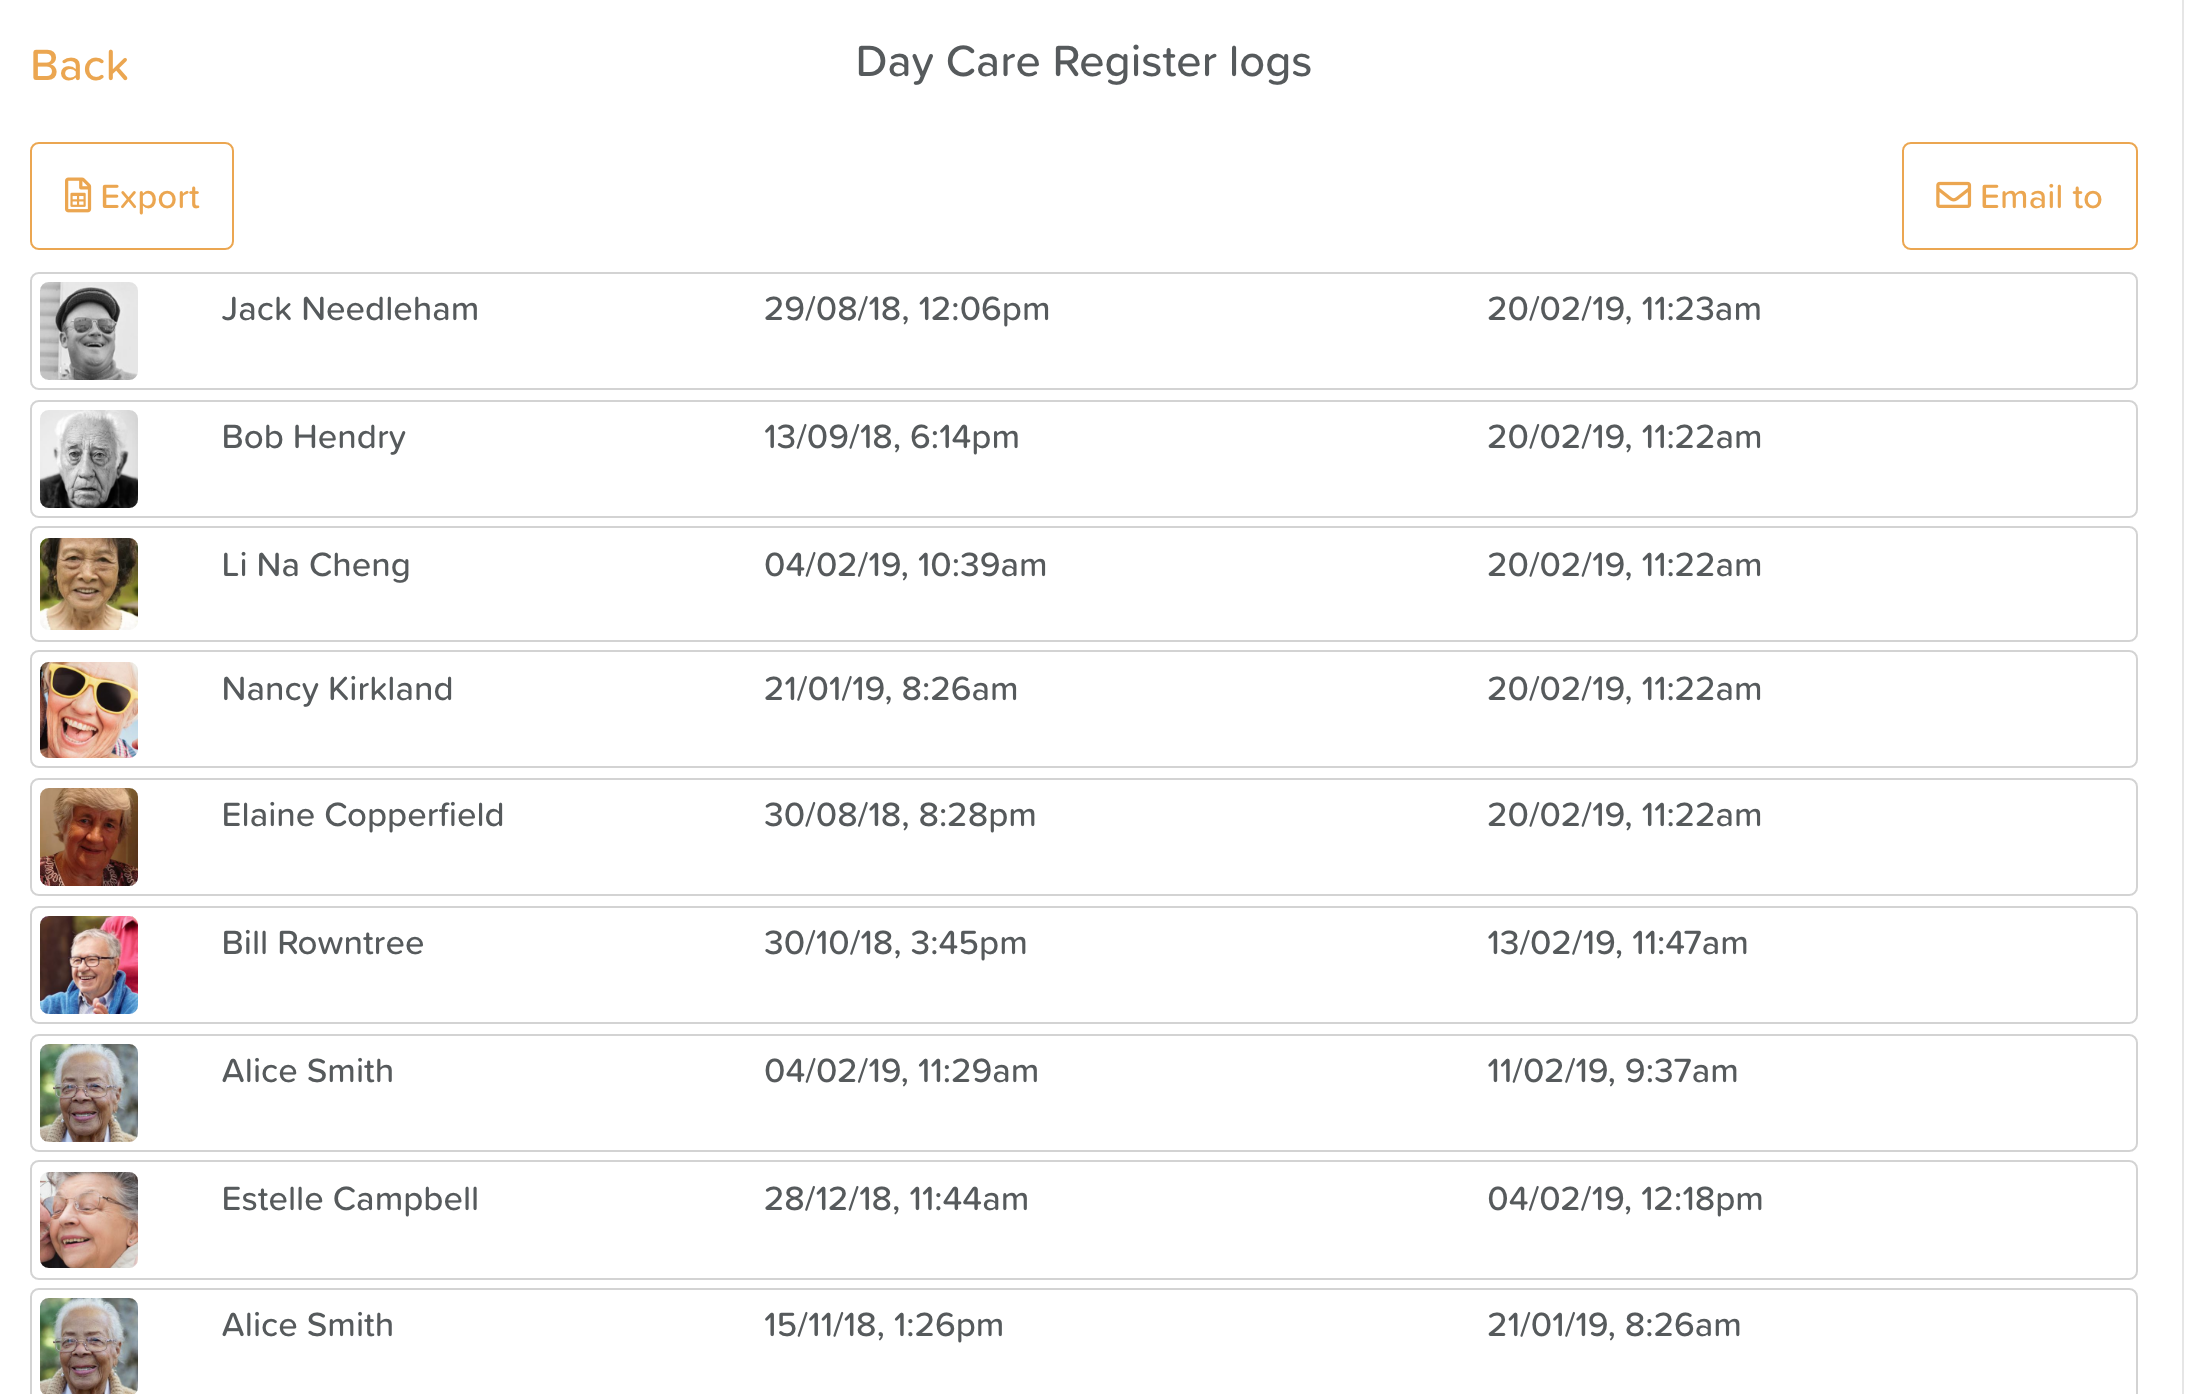
Viewing & Editing Register Logs
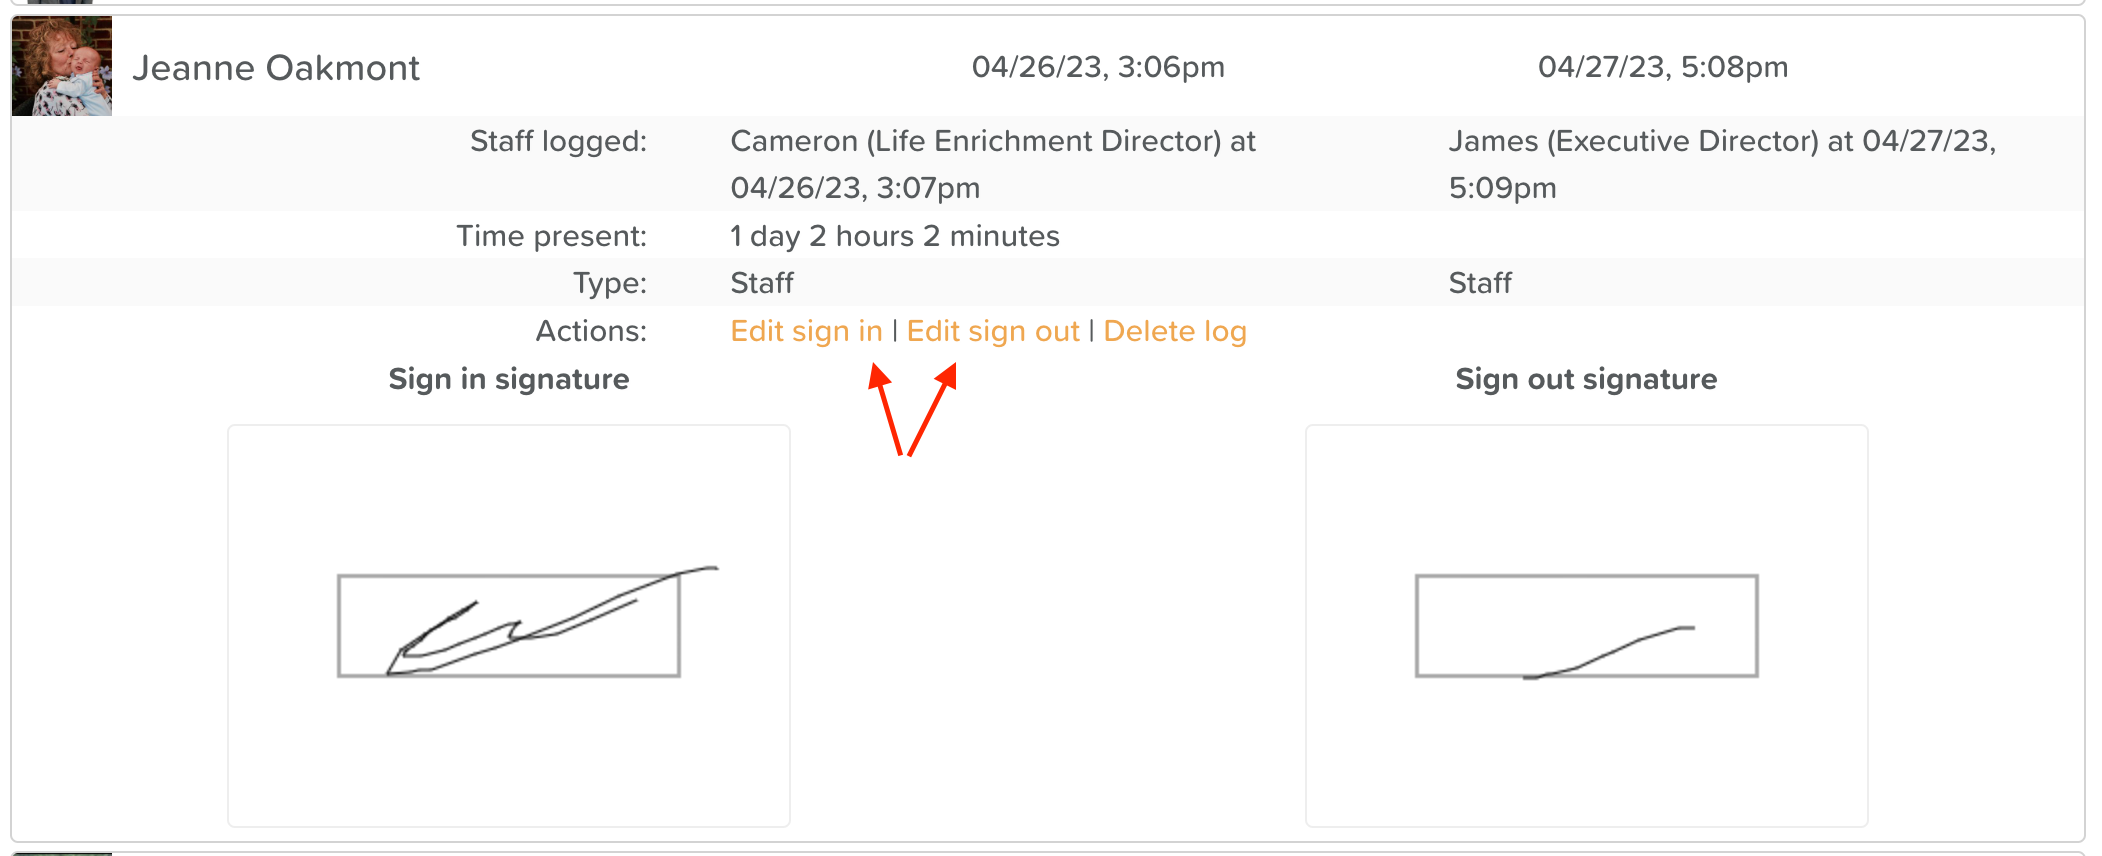
Navigate to Register > View Logs.
Use the filters to find the log you're looking for.
Click on an log to:
Edit Sign In / Sign Out
Delete Log
Use the same steps for editing absences.
We have also updated our real-time Register metrics to display:
The number of users present
The number of users scheduled for the day
The number of users absent
The number of users signed out today
If any absences are recorded in error, they can be edited the same way attendance logs are edited via the Register Log View (shown below).
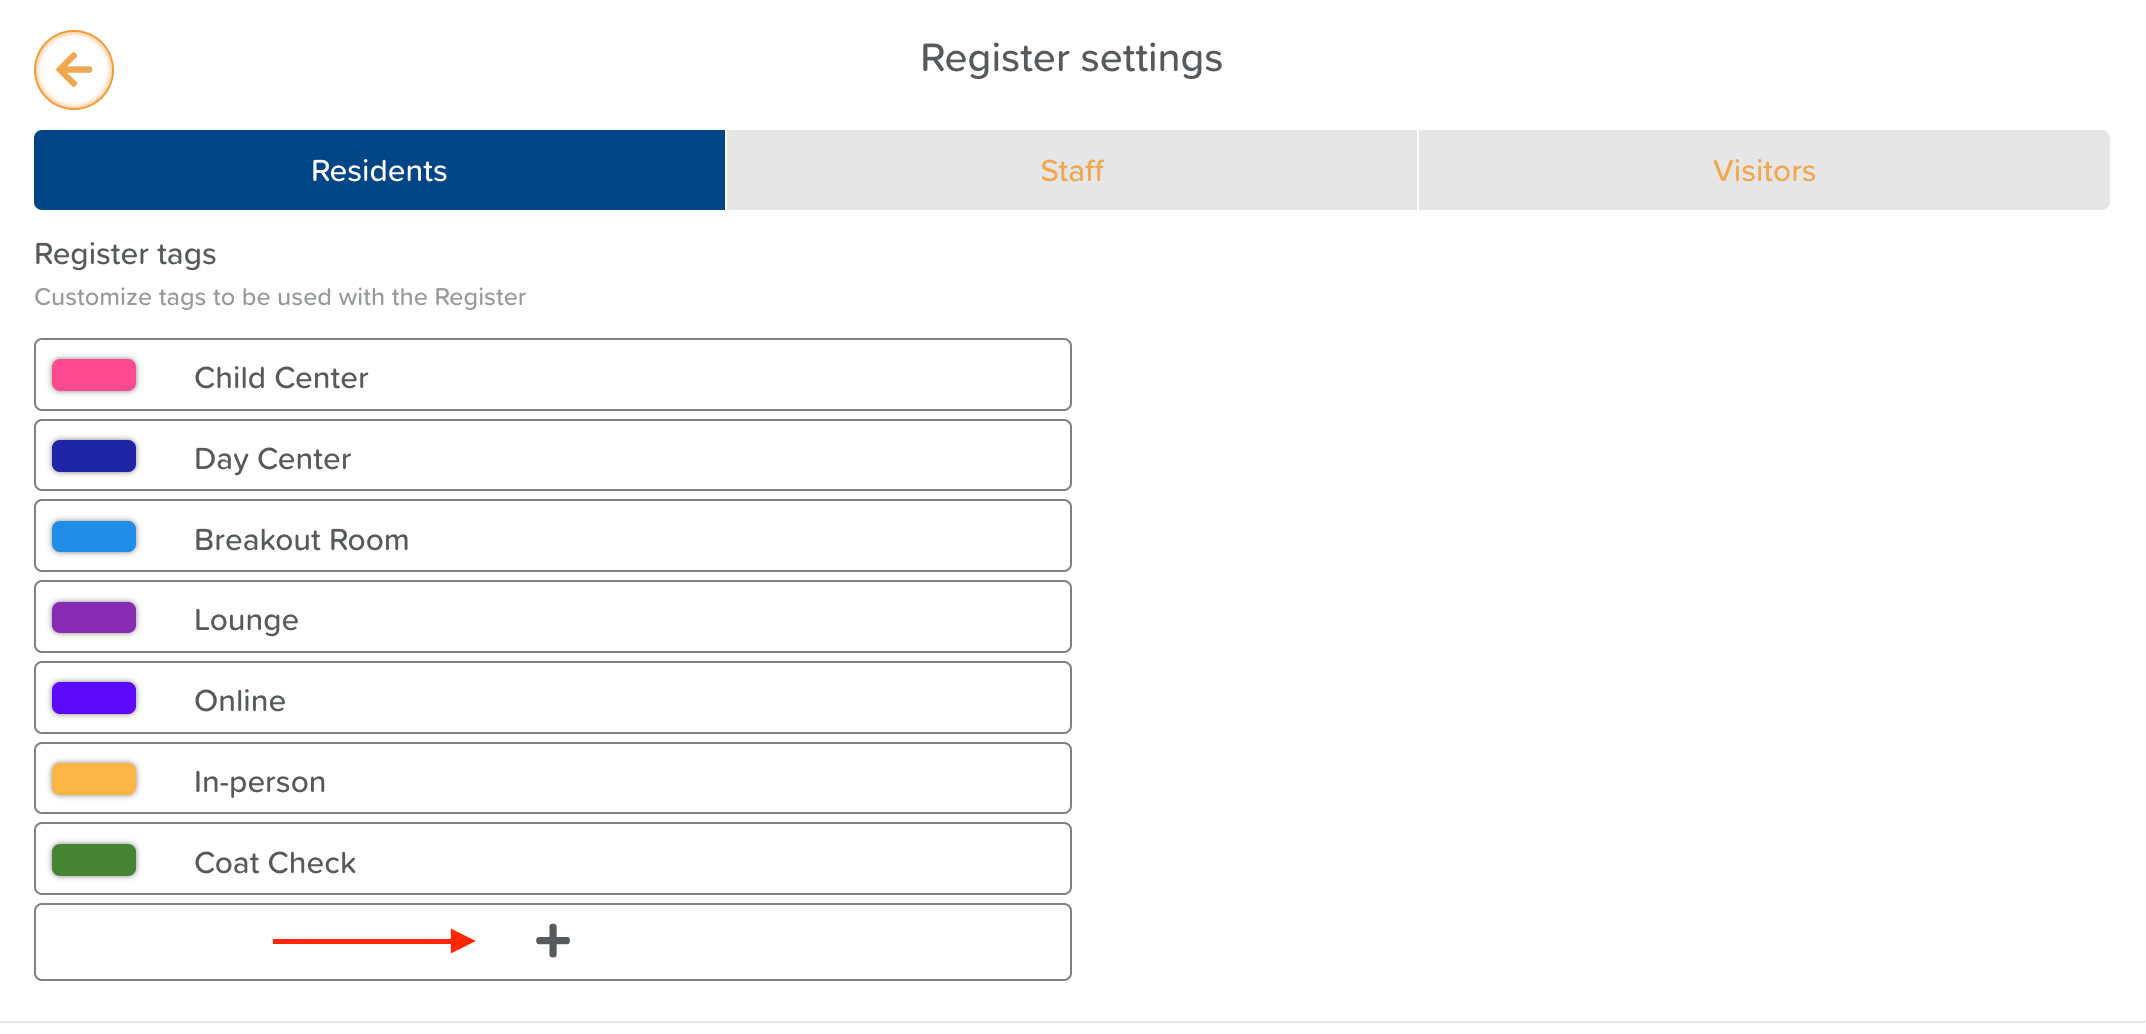
Creating & Using Register Tags
Tags can be applied to participants, staff, and visitors upon sign-in or when marking as absent. Tags can provide staff and management with quick, organizational reference when viewing the Register. Many of our clients create tags for types of service (i.e.AM attendance, PM attendance, transportation user, health services, etc.)
To Create Tags:
Go to Register > click the Settings Cog.
Click “+” to add a new tag.
Name and color the tag.
Click the Save (disc) icon.
To Use Tags:
When signing in a user, choose applicable tags from the dropdown.
Tags appear under the user’s name and can be used to filter data or gather data in attendance exports.
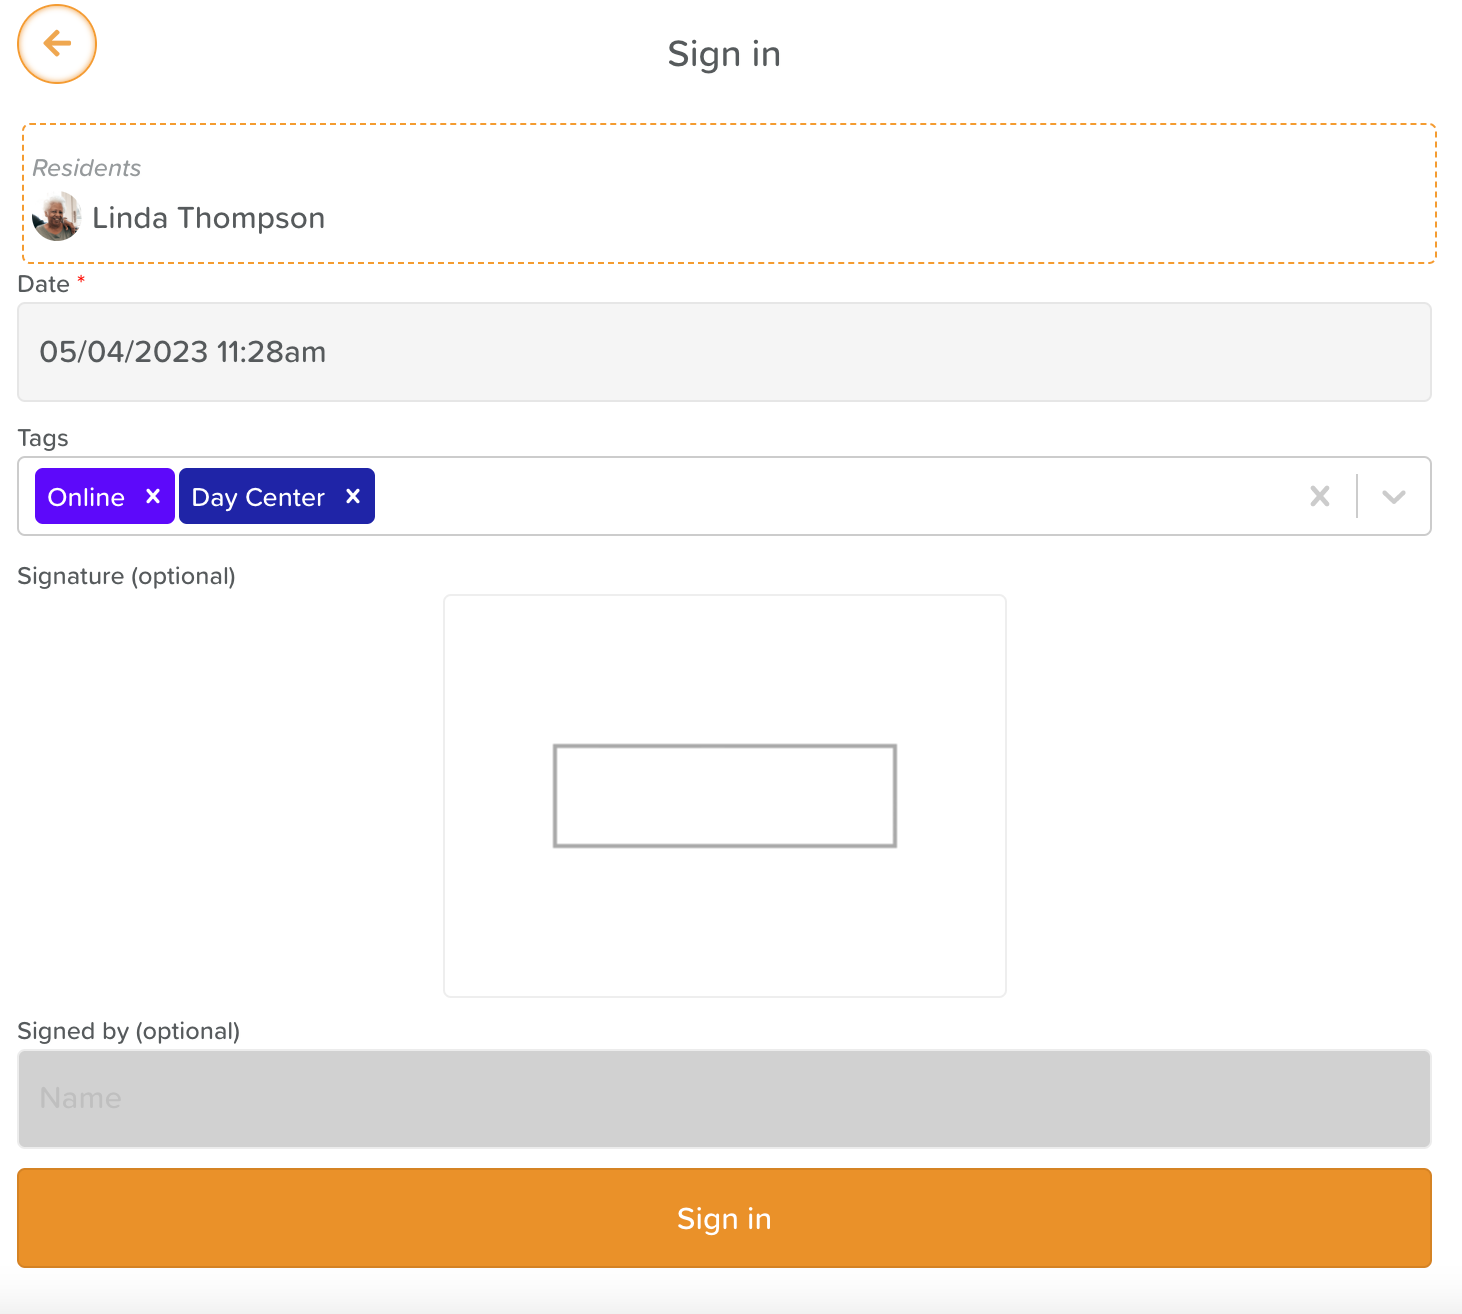
Once the user is signed in, you will see the tags displayed under their name like this:

Printing an Active Register
Go to Register.
Click the Register button on the left.
A print screen will open—download or print the PDF as needed.
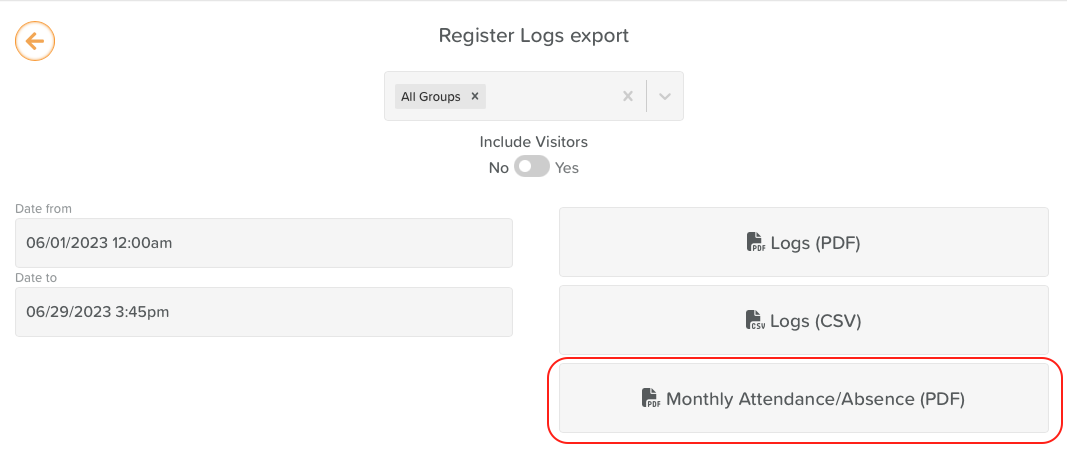
Exporting Register Logs
Go to Register > View Logs.
Click the Export button.
Choose:
Register Logs – standard sign-in/out data.
Attendance Table – detailed data for billing or reporting (including schedules, rota info, etc.).
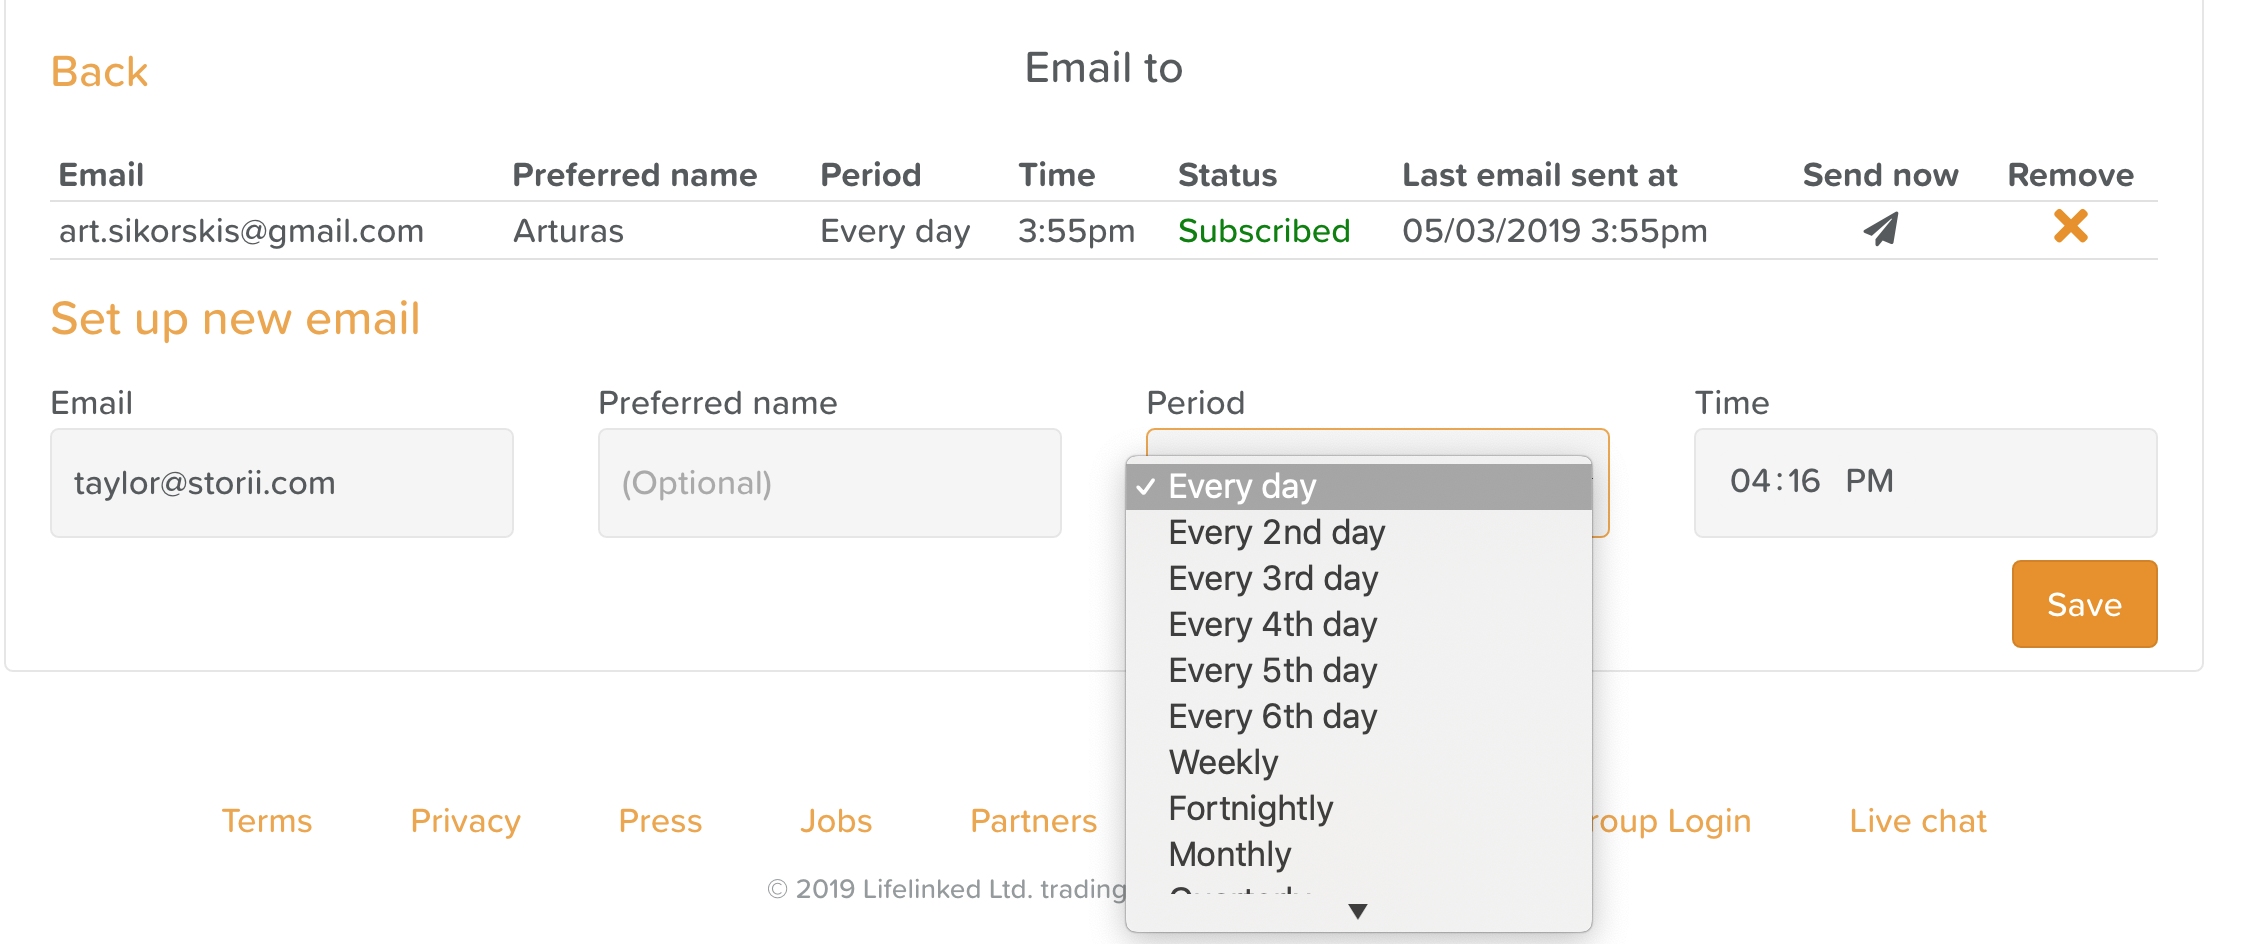
Emailing Register Logs
You can schedule Register logs to be emailed to a recipient of your choice at a regularly recurring interval or make it a one-off occurrence.
Go to Register > View Logs.
Click Email to on the right-hand side.
Enter recipient details and set the frequency (one-off or recurring).
Click Save to activate.

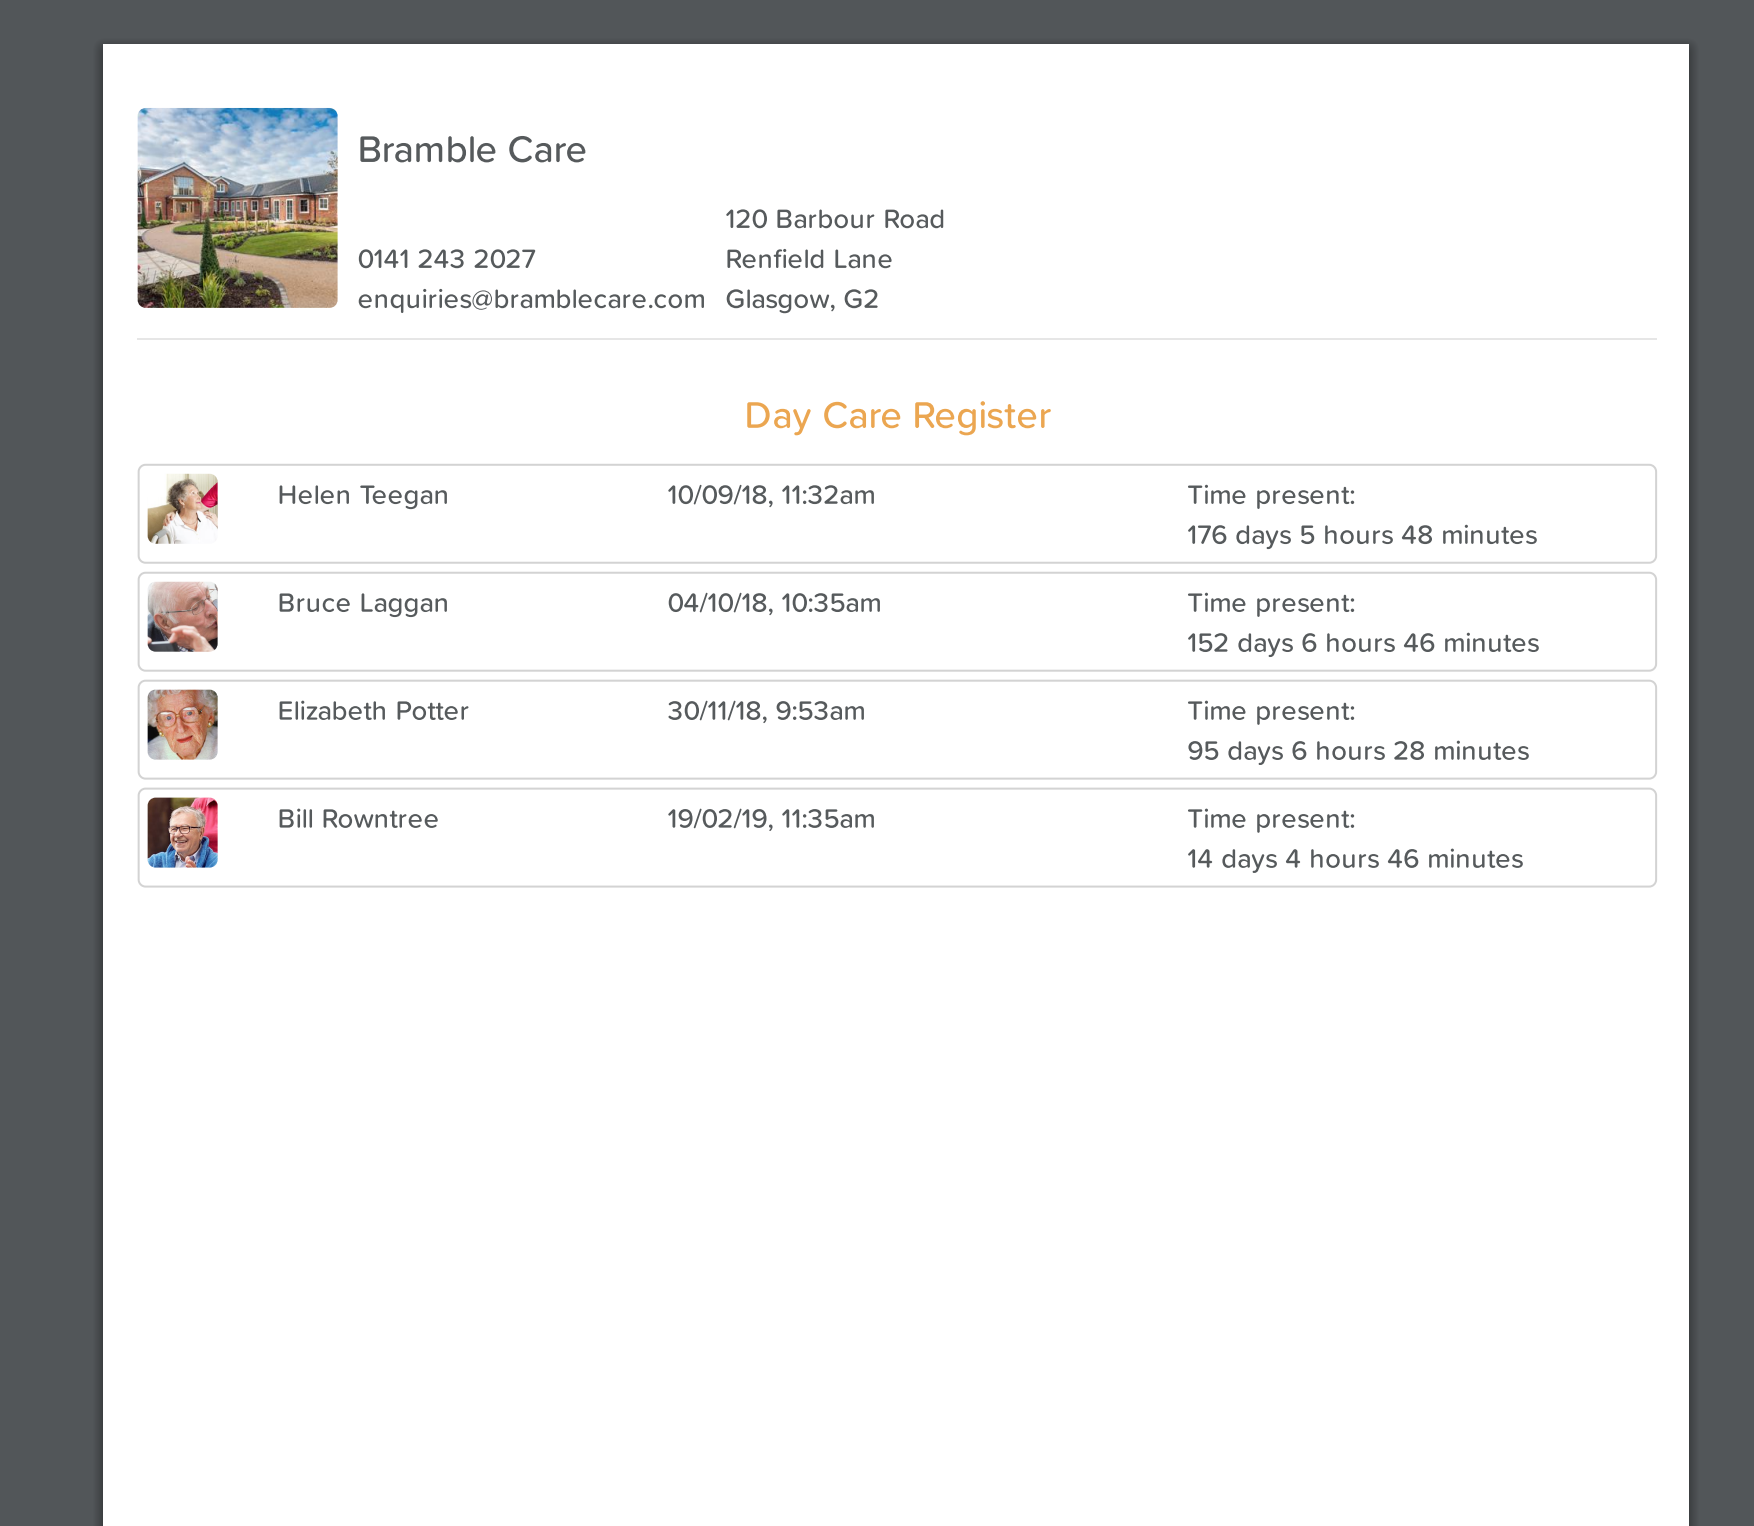
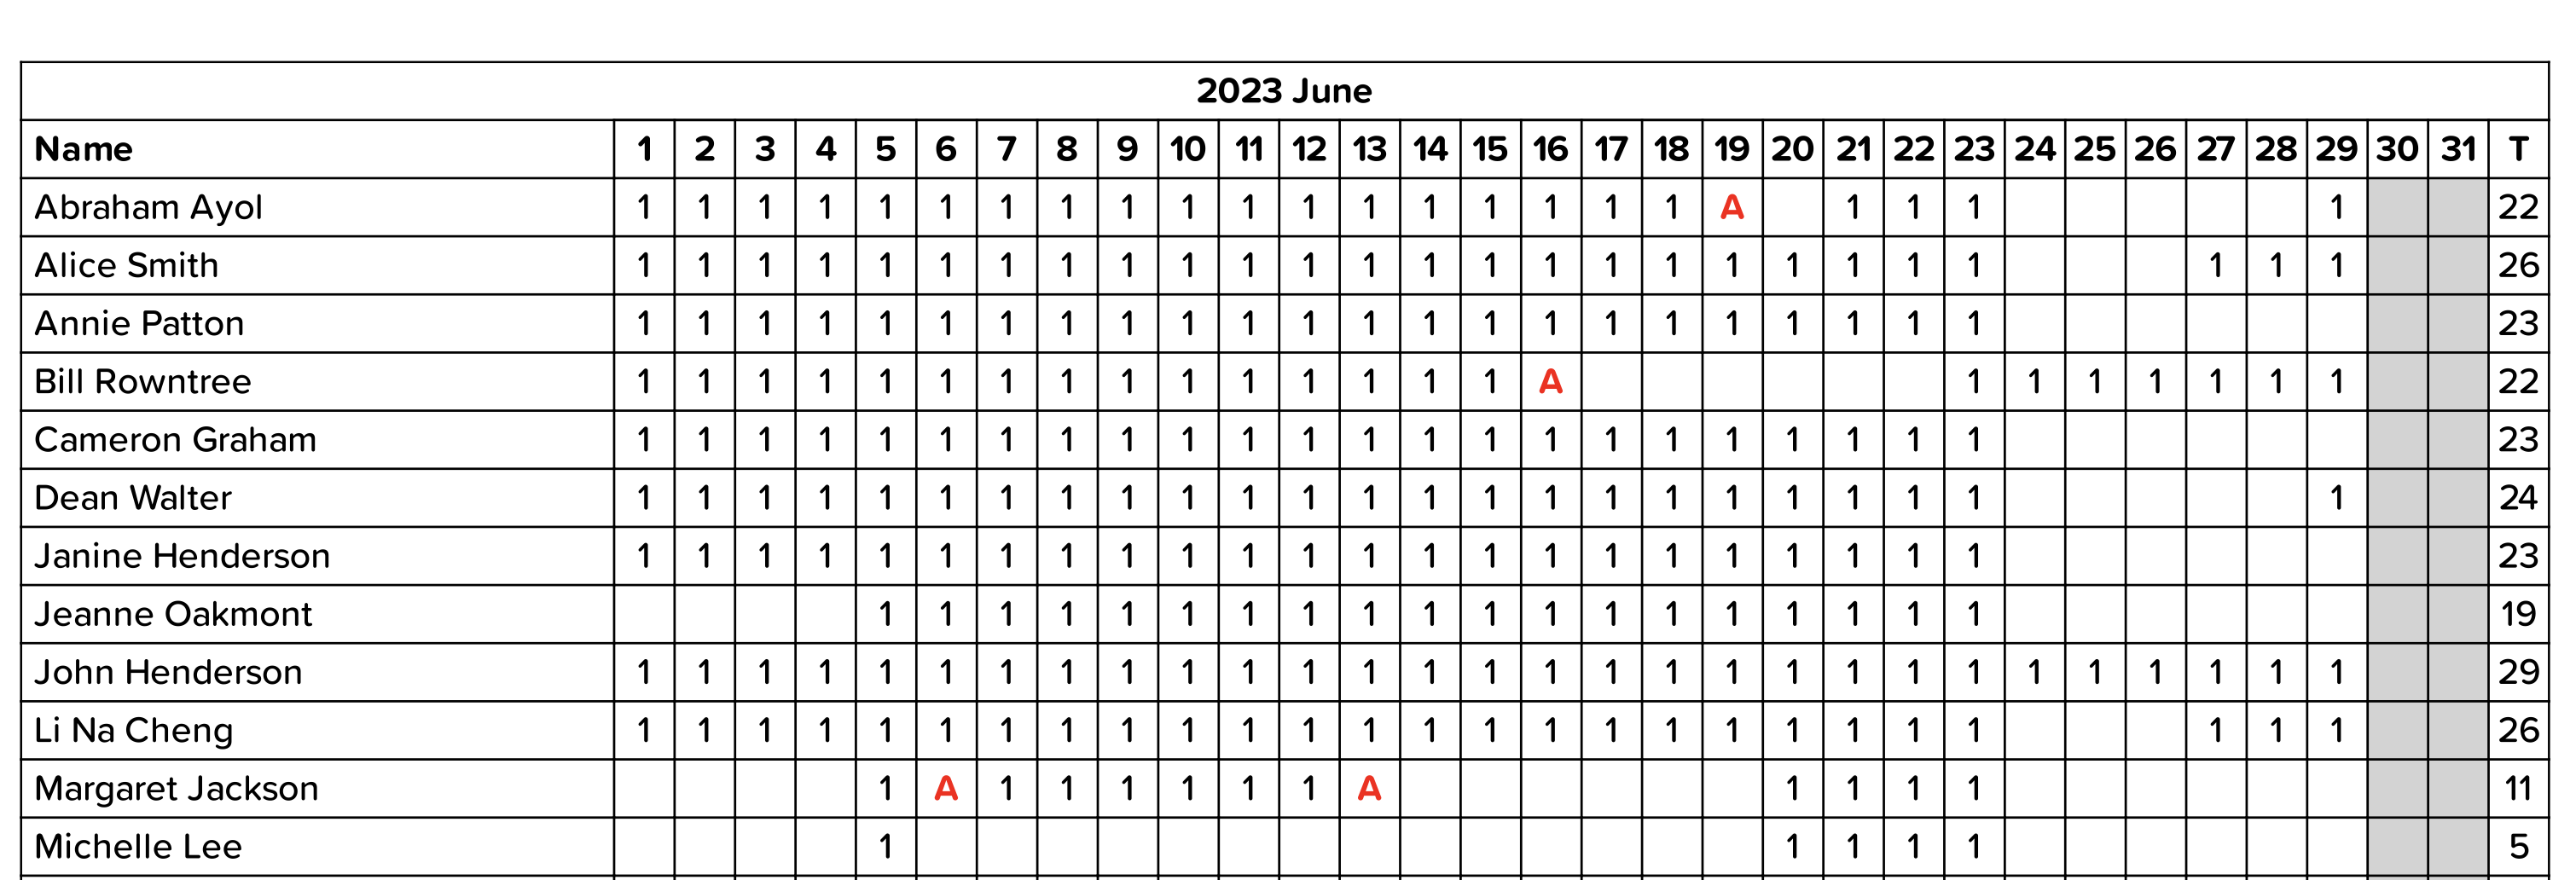
Monthly Attendance / Absence Report (PDF)
A comprehensive monthly overview showing:
‘1’ for attendance
‘A’ (red) for absences
A breakdown of tag usage (if this setting is toggled on when exporting)
Totals per participant and for the entire service
Located under:
Exports > Register Logs > Monthly Attendance / Absence (PDF)
Setting Up QR Codes and PIN Codes
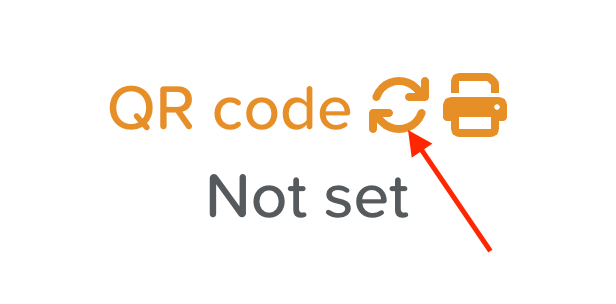
Go to Register > Access (top right).
Click a user’s QR Code or Lock icon.
Click the circular arrows to generate a code.
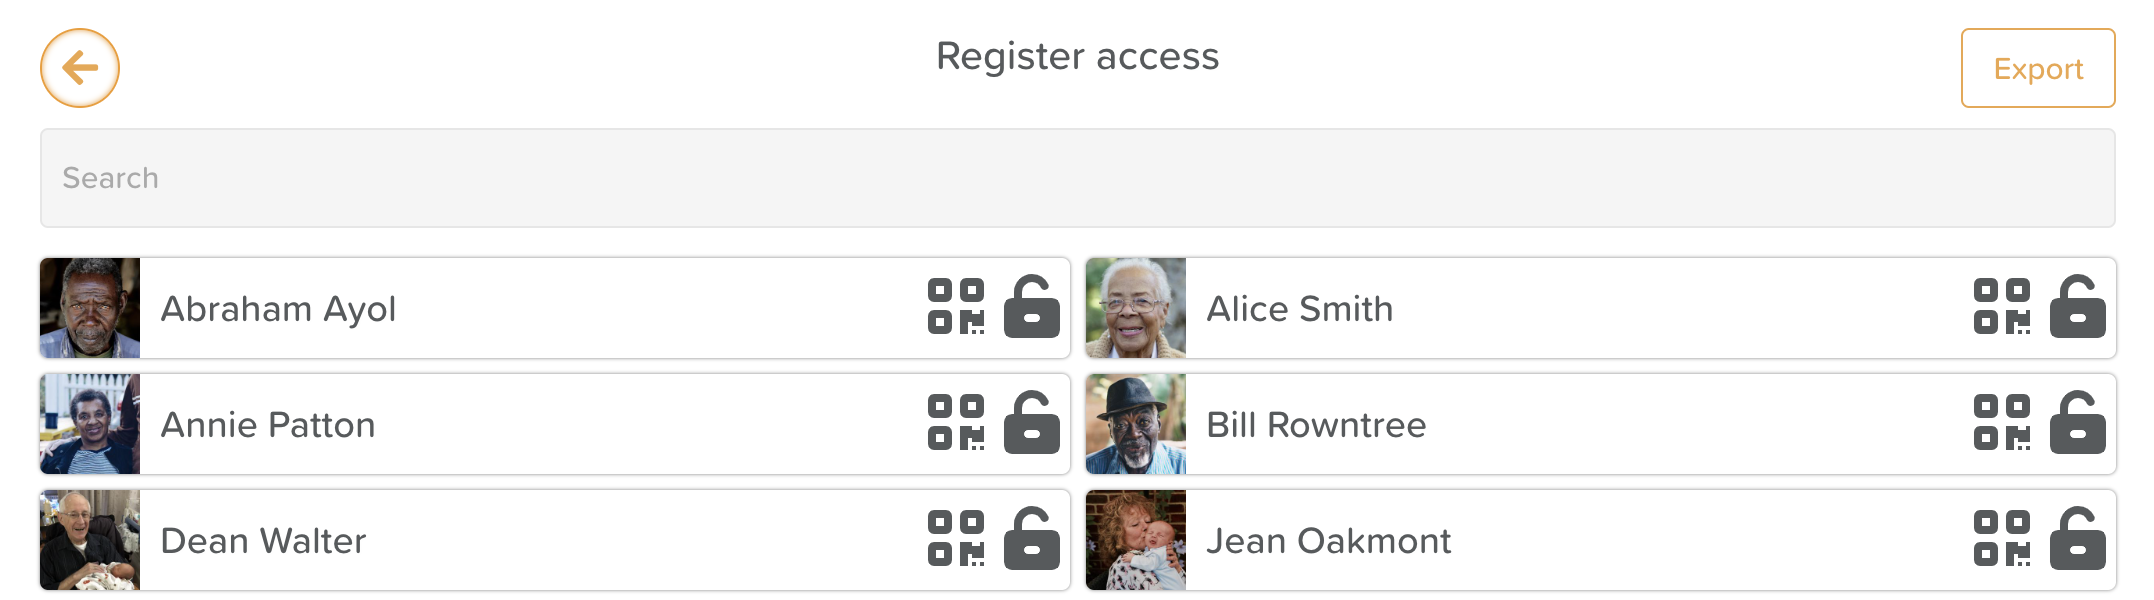

You can learn more about how PIN Codes and QR Codes can be used and how to print them off in our Register App Article.
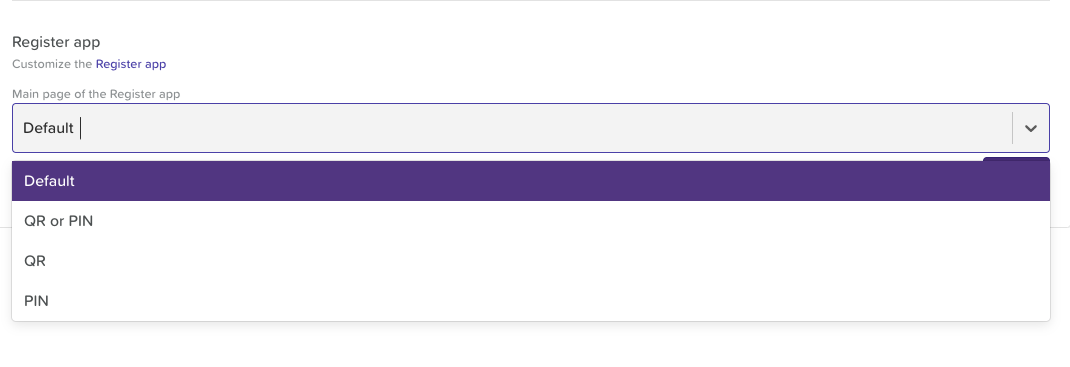
You can assign default sign-in methods for Participants, Staff, and Visitors by:
Going to Register > Settings Cog.
Selecting the default method from the dropdown menu in each tab.