
How to Edit the Care Plan Structure
StoriiCare offers a highly flexible, modular care plan structure that can be tailored to your organization’s needs. You can add, remove, rename, or rearrange categories and sections to match your preferred structure—or even mirror your existing paper forms.
(Note: On your system, “Care Plan” may appear under alternate terms like Support Plan, Service Plan, Plan of Care, or other custom labels.)
Important: You must have the correct permission level to access and modify the Care Plan structure. If you don’t see editing options, contact your manager or administrator for assistance
Before You Begin: Preview the Care Plan Feature
Before editing the structure, it’s best to view the Care Plan feature from a Test Participant’s profile.
Doing so will help you:
See how your current Care Plan is structured.
Understand how each category and field behaves from the staff perspective.
Identify what you want to change or improve before making adjustments in Care Plan Settings.
This hands-on review ensures your edits are practical and user-friendly once implemented.
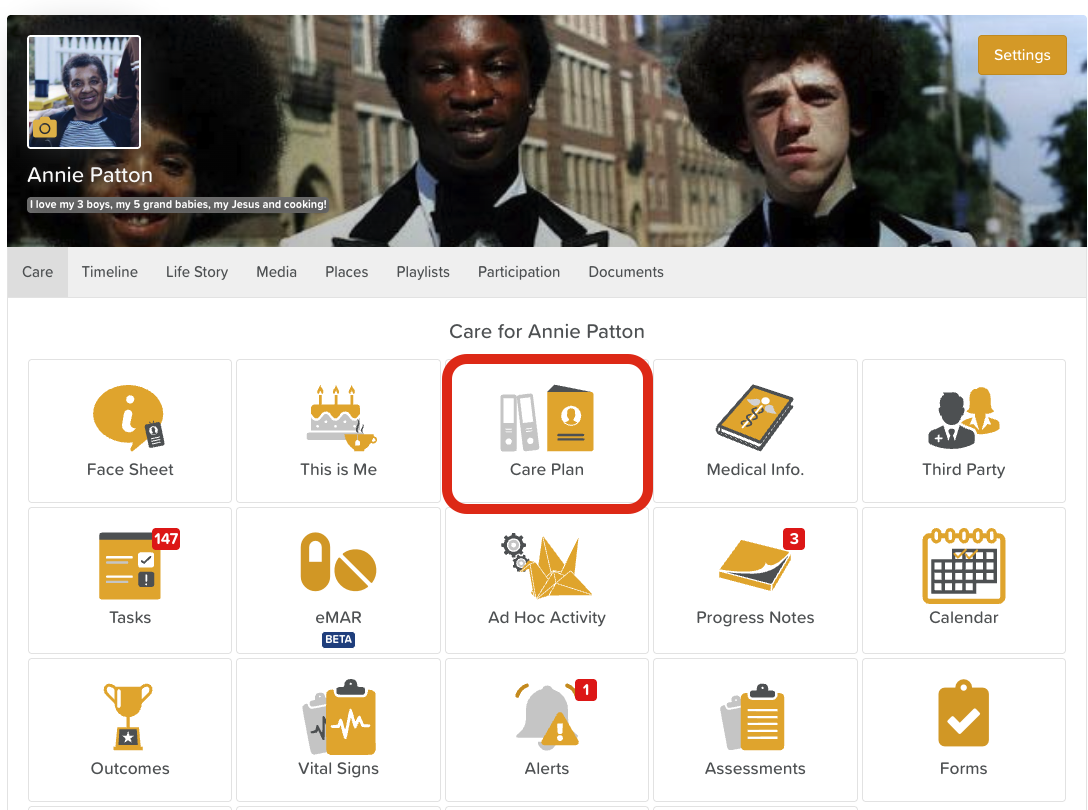
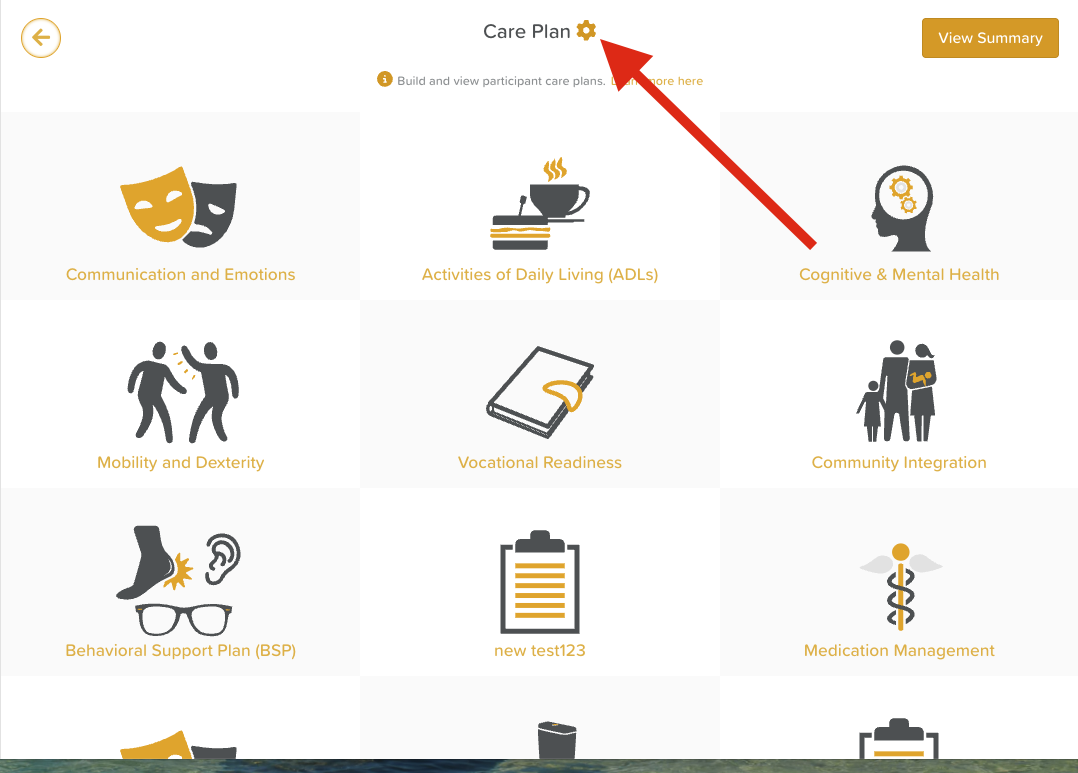
Open Care Plan Settings
Log in to StoriiCare and click on any participant profile
Select the Care Plan (or your organization's equivalent term)
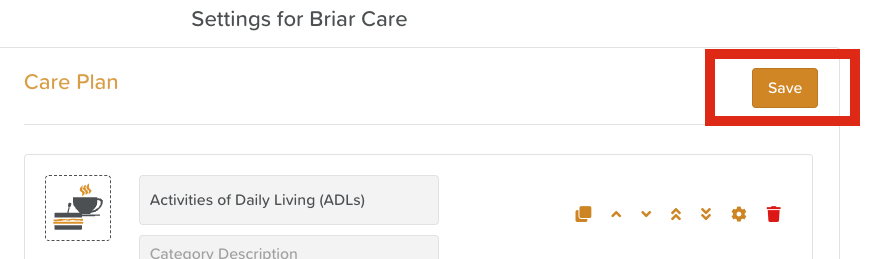
Click on the cog/wheel icon at the top of the page
Any changes you make here will apply to all Care Plans within your service location.
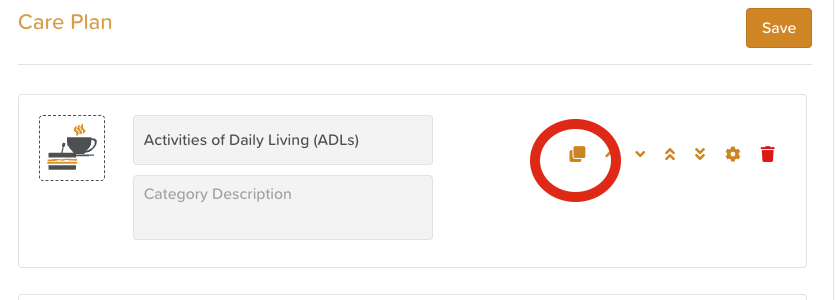
Time-Saving Tip: Duplicate Categories
If each category in your Care Plan will have the same or similar questions, prompts, or headings, it will save you significant time to:
Configure one category completely, with all desired fields and formatting.
Then, use the Duplicate Category option to copy it.
Rename the new category and change the icon image as needed.
Customize Categories
Categories act as the top-level sections of your Care Plan. Each category can contain one or more Care Plans or subsections.
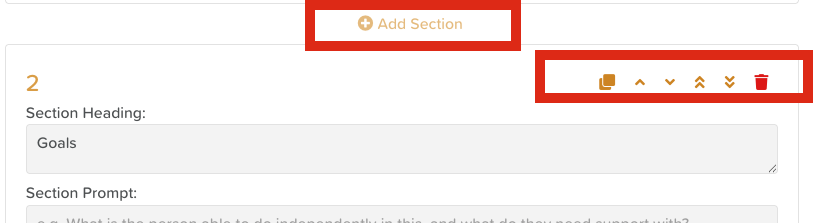
➕ Add a New Category
Scroll to the bottom of the list and click the “+” button to add a new category.
Enter the name, add a description, and choose an icon (optional).
🖊️ Rename a Category
Click the category title and overwrite it with your preferred name.
🗑️ Delete a Category
Click the trash can/bin icon next to a category to remove it.
🔀 Reorder Categories
Use the single arrows to move a category up or down.
Use the double arrows to move it to the top or bottom of the list.
🖼️ Change Category Icon
Click the dotted outline where the current icon appears and select a new image from the available options. Uploading your own icons is not an option at this time.
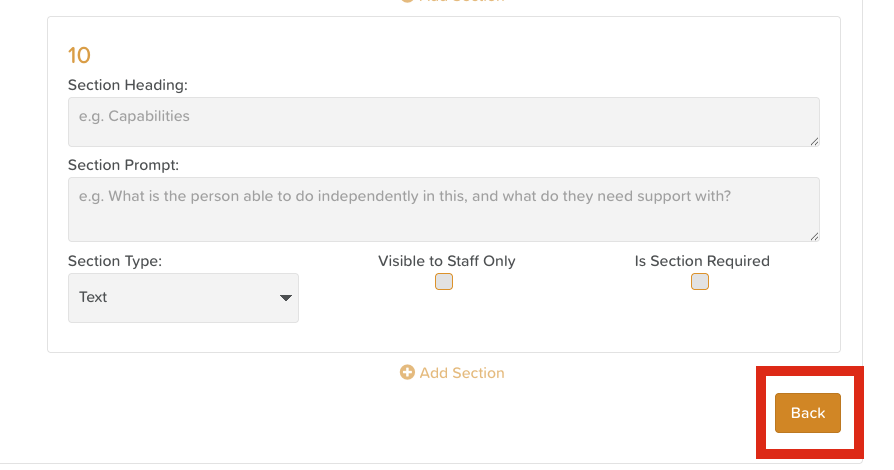
Edit Sections Within Categories
Each category can contain multiple fields or prompts. You can customize these by clicking the settings/cog wheel (⚙️) next to the section.
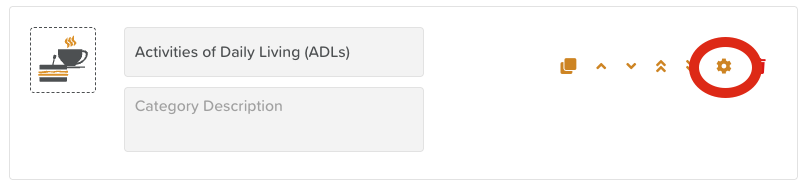
From the settings menu, you can:
Add or remove sections (text, date, dropdown, outcome selector, etc.)
Enable/disable or rename built-in elements like Notes, Archived items, or Summary views
Make sections as required, so staff must complete them
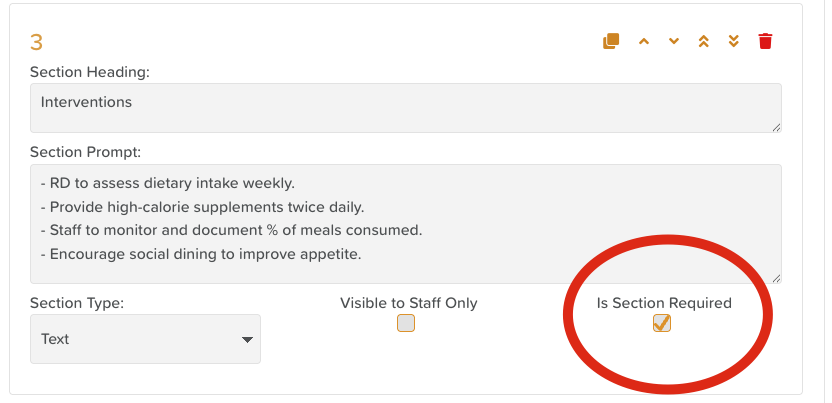
Insert divider lines to visually organize content
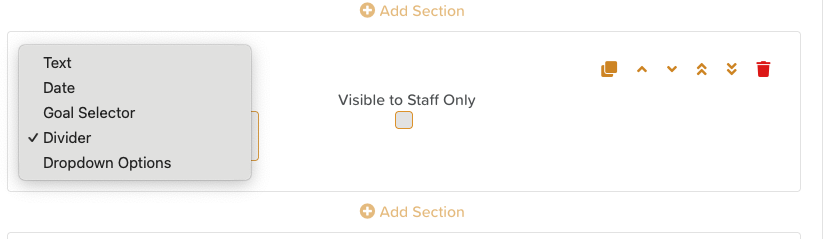
Insert Date fields for things like Review Dates
Insert Goal/Outcomes (or whatever terminology is set for the organization) Selector to link those to specific Care Plans
Saving & Previewing Your Structure
Once you’ve made updates, scroll to the bottom of the page and click Back or use the Back Arrow at the top of the page. Then click Save to save your changes.
Scroll to the bottom of the page to select the Show Preview button.
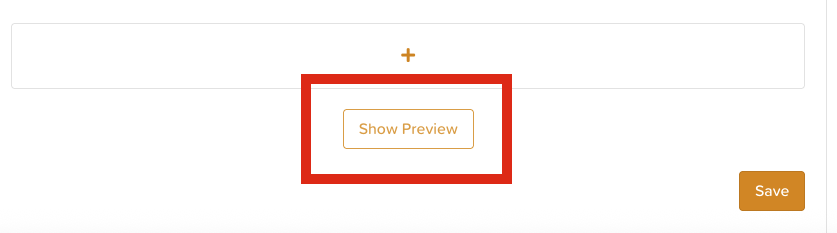
This allows you to see exactly how your structure will look and function within participant profiles.
Your updates will automatically apply to all Care Plans within your selected location.
Return to your Test Participant to review how the revised structure performs in action.
Pre-Filling Parts of a Care Plan
Care Plan Templates help standardize documentation and save staff time by pre-filling sections of a Care Plan with commonly used text. Care Plan Templates are separate from the overall Care Plan Structure.
Templates are category-specific and only apply within the category in which they are created. Use templates for diagnoses, service models, or regulatory language that applies to many participants
To learn how to create and use Care Plan Templates, check out How to Use Care Plan Templates.
Best Practice
Review your structure regularly to ensure it continues to meet compliance and documentation needs.
Keep your category names and field labels clear and consistent.
When testing changes, always do so in a non-active profile to avoid disrupting live care data.
Need More Help?
If you need further assistance, you can reach out to our support team by emailing support@storii.com. Our support team is ready to help you with any questions or issues you may have.