
A Guide to Using Groups
The Groups feature in StoriiCare allows care providers to easily organize and manage staff and participants based on shared characteristics, risks, or other criteria.
Previously located in Business Settings, the Groups feature has now moved to the Dashboard for easier access and broader usability.
Important Update: Groups Permission Change
If you previously accessed Groups through Business Settings, please note that this feature has been relocated to the main Dashboard.
This change allows more staff to manage Groups without needing admin-level access to sensitive settings.
⚙️ Action Required:
Administrators should revisit Permission Levels and ensure that the appropriate Groups permission is enabled for all relevant custom permission levels.
This ensures that staff who need to create or manage Groups can do so directly from the Dashboard.
What Are Groups?
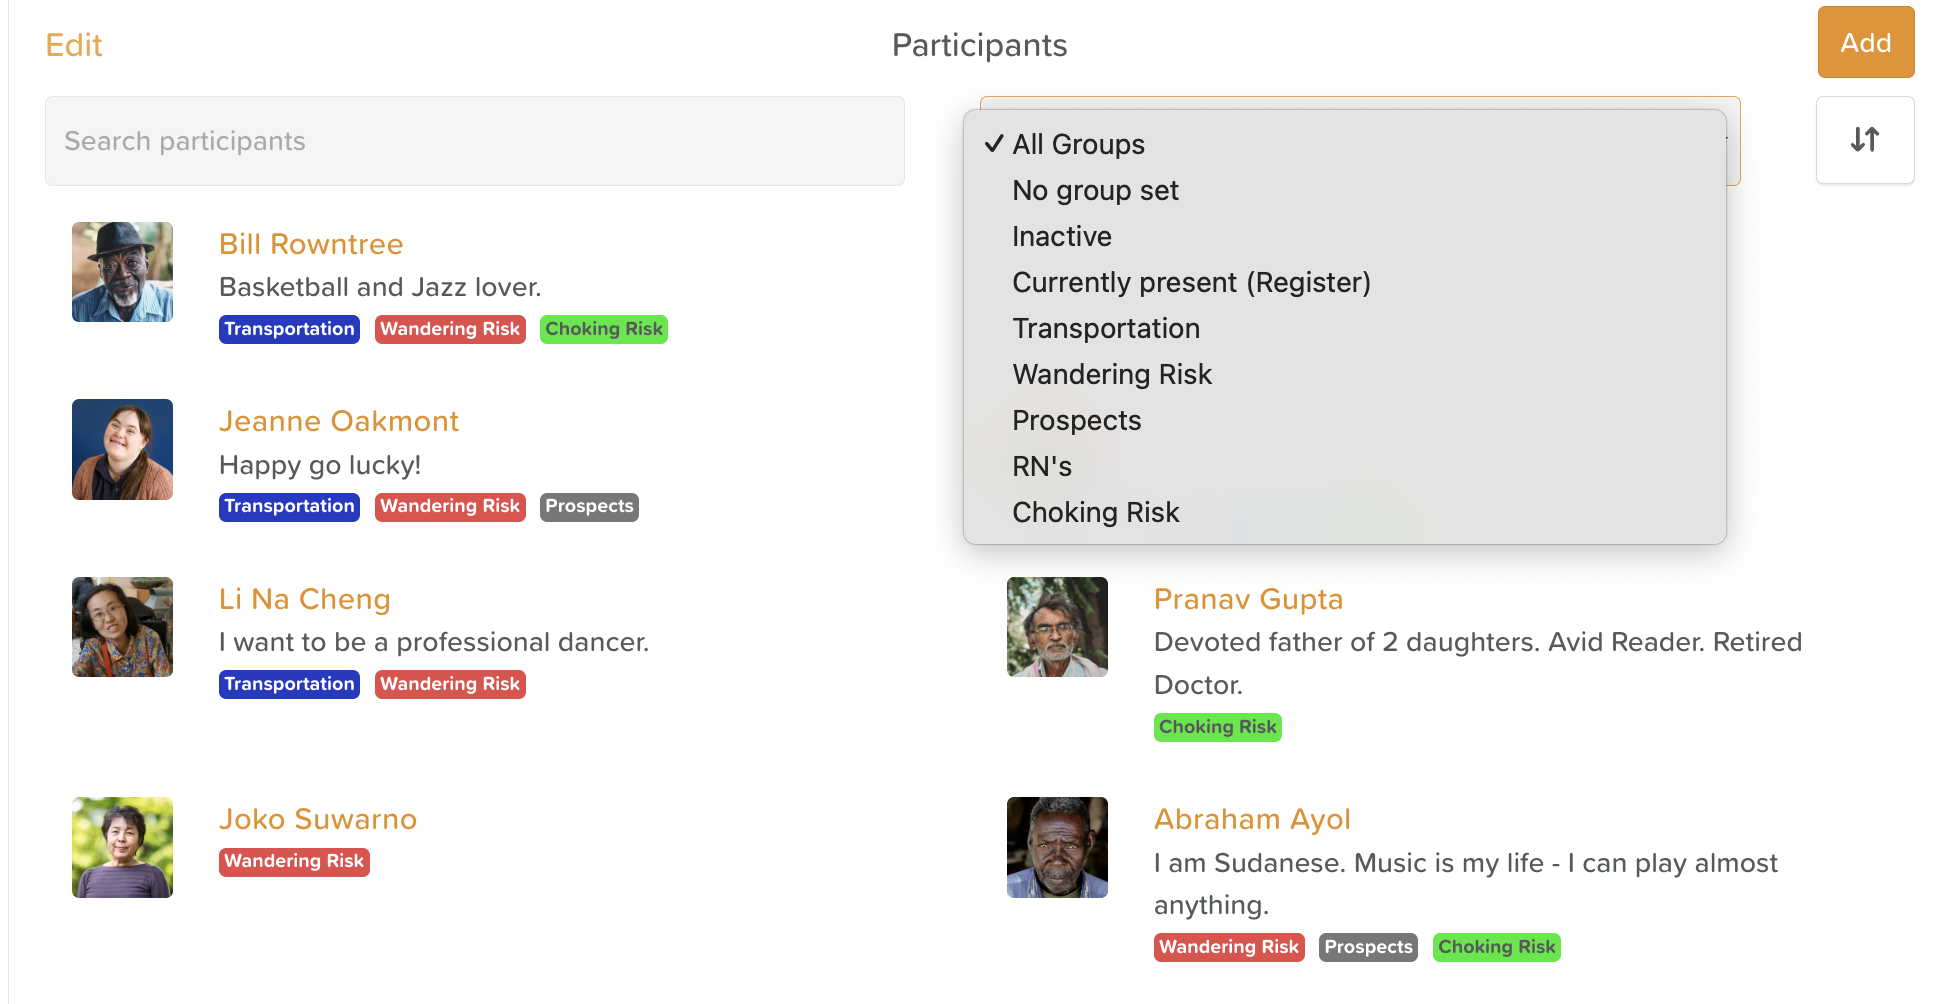
Groups are a flexible way to categorize and filter participants and staff across StoriiCare.
You can assign individuals to one or multiple groups and then filter by those groups throughout the platform — for example, when viewing participant lists, activity attendance, or analytics.
Common Examples of Groups
Risk-Based Groups: Fall Risk, Wandering Risk, Choking Risk
Operational Groups: Transportation, No Photo Consent
Location-Based Groups: 1st Floor, 2nd Floor, Memory Care
Staff Assignments: Key Worker, Primary Nurse
Groups make it easy to identify, filter, and report on participants and staff who share specific traits or needs.
⚠️ Groups should not be used for something like identifying who has Allergies. The system is not set up to automatically place individuals with allergies in a specific Group. Individuals need to manually be added and removed from Groups.
How to Add a New Group
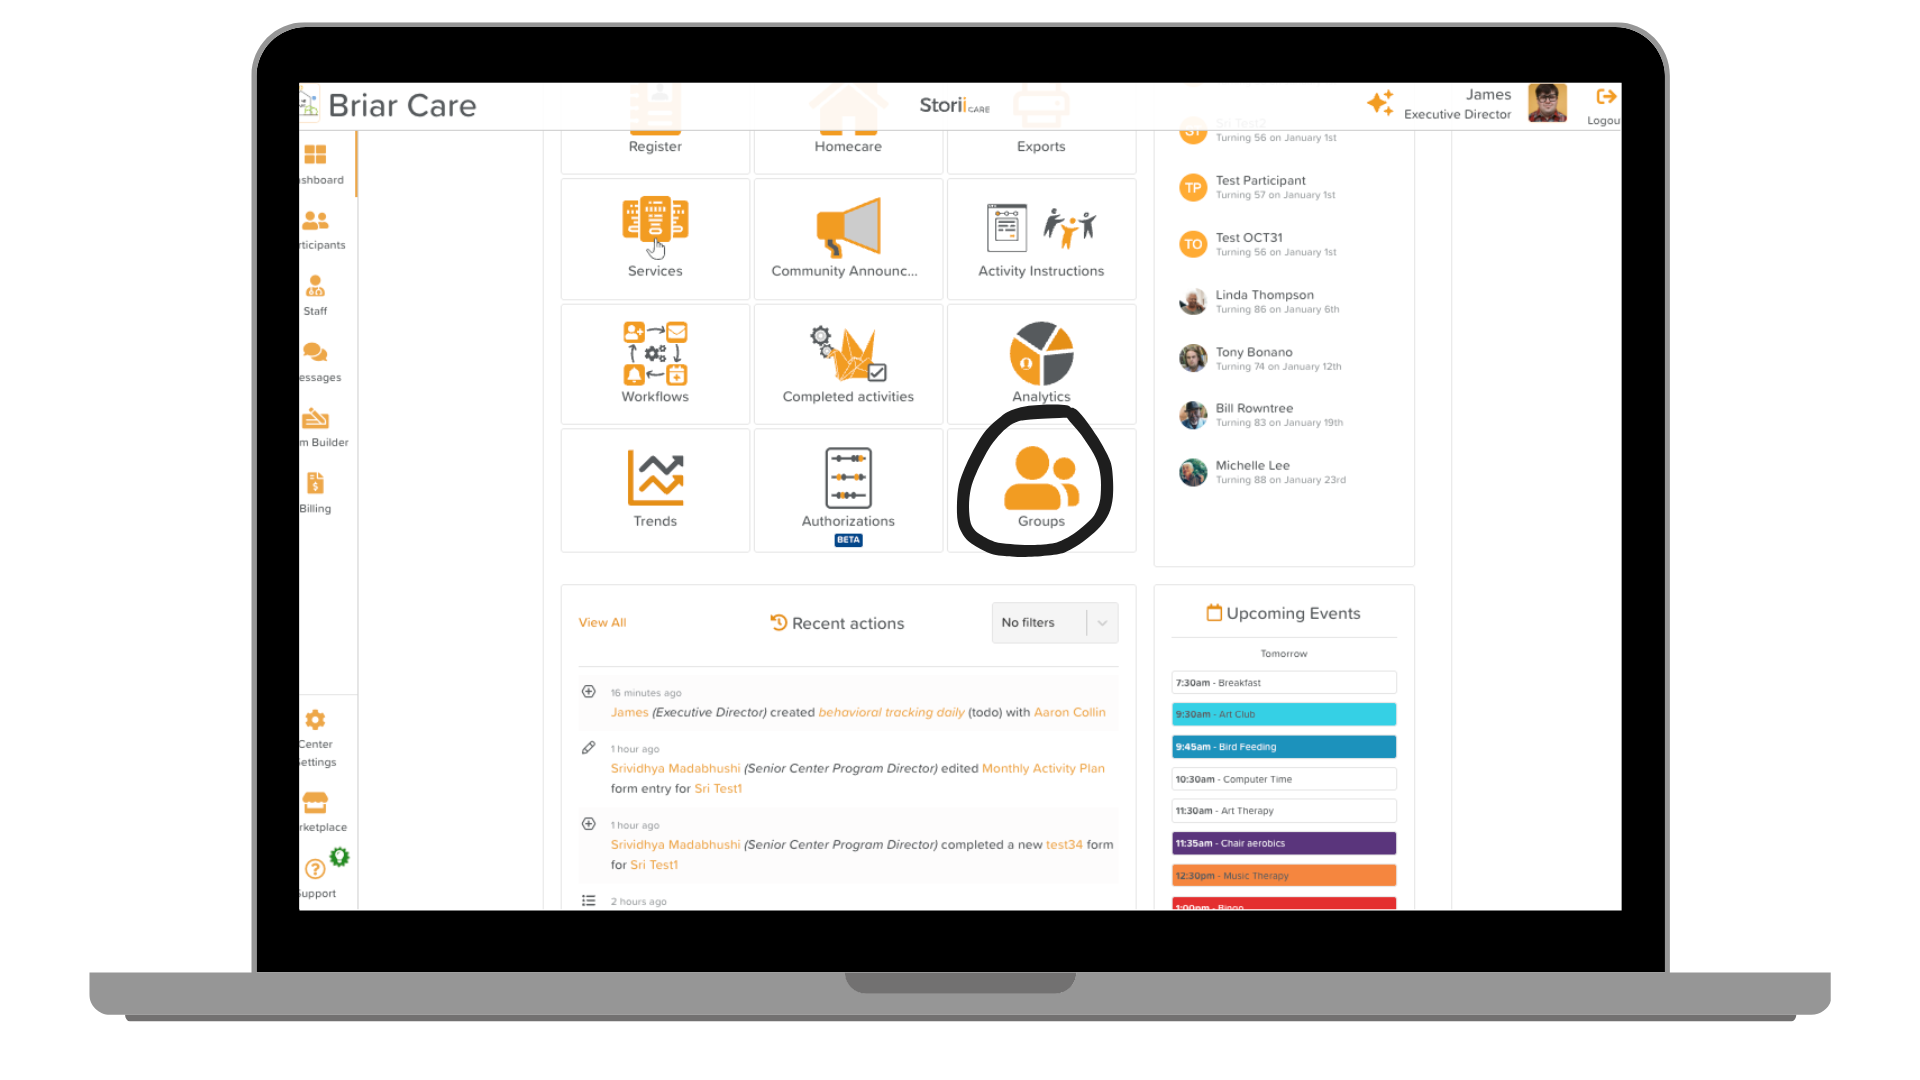
From the Dashboard, navigate to the Groups feature.
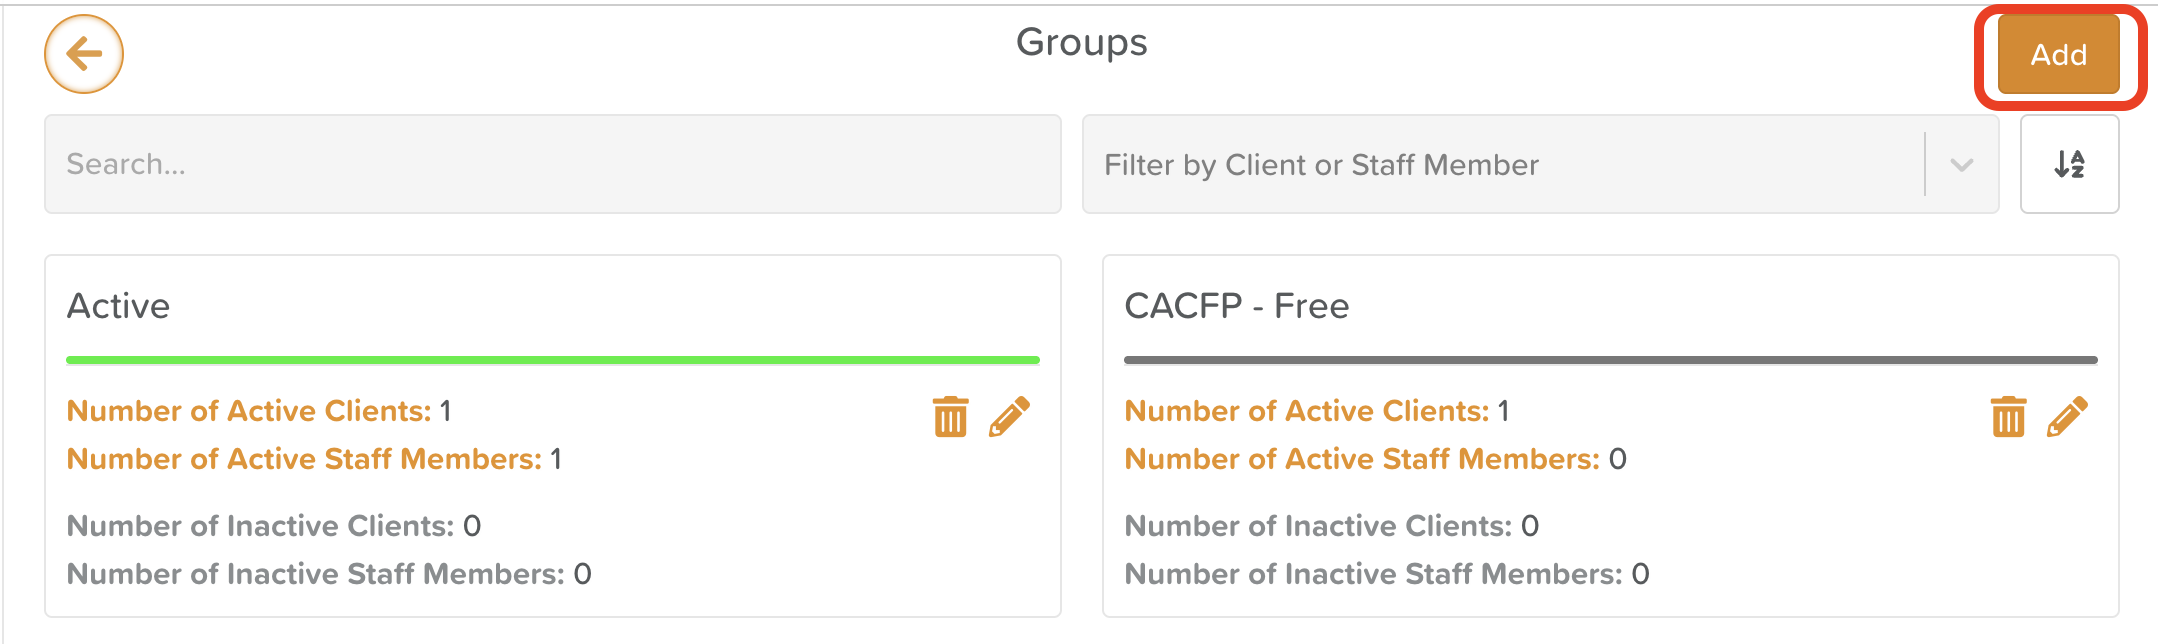
Click Add Group.
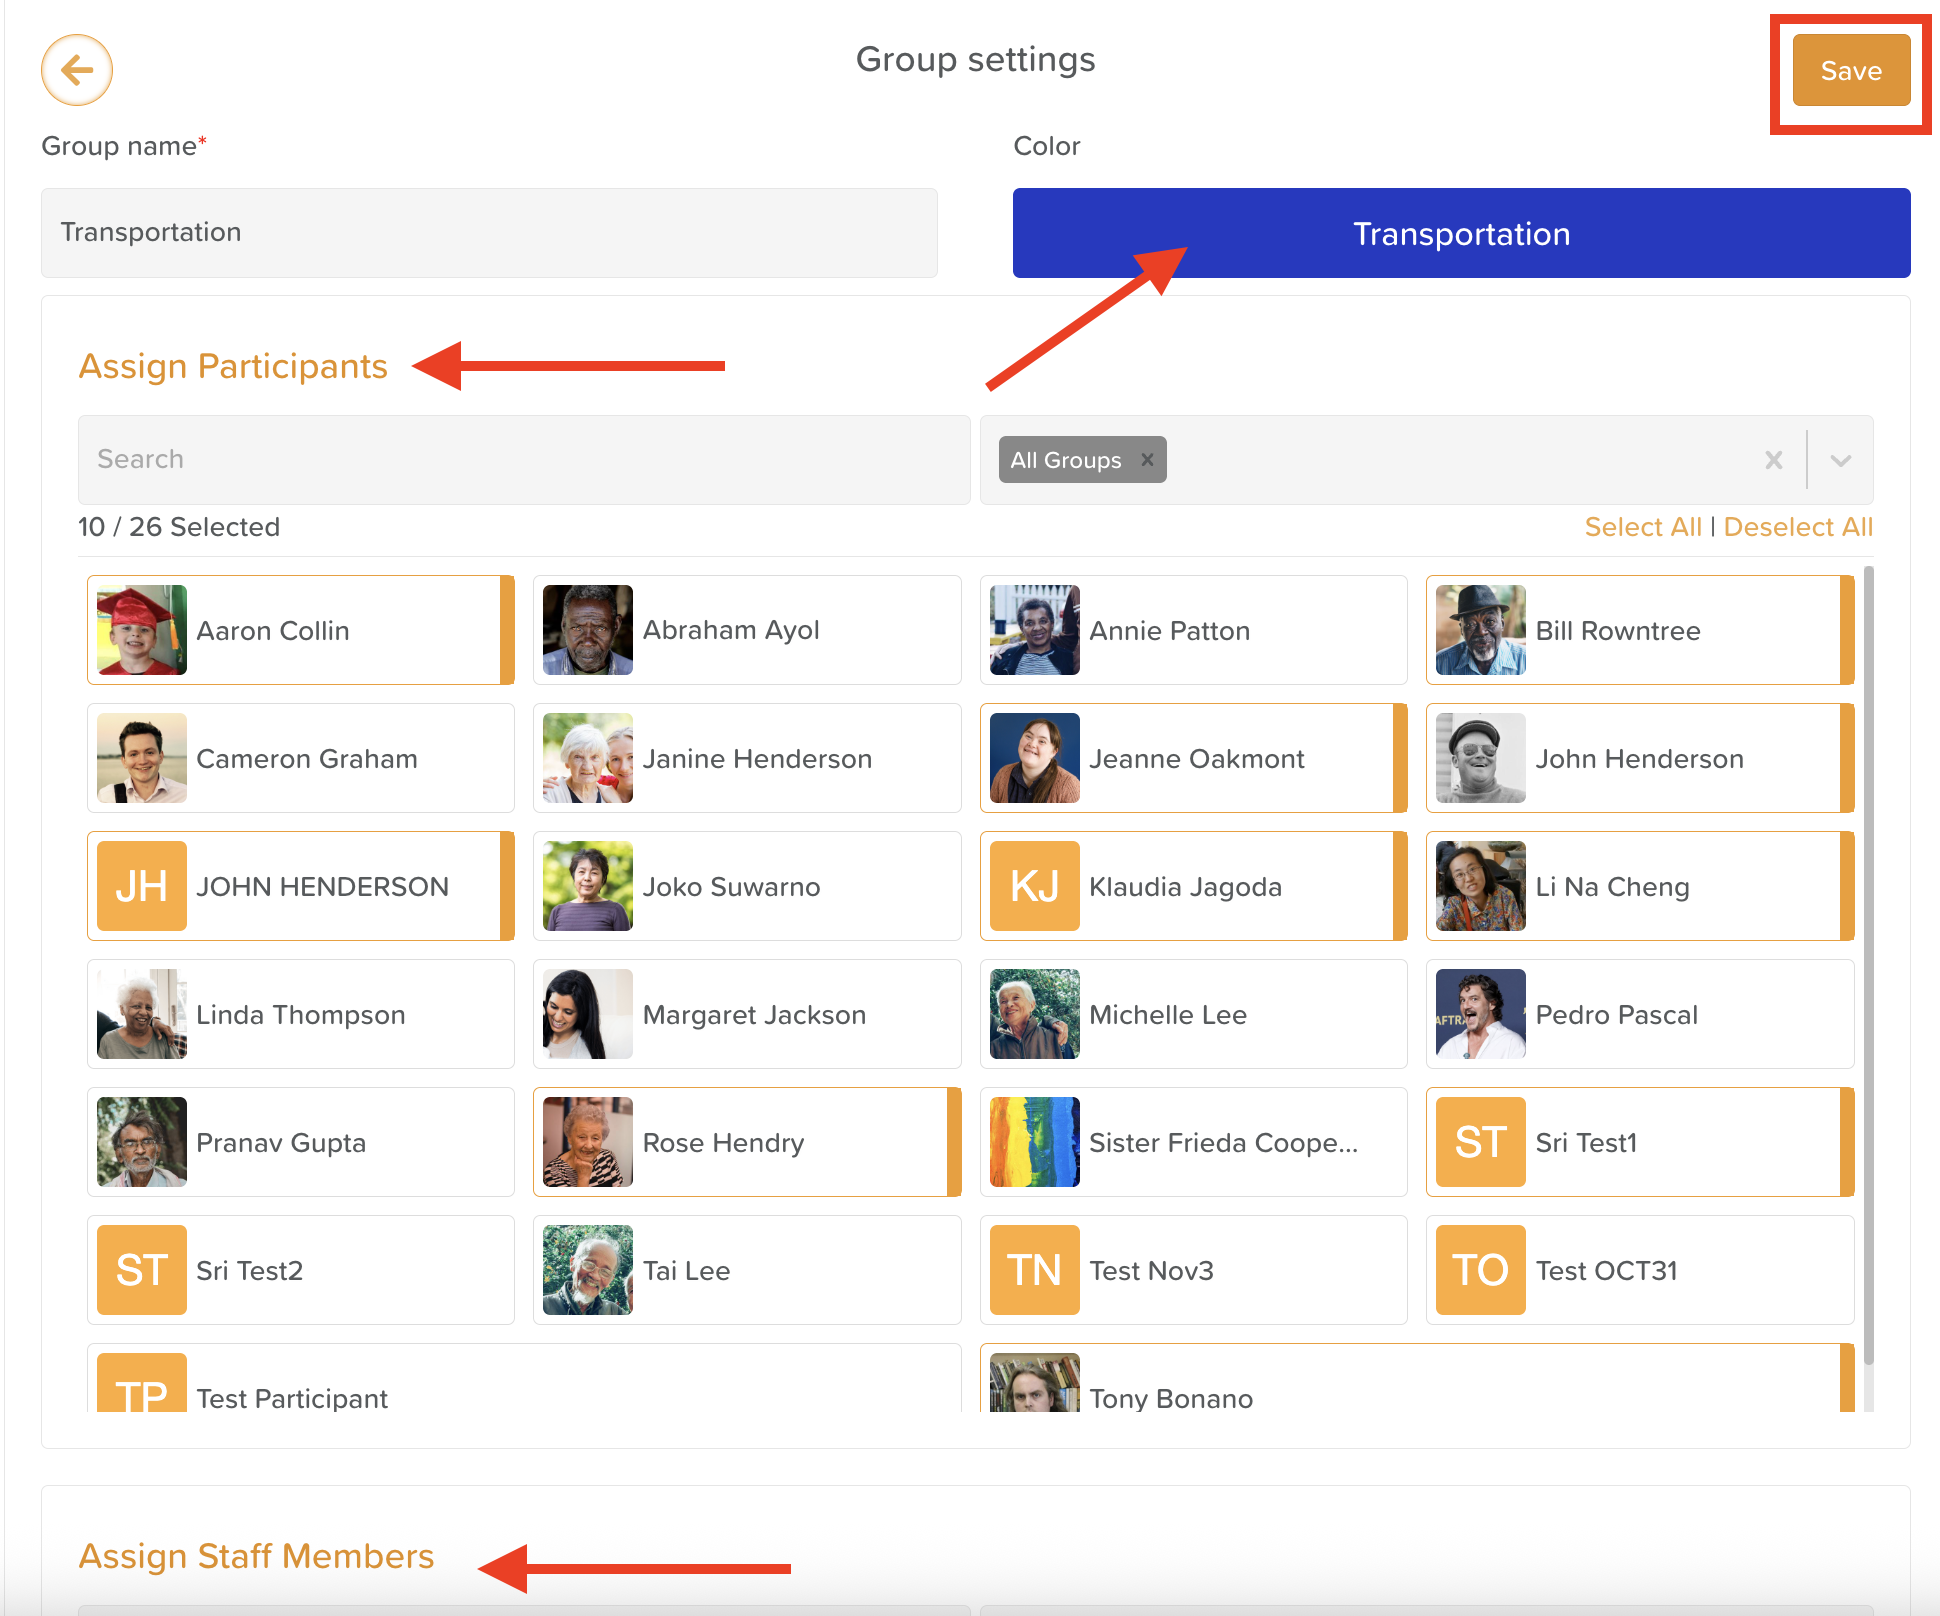
Select the participants and/or staff you’d like to include in this group.
Enter a Group Name.
Choose a Group Color — either by using the color selector or entering a hex code for a specific color.
Click Save.
Your new Group will now appear across relevant pages and filters throughout StoriiCare.
How to Edit an Existing Group
If you need to modify a Group by adding or removing members:
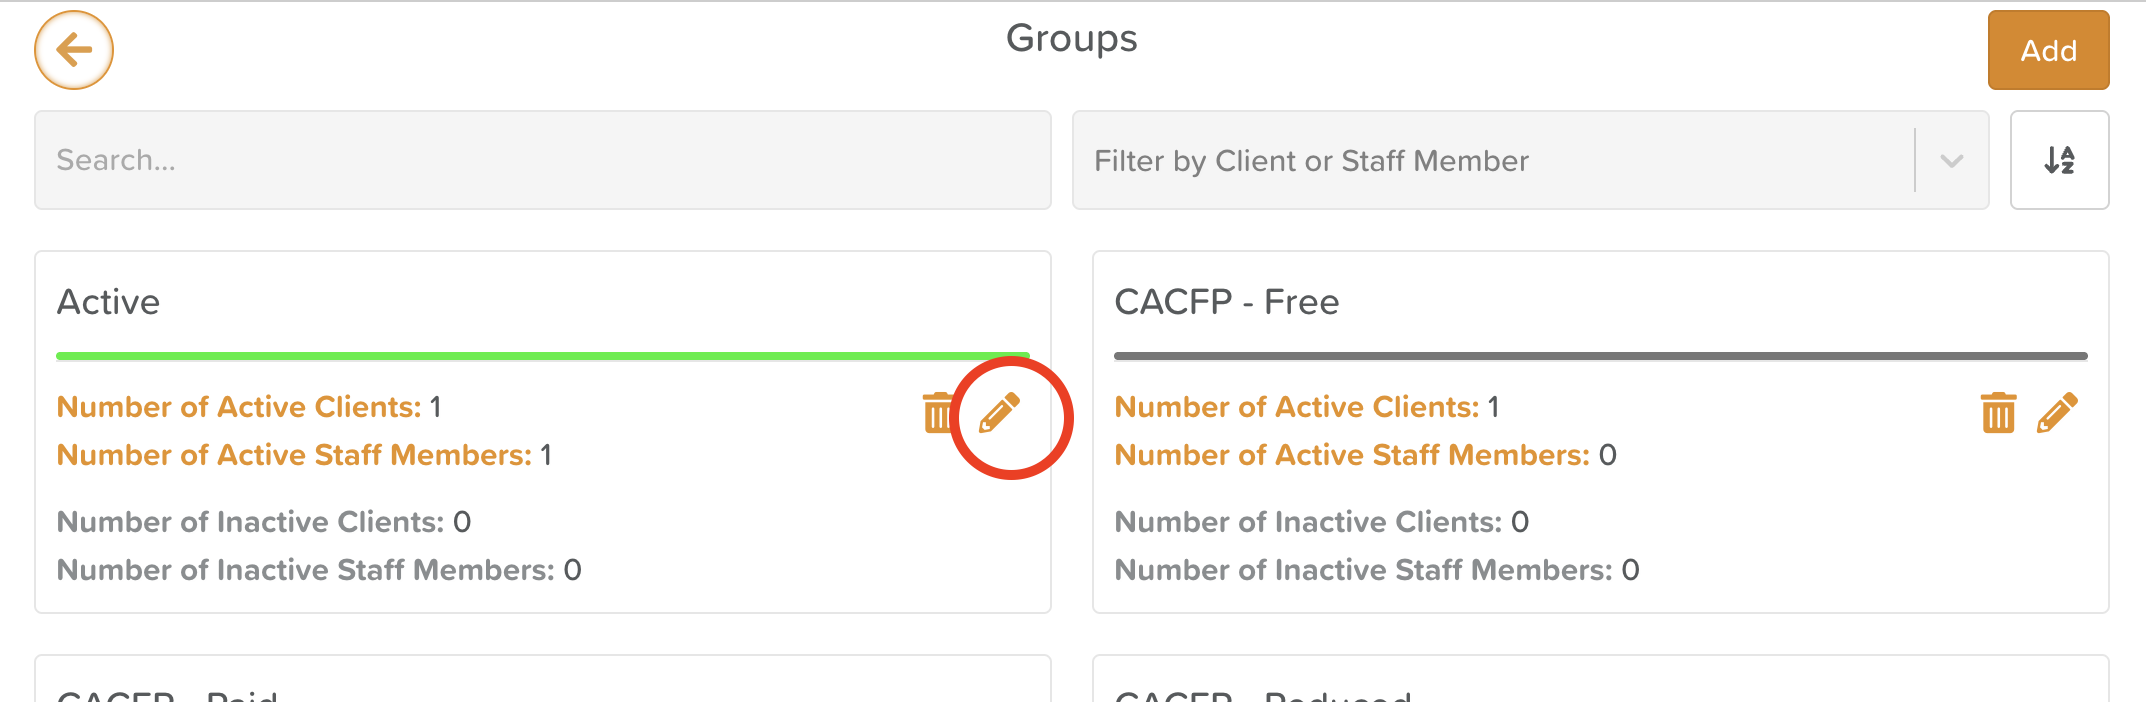
Click the pencil icon (✏️) next to the Group you want to edit.
Select or deselect participants and/or staff as needed.
Click Save to apply your changes.
Managing Groups
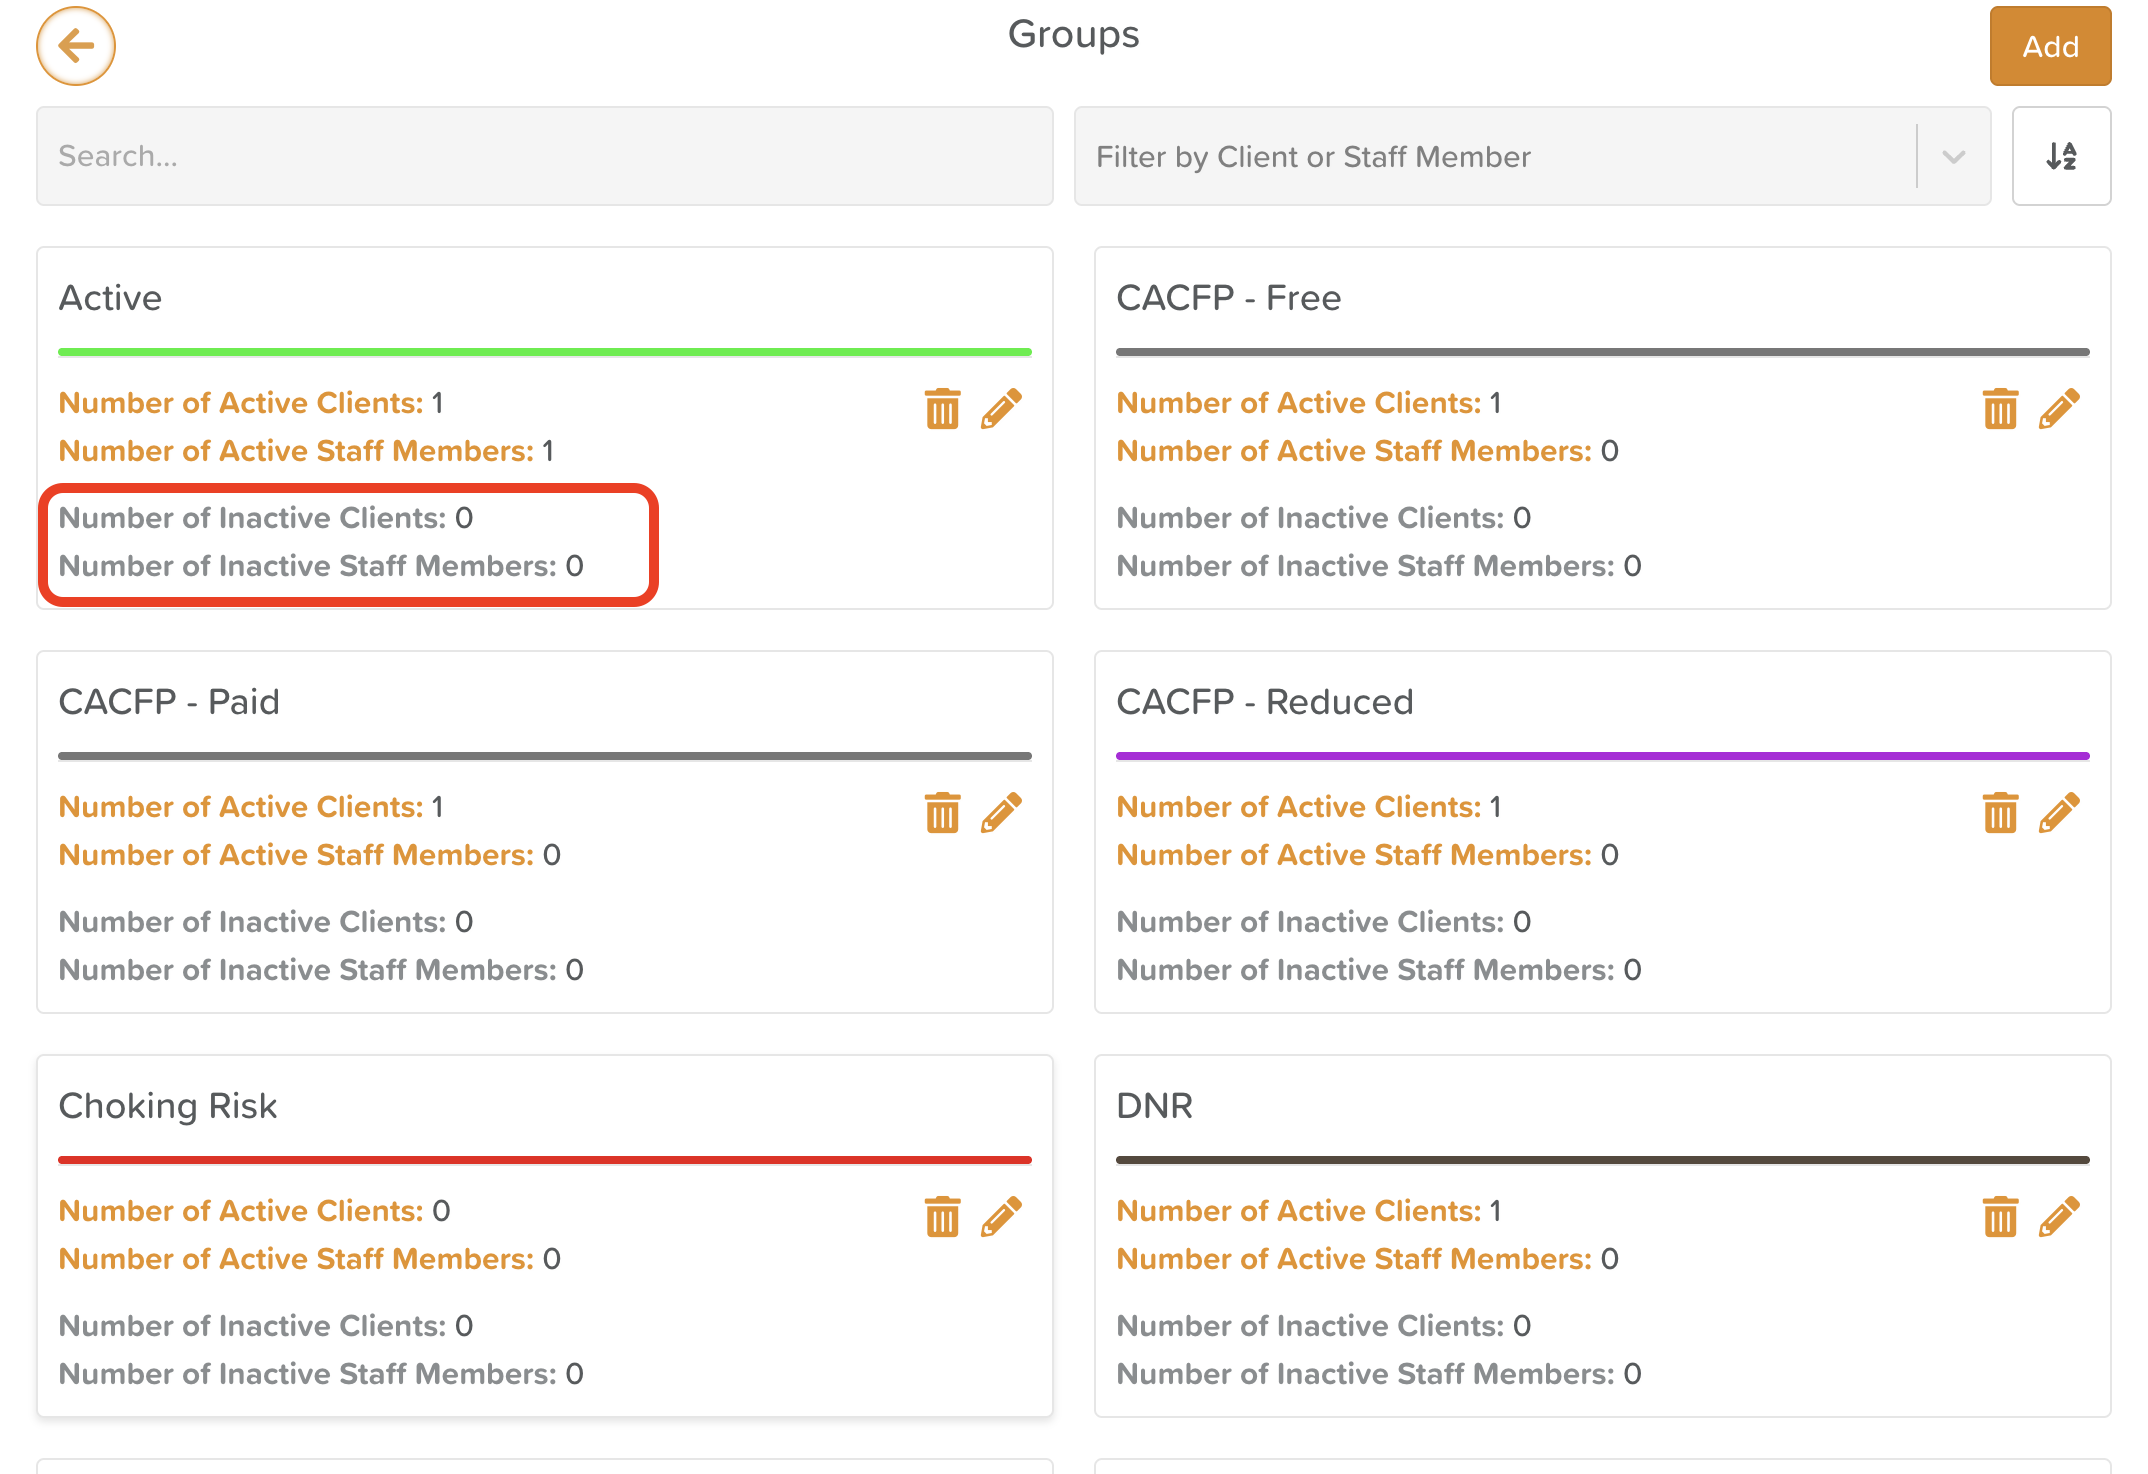
Care providers can remove discharged participants from Groups at any time by editing the Group. However, for reporting purposes, many providers choose to keep discharged participants in their Groups. To help manage this, StoriiCare displays a clear breakdown of Active and Inactive participants (or staff) within each Group, so you can see the current composition at a glance.
How to Delete a Group
If a Group is no longer needed:
Click the trash can icon (🗑️) next to the Group’s name.
Confirm your action in the pop-up window.
⚠️ Note: Deleting a Group permanently removes it from the platform. This cannot be undone, so double-check before confirming.
Groups Reporting
You can view a history of all actions made to Groups via the Exports feature.
To generate a Groups report:
Navigate to the Dashboard and open Exports.
Select the Timeline Export option.
Filter by:
Groups, and
Your desired date range.
Download the report as a CSV file.
This export will show you:
Which staff member created, edited, or deleted a Group.
The date and time of each change.
Which participants or staff were included in the update.