
A Guide to Using Vital Signs
The Vital Signs feature in StoriiCare allows clinical staff to record, review, and monitor participant observations over time. On some accounts, this feature may appear under a different name—such as Observations or Measurements—depending on your organization’s customized terminology.
Vital Signs can be accessed from:
The StoriiCare Dashboard
Individual Participant Profiles
What Vital Signs Can Do
Vital Signs enables staff to:
Record clinical observations (e.g. temperature, blood pressure, heart rate)
Automatically generate charts based on recorded data
Add notes to individual observations
Configure alerts so certain readings are flagged for review
Download reports for audits, reviews, or clinical meetings
Administrators can further customize Vital Signs by:
Creating custom Vital Sign Types (e.g. Fluid Intake)
Creating Vital Signs Groups so multiple readings can be recorded together
Examples of Vital Signs Groups
Blood Pressure Group: Systolic + Diastolic
Monthly Vitals Group: Temperature, Heart Rate, Glucose, Blood Pressure

Grouping vitals allows staff to record multiple observations in one workflow, without navigating between separate charts.
⚠️ Important: Users should view only one type of data on a chart at the time, rather than attempt to interpret data from a combined view. This improves the clarity of the data presented, but also ensures that the y-axis is of a scale that optimizes the display of variation in values.
To do this: Click on the color blocks to de-select data types from the chart.

How to Record an Observation
Navigate to Vital Signs from the Dashboard or open on a Participant Profile.
Select the relevant Vital Sign Type or Vital Signs Group.
Click Add Entry.
Enter the observation value(s).
Click Save.

The observation will immediately appear in the participant’s chart.
How to Add Notes to an Observation
Notes provide important context for recorded readings.
Record or open an existing observation.
Click on the speech bubble icon next to the recorded value.
Enter your note in the Notes field.
Include context such as symptoms, positioning, equipment used, or follow-up actions.
Click Save.
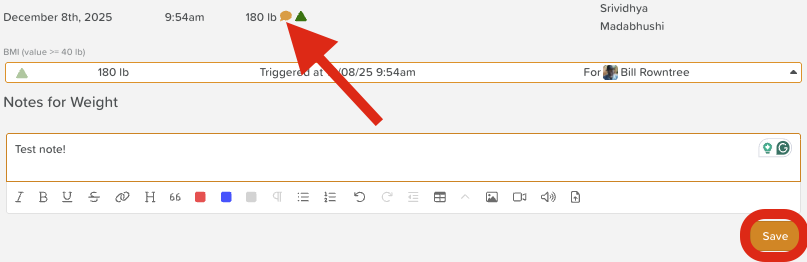
Notes are stored alongside the observation and visible in charts and reports.
How to Edit an Observation
(Access depends on your permission level.)
Open Vital Signs.
Locate and hover the observation you wish to update.
Select Edit.
Make your changes.
Click Save.

Edits update the existing record.
How to Delete an Observation
(Access depends on your permission level.)
Open Vital Signs.
Find on the observation you want to remove.
Select Edit.
Select Delete.
Confirm your action.


⚠️ Deleted observations are permanently removed and cannot be recovered.
How to Create a Custom Vital Sign Type
Administrators can create additional Vital Sign Types to suit their service model.
Navigate to Vital Signs (or equivalent customized term).
Click the Settings wheel icon (depends on permissions)
Click New Type.
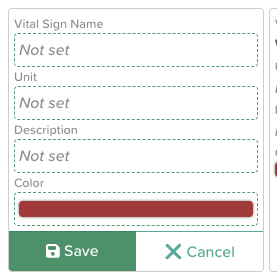
Enter:
Name (e.g. Fluid Intake)
Units of measure (e.g. ml)
(Optional) Description: Allows you to create or choose a List for the Description section (e.g. Fluids - Water, Juice, Milk, Coffee, Tea, etc.). You can also make this selection required.
Color: This is the color the chart will display for that unit of measurement.
Click Save.
Custom Vital Sign Types can then be recorded and charted like standard vitals.
NOTE: Vital Sign Types must be created before adding them to a Vital Signs Group.
How to Create a Custom Vital Signs Group
Vital Sign Type Groups consolidate multiple vital signs into a single graph and enable you to take multiple vital signs at the same time.
Navigate to Vital Signs (or equivalent customized term).
Click the Settings wheel icon (depends on permissions)
Scroll down to the Groups section.
Click New Group.
Enter a Group Name.
Select the Vital Signs types for this Group (the order you select them is the order in which they will appear when recording).
Click Save.
Custom Vital Sign Groups can then be recorded and charted like standard vitals.
⚠️ Note: When using the Chart Type dropdown menu, scroll UP to see Groups - they are listed above the single Vital Sign charts.
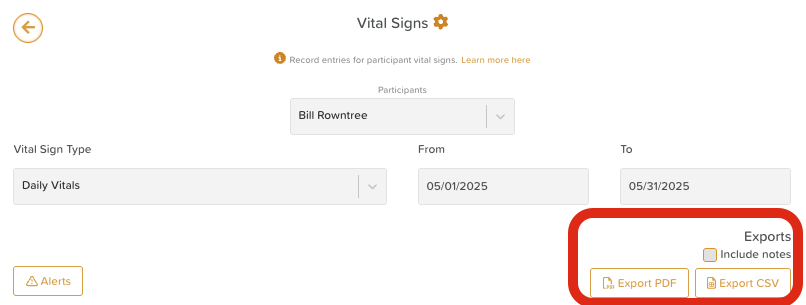
How to Download Vital Signs Reports
Vital Signs data can be exported for audits, reviews, or sharing with external professionals.
Go to Vital Signs.
Apply filters such as:
Participant
Vital Sign Type or Group
Date range
Including notes
Choose your export format:
PDF for printing or sharing
CSV for analysis or archiving
Best Practices
Use Vital Signs Groups to save time when recording multiple readings
Always review charts to identify trends—not just individual readings
Add notes to provide clinical context
Ensure staff understand that alerts support—but do not replace—clinical judgement
Regularly export data for audits and reviews
Need More Help?
If you need further assistance, you can reach out to our support team by emailing support@storii.com. Our support team is ready to help you with any questions or issues you may have.