
Attendance Table Export
The Attendance Table export lets you compare what was scheduled with what actually happened, all in one report. You can combine Register data (sign-ins and sign-outs) with Schedule data, filter by dates, days, participants, staff, and Register tags, and calculate billable amounts using your Rates.
Depending on what you need, you can export to:
Attendance Table (Excel): a detailed attendance report, with tabs for each week or month
QuickBooks (CSV): a file formatted for importing into QuickBooks
Payroll / Staff Time (CSV): a file of staff hours for payroll tools such as Gusto or Paychex
Opening the Attendance Table Export
Go to the Register from your StoriiCare dashboard.
Click [Export], then select Attendance Table. Our Register export expanded to become the 'Attendance Table' export, with significantly more use cases and customization options.
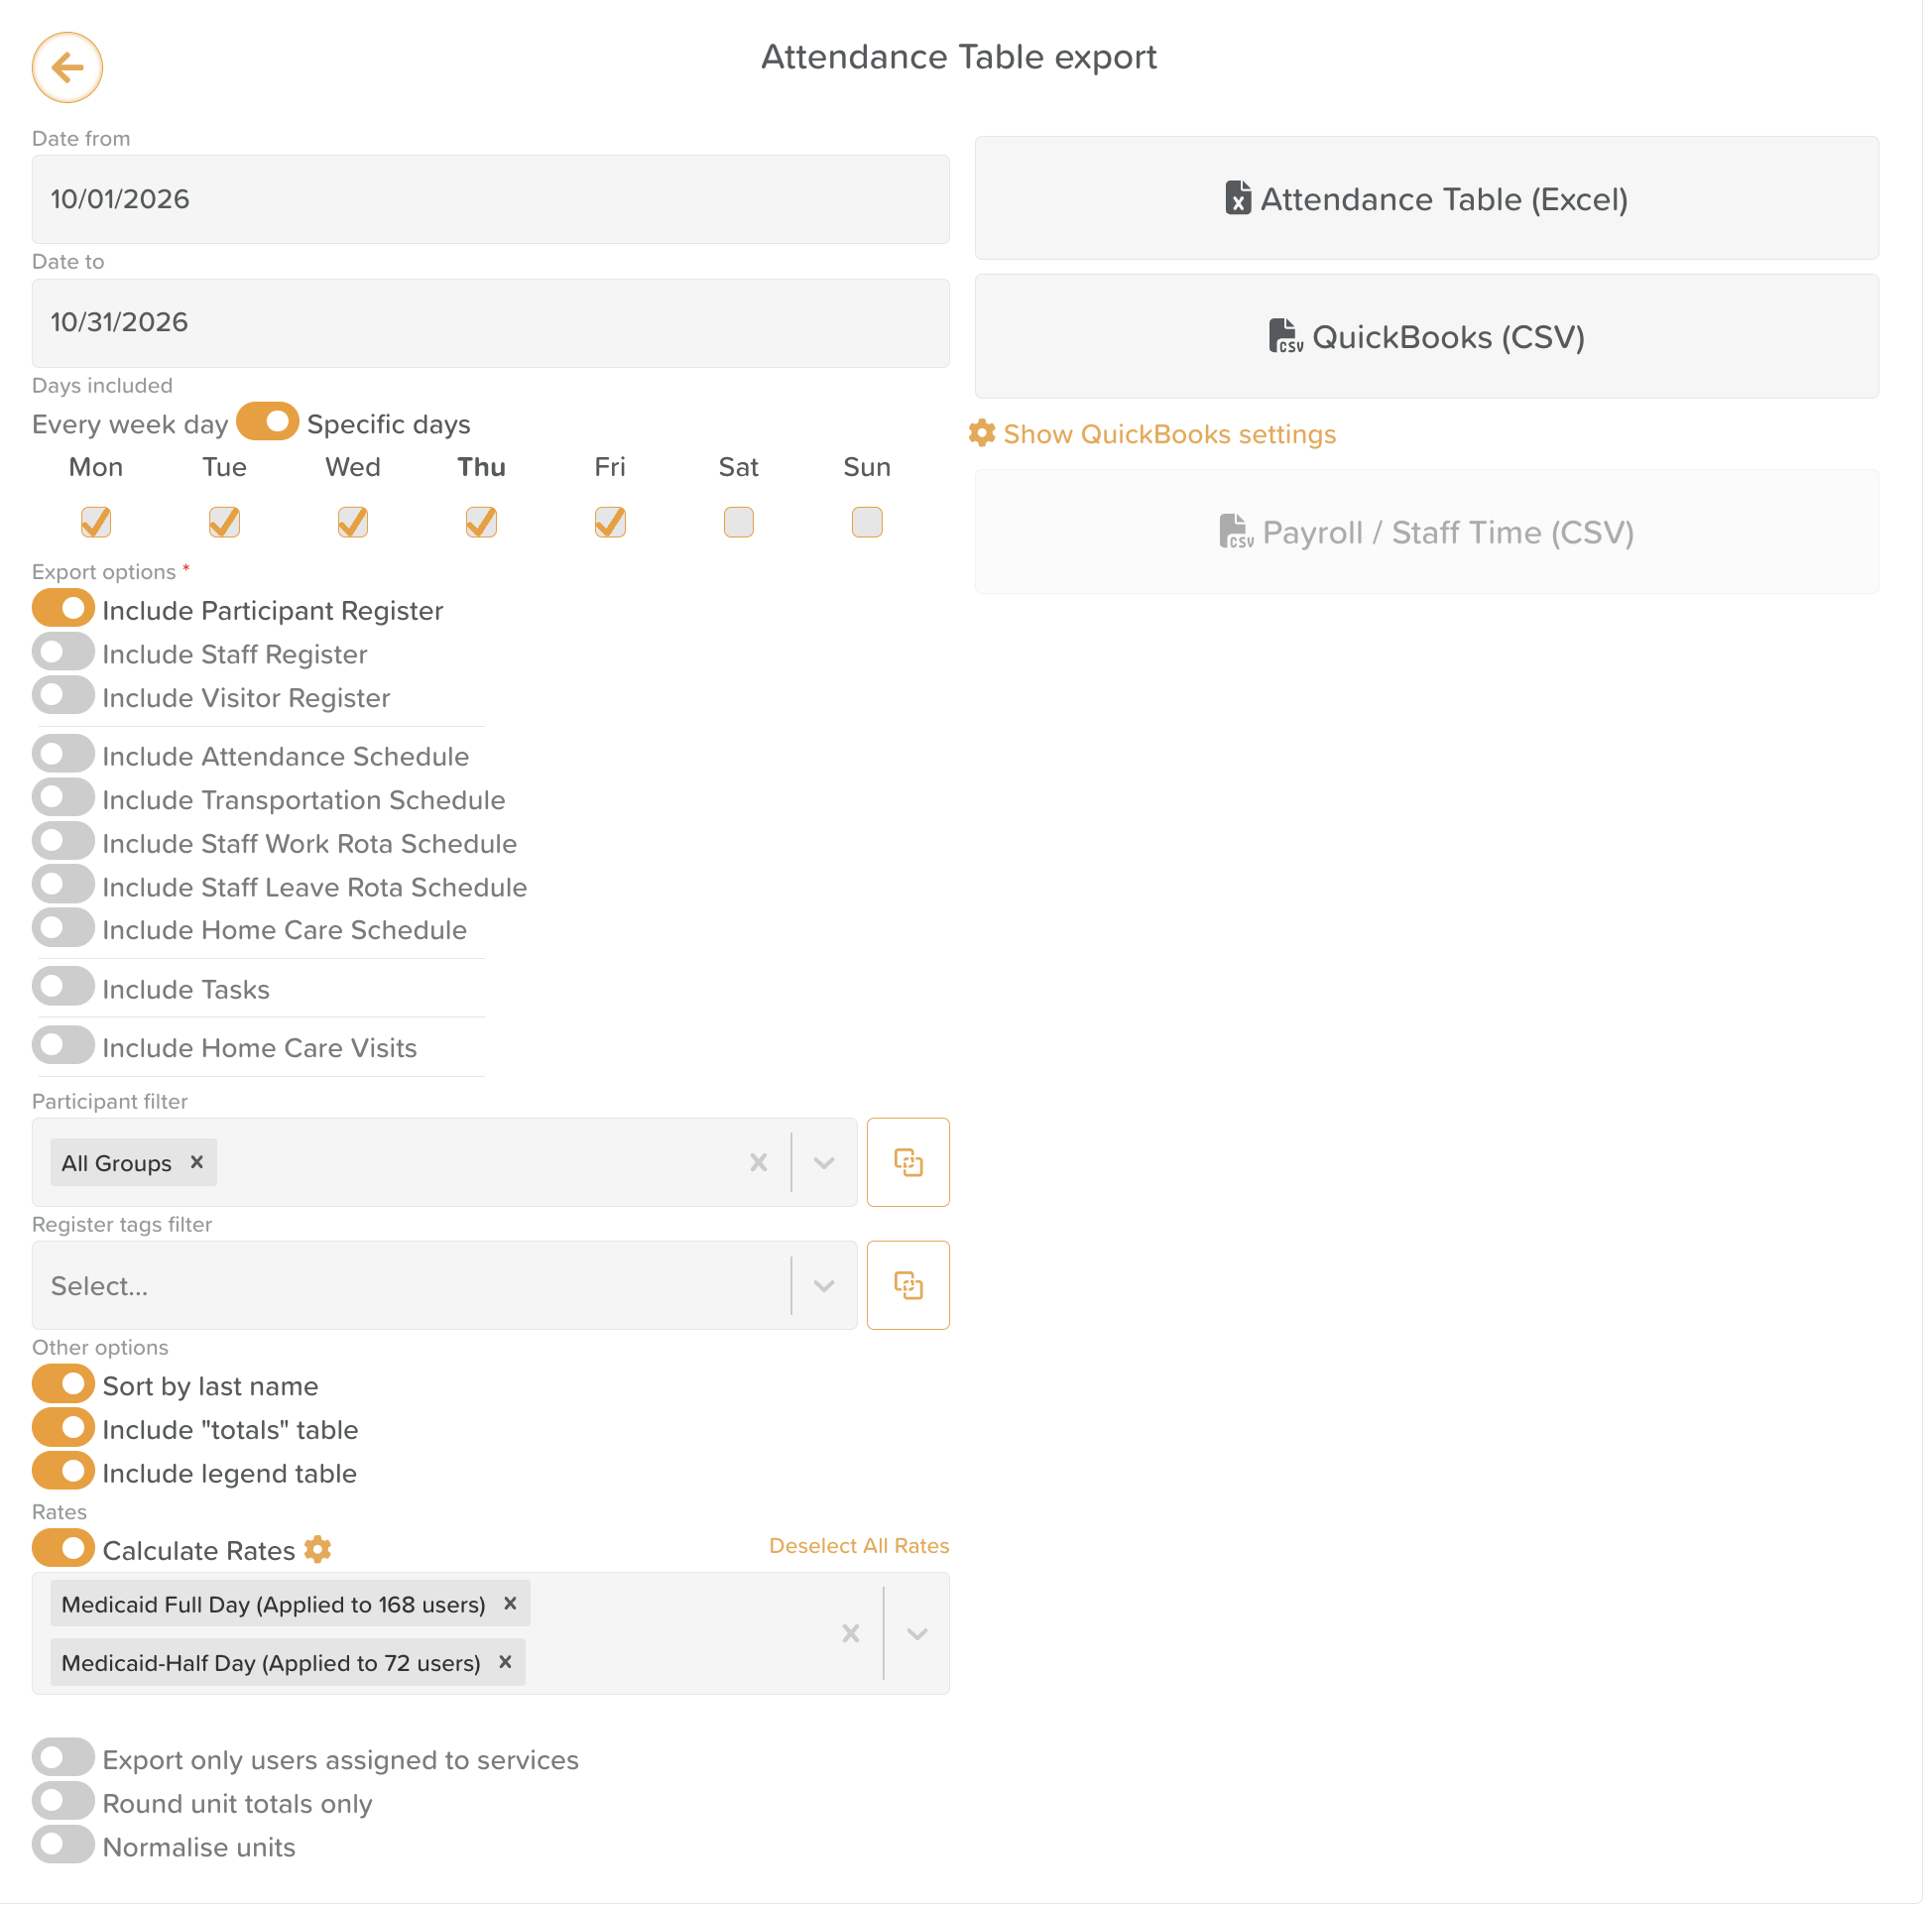
Step 1: Choose Your Dates and Days
Date from / Date to: set the period you want to report on.
Days included: leave this on Every week day, or switch to Specific days and uncheck any days your center is closed.
Step 2: Choose What to Include
Under Export options, toggle on each data source you want in the report. You must select at least one.
Category | Options |
|---|---|
Register (actual attendance) | Include Participant Register, Include Staff Register, Include Visitor Register |
Schedules (planned attendance) | Include Attendance Schedule, Include Transportation Schedule, Include Staff Work Rota Schedule, Include Staff Leave Rota Schedule, Include Home Care Schedule |
Other | Include Tasks, Include Home Care Visits |
💡 To compare planned attendance with actual attendance, turn on both a Register option and its matching Schedule option, for example Include Participant Register and Include Attendance Schedule.
Step 3: Filter Your Results
Participant filter: select specific participants or groups.
Staff filter: select specific staff members or groups.
[Register tags filter]: include only entries with certain Register tags.
Register data can now be directly compared to Schedule data within one Excel export, including the ability to filter for specific date ranges, days, Service Users, Staff and Register tags.
Step 4: Choose Other Options
Under Other options, you can:
Sort by last name instead of first name
Include a “totals” table
Include a legend for color-coding
Calculate Rates: if Rates are set up, select which ones to calculate from the Register data. The export then shows billable amounts alongside attendance.
Step 5: Export
Click the export you need: Attendance Table (Excel), QuickBooks (CSV), or Payroll / Staff Time (CSV). Each is explained below.
Attendance Table (Excel)
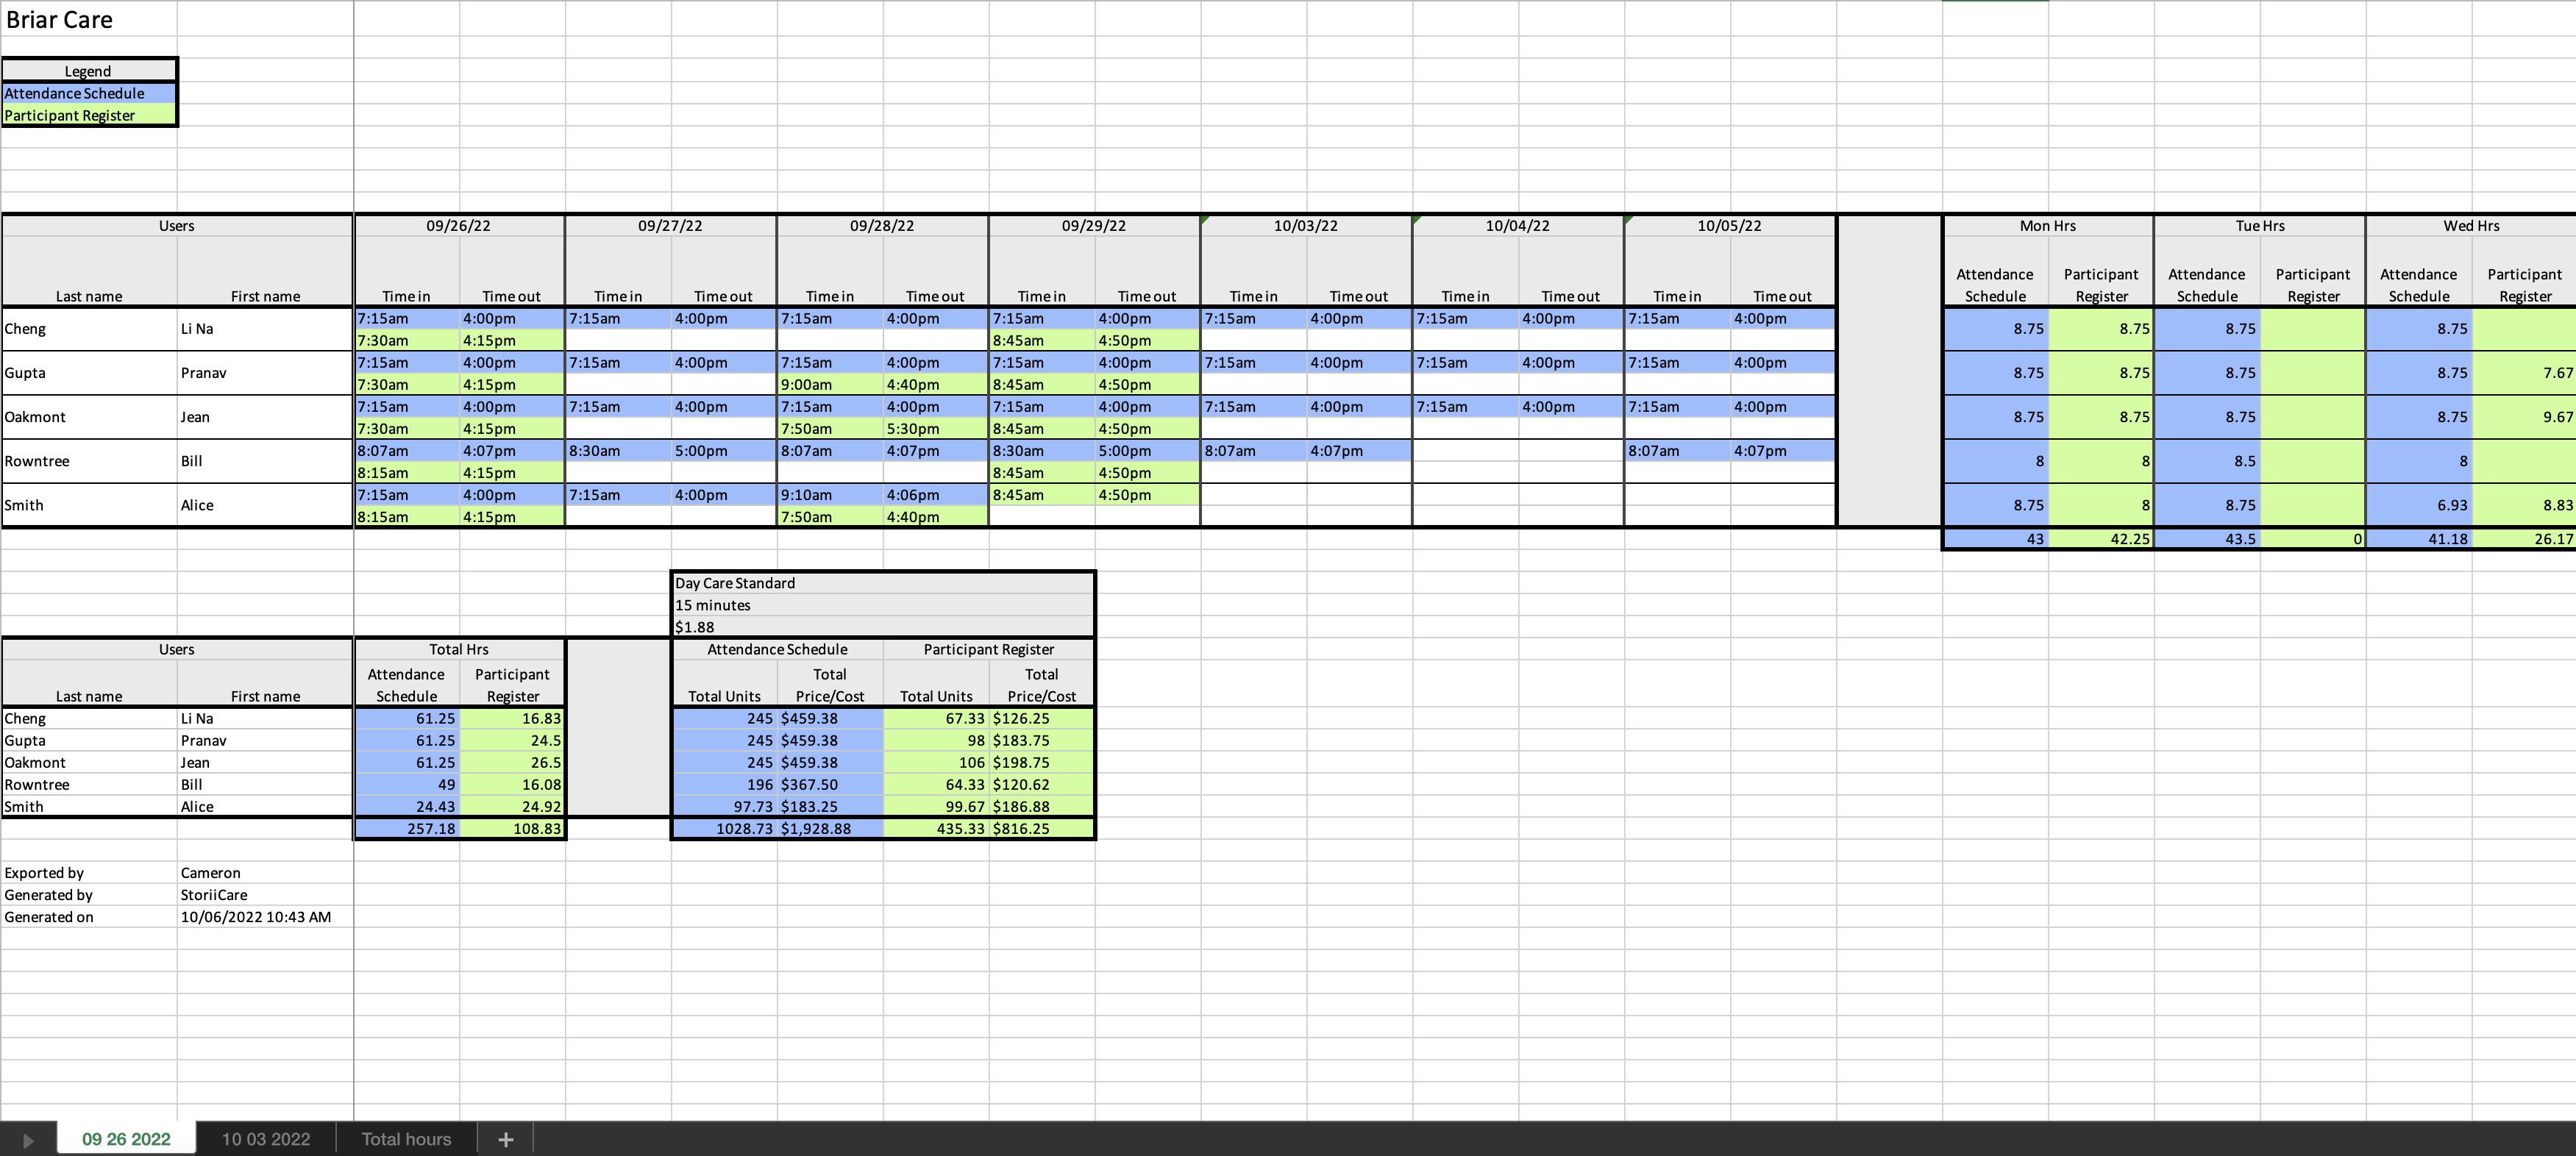
The Excel export creates a tab for each week or month in your date range. Calculations for any selected Rates appear for each week and are totaled for each month. Where applicable, a Total hours tab adds up everything for each person across the full export.
Example: Scheduled vs. Actual Attendance for Medicare Participants
To compare scheduled and actual attendance for your Medicare participants in September:
Set Date from / Date to for September.
Under Specific days, uncheck any days your center is closed.
Toggle on Include Participant Register and Include Attendance Schedule.
In the Participant filter, select your Medicare group or specific participants.
Toggle on Include “totals” table.
Toggle on Calculate Rates and select your Medicare rate.
Click Attendance Table (Excel).
The export compares actual attendance times with scheduled times, alongside actual and expected billable amounts.
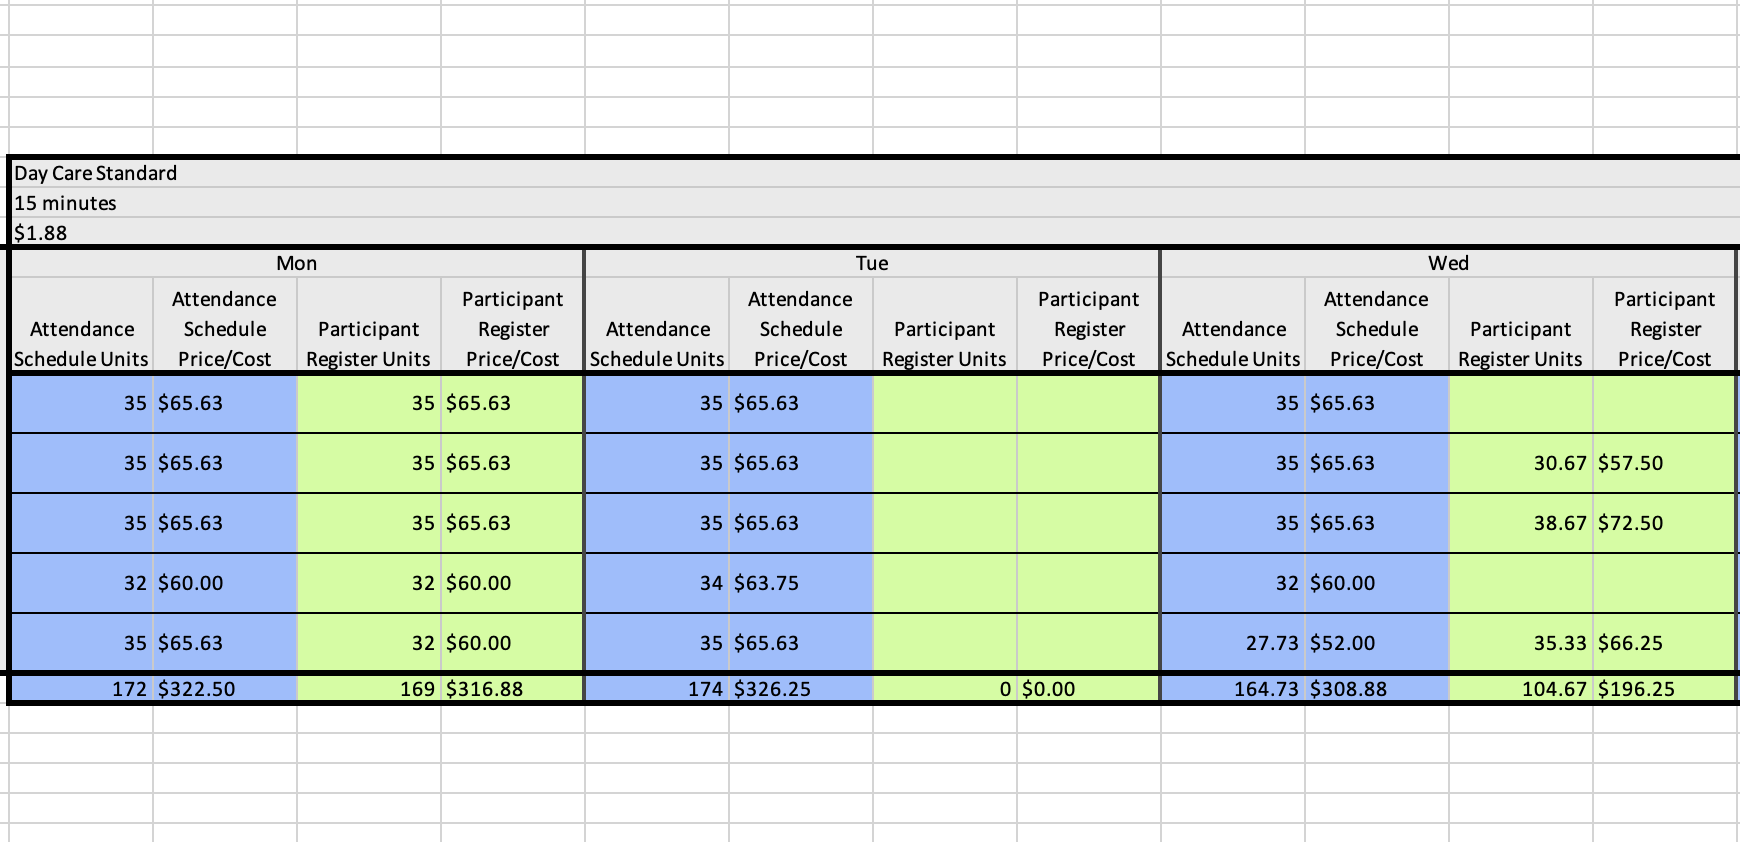
Calculations for your selected Rates are displayed for each individual week and totaled for each month.
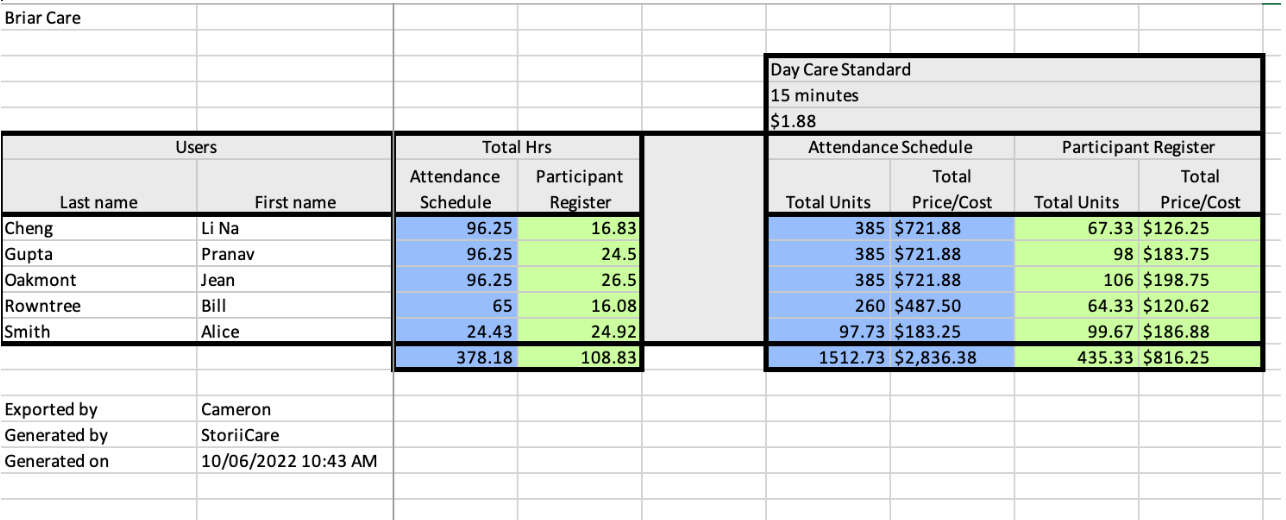
Where applicable, a 'Total hours' tab will be populated to tally all calculations for a user within the full export.
QuickBooks (CSV)
Use this export to import attendance-based charges into QuickBooks.
⚠️ The QuickBooks (CSV) button only becomes available when Calculate Rates is toggled on and rates are selected.
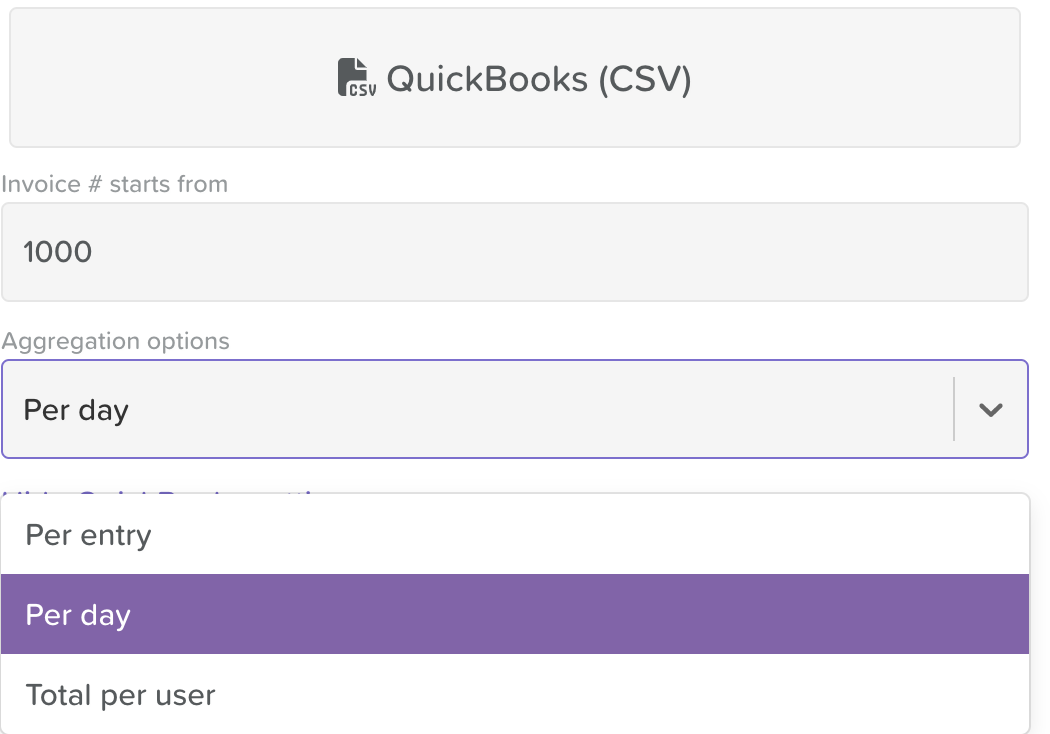
Click the Show QuickBooks settings wheel (⚙️) just below the QuickBooks (CSV) button to choose:
Invoice starting number: the number your invoices should start from
Aggregation: how entries are grouped: Per day, Per entry, or Total per user
Payroll / Staff Time (CSV)
The Payroll / Staff Time (CSV) export creates a simple file of staff hours that you can upload to payroll tools such as Gusto or Paychex.
This export works with two data sources:
Include Staff Register: hours from staff sign-ins and sign-outs
Include Home Care Visits: hours from home care visits, totaled per staff member
It isn’t available for the Staff Work Rota Schedule or Home Care Schedule, because those show planned hours rather than actual time worked.
How to run a payroll export:
Set the Date from and Date to for your pay period.
Toggle on Include Staff Register, Home Care Visits, or both.
Optionally, use the Staff filter to include specific staff members or groups.
Under Staff record field for Employee ID, select the Staff Records field that holds each employee’s ID.
Optionally, under Extra staff record field, select one more Staff Records field to include, such as a department or pay rate.
🔒 Only Super Users can choose these fields. If you aren’t a Super User, your export will include the remaining columns but not the Employee ID or extra field. If your payroll provider requires Employee IDs, ask a Super User at your organization to run the export.
Click Payroll / Staff Time (CSV)
The export includes:
Column | Description |
|---|---|
Employee ID | From the Staff Records field you selected |
Employee Name | The staff member’s name |
Work Date | The date worked |
Clock In / Clock Out | Sign-in and sign-out times, or visit start and end times |
Total Hours | Hours worked, in decimal format (for example, 1 hour 15 minutes = 1.25) |
Extra field (optional) | The additional Staff Records field, if selected |
💡 Tip: If your staff don’t have an Employee ID field yet, you can add one in your Staff Records settings. See Staff Records.
We built the Attendance Table export to be flexible for the many types of care services our clients provide, and we’ll keep improving it based on your feedback. Thank you to everyone who has shared ideas with us so far!
Need More Help?
If you need further assistance, email our support team at support@storii.com.