
Generating Invoices from Billing Plans
Use this article to learn how to preview and generate invoices directly from a billing plan in StoriiCare.
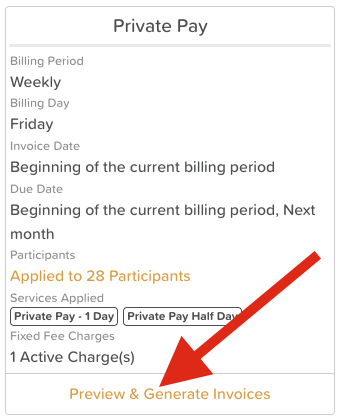
Step 1. Locate the Billing Plan

From the StoriiCare dashboard, navigate to the Billing section and select the Billing Plans tab.
Locate the billing plan you want to generate invoices for.
At the bottom of the billing plan, click Preview and Generate Invoices.
Step 2. Preview Invoices
Before generating, StoriiCare allows you to preview invoices to review charges and make any necessary corrections.
Select Participants
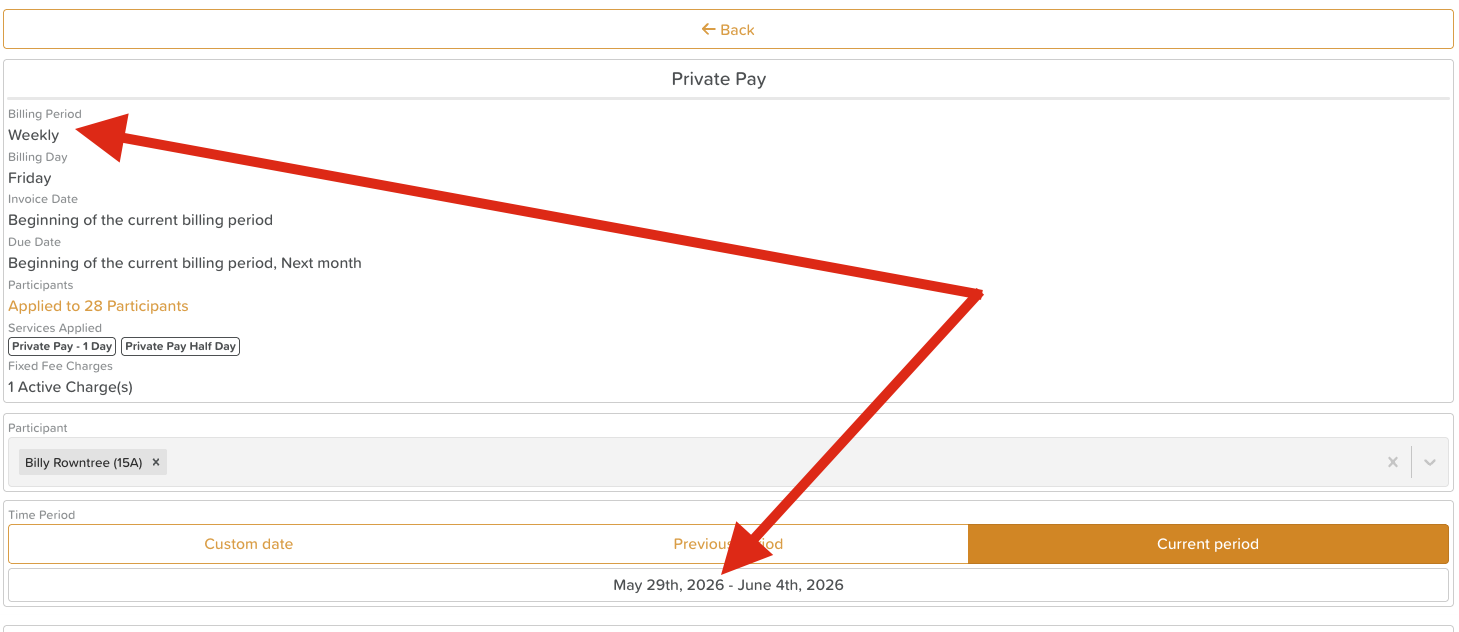
By default, the preview will display invoices for all participants on the billing plan.
To narrow your view, use the dropdown to select a specific participant or group of participants, or type into the Filter bar to search for a participant name.
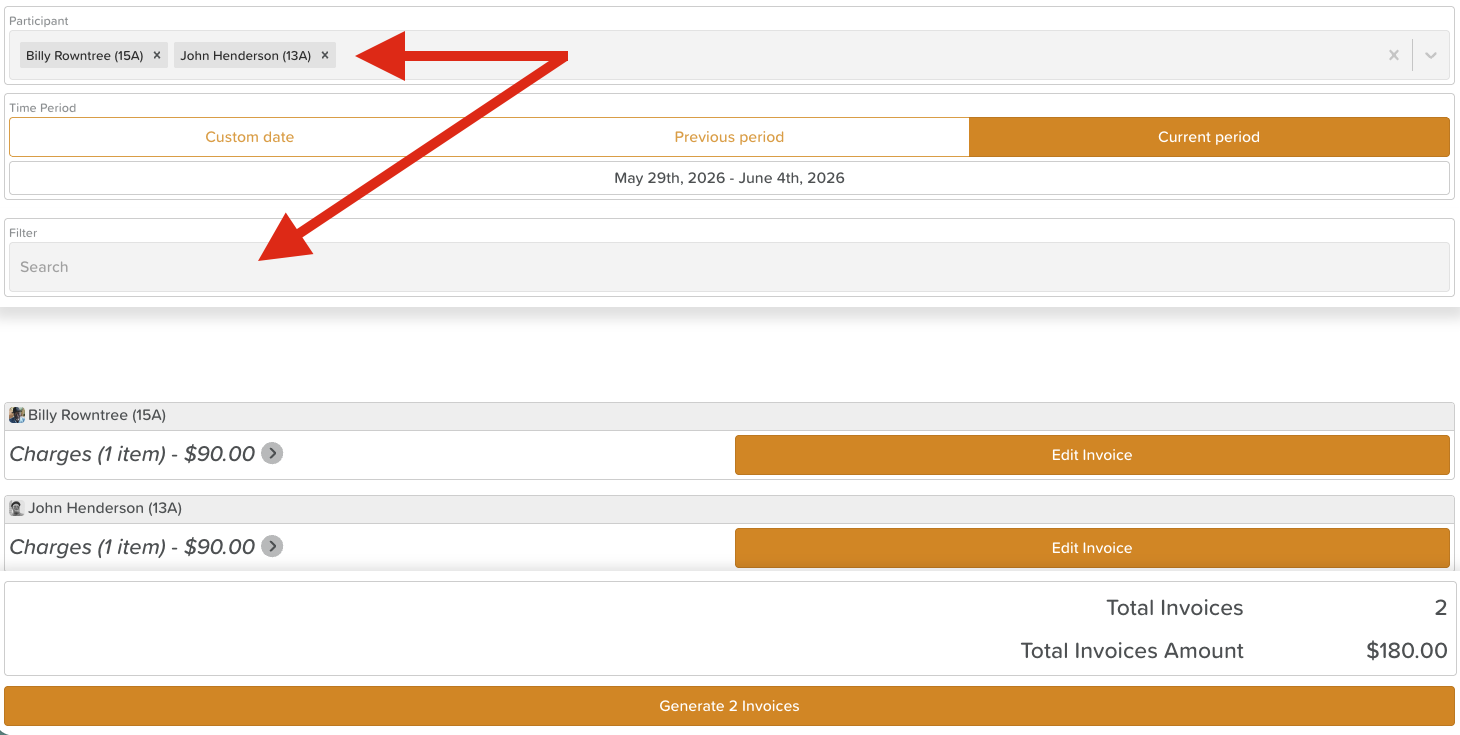
Select a Pay Period
By default, the preview displays the current period (e.g., the current month for a monthly billing plan).
Click Previous Period to view the prior billing period, or enter a custom date range if needed.
Review Charges
The preview shows the total number of charges for the selected participant and period.
Click the arrow next to the total charges to expand the invoice and view individual line items, including any applicable discounts.

Edit an Invoice
Click Edit Invoice to make changes before generating. From here you can:
Adjust the details of any line item
Delete a line item
Change the assigned payer
Edits apply immediately. Click the Back button at the top to return to the Billing Plan Preview.
Review Logs
Click Show Logs to open a pop-up displaying each register log or attendance schedule entry for the participant, including daily time-in and time-out records.
This is useful for identifying discrepancies — for example, if a charge appears higher than expected, the log may reveal that a participant was not signed out on a particular day.
If corrections are needed, navigate to the register logs to update the relevant entries before generating the invoice.

Step 3. Generate Invoices
Once you have reviewed and confirmed the invoice details, click Generate Invoice at the bottom of the screen.
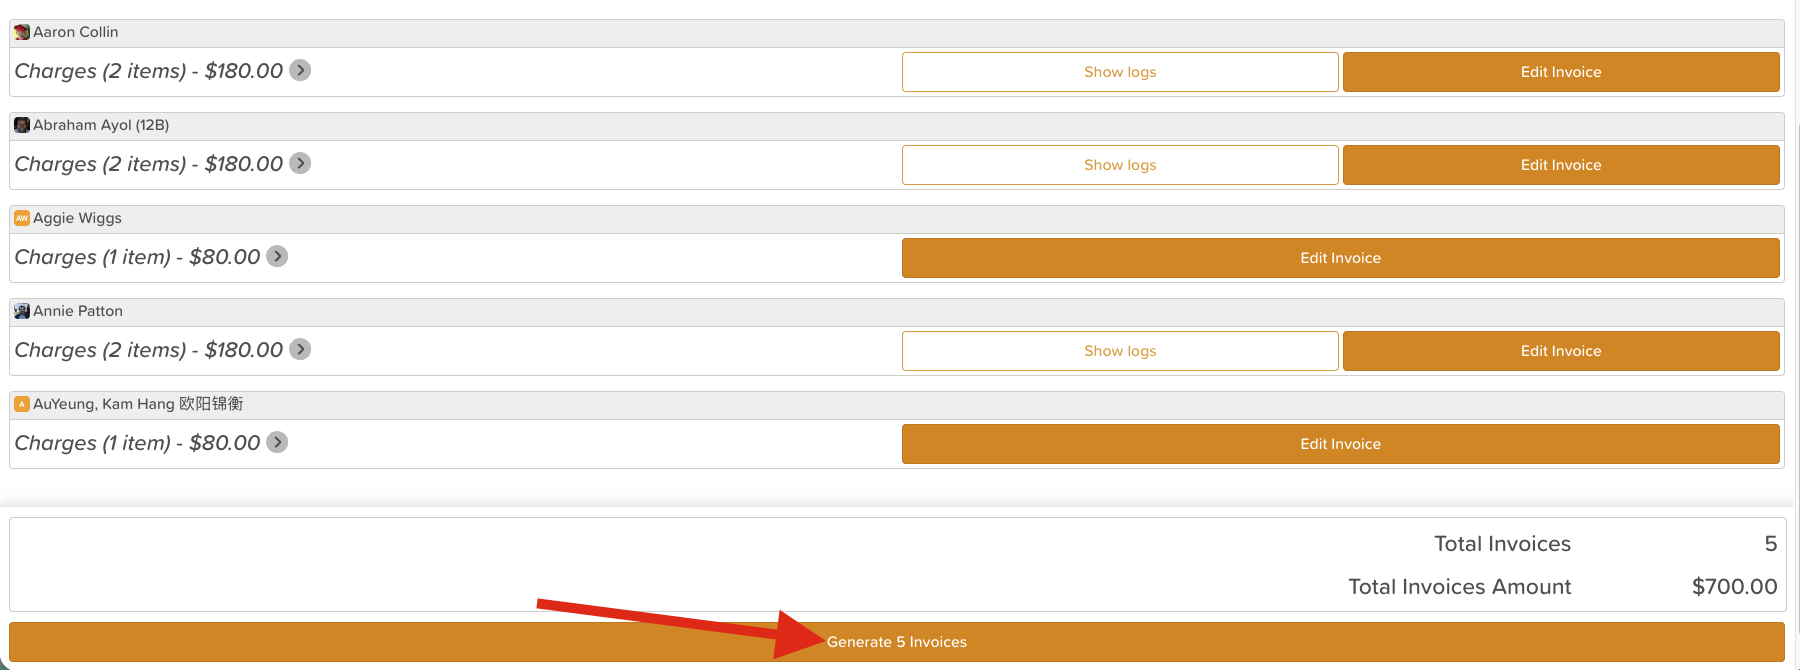
A green checkmark that says Invoice Generated will appear next to each successful invoice.

Generated invoices will appear under the Invoices tab.
Need More Help?
If you have any questions or need further assistance, please contact our support team at support@storii.com.